Jekyll2025-12-01T11:51:45+00:00https://www.cyberpunk.tools/feed.xmlThe Cyberpunk.Tools BlogA blog about the lessons, tools, and tricks I’ve picked up over nearly 20 years in IT.
Jurijs Ivolgajurijs.ivolga@gmail.comAdd AI Voice Agent to FreeSWITCH in 30 Minutes2025-11-18T08:00:00+00:002025-11-18T08:00:00+00:00https://www.cyberpunk.tools/jekyll/update/2025/11/18/add-ai-voice-agent-to-freeswitchOverview
Today I’ll explain how to connect your PBX to a real AI agent from ElevenLabs or any other AI agents that can communicate via WebSockets. We’ll focus on ElevenLabs, and our WebSocket server is designed to use ElevenLabs, but it can be easily adjusted for any other AI provider.
Architecture: End users registered to FreeSWITCH make outbound calls. FreeSWITCH connects to a local WebSocket server, which then connects to the ElevenLabs AI agent.
At the end of this setup, any user registered in FreeSWITCH will be able to dial 9999 and the call will be connected to an ElevenLabs AI agent.
We’ll use mod_audio_stream as the FreeSWITCH module that communicates with ElevenLabs. Note that the version I’m using (1.0.3) is not open source and is limited to 10 licenses.
If you have another PBX like Asterisk, you can configure a SIP trunk between Asterisk and this setup, then route the necessary calls to FreeSWITCH and from there to ElevenLabs.
If needed, you can also get a real phone number, set up routing, and connect it to your FreeSWITCH instance, which then routes to ElevenLabs.
All of this is beyond this short manual. Here I’ll just explain how to route a call from FreeSWITCH to an ElevenLabs AI agent using WebSockets.
Requirements
You’ll need an account in ElevenLabs, where you’ll create or use an existing agent. For my test, I used the default public agent. Your agent should be configured for PCM 16000 Hz. You’ll need to grab your Agent ID - we’ll need it later.
Installing FreeSWITCH with mod_audio_stream
I prefer a dockerized environment, and in my lab I used Docker - we’ll use it extensively here.
If mod_audio_stream is loaded and the dialplan is in place, let’s move to the WebSocket server setup.
Setting up the WebSocket Server
The WebSocket server is very straightforward, and I’ve already prepared all the code.
Clone the repository to the same machine and start it up:
git clone https://github.com/os11k/freeswitch-elevenlabs-bridge
cd freeswitch-elevenlabs-bridge
Copy the example environment file:
cp .env.example .env
Edit .env and add your ElevenLabs Agent ID:
ELEVENLABS_AGENT_ID=your_actual_agent_id_here
Then run:
docker compose up -d--build
Testing a Call with AI
At this point, you should have FreeSWITCH and the WebSocket server running. All that’s left is to register to FreeSWITCH and make a test call.
During a call, you can monitor the logs:
docker logs freeswitch-elevenlabs-bridge -f
If everything is working correctly, you should see something like this:
websocket listening on port 8080
received connection from 172.19.0.1
Connected to Eleven Labs
[ElevenLabs] Non-audio response: {
  conversation_initiation_metadata_event: {
    conversation_id: 'conv_9501kac1bwyyfy297f4gjrhefyqc',
    agent_output_audio_format: 'pcm_16000',
    user_input_audio_format: 'pcm_16000'
  },
  type: 'conversation_initiation_metadata'
}
[ElevenLabs] Non-audio response: {
  agent_response_event: {
    agent_response: "Hey there, I'm Alexis from ElevenLabs support. How can I help you today?",
    event_id: 1
  },
  type: 'agent_response'
}
[ElevenLabs] Non-audio response: {
  user_transcription_event: { user_transcript: 'Hey, how are you?', event_id: 23 },
  type: 'user_transcript'
}
[ElevenLabs] Non-audio response: {
  agent_response_event: {
    agent_response: "I'm doing great, thanks for asking! And yourself? What brings you here today?\n",
    event_id: 23
  },
  type: 'agent_response'
}
Conclusion
As you can see, it’s not rocket science to connect FreeSWITCH to an AI agent and make actual phone calls where you can speak with AI. Obviously, this configuration is not production-ready, but rather a starting point for your adventure with FreeSWITCH and mod_audio_stream.
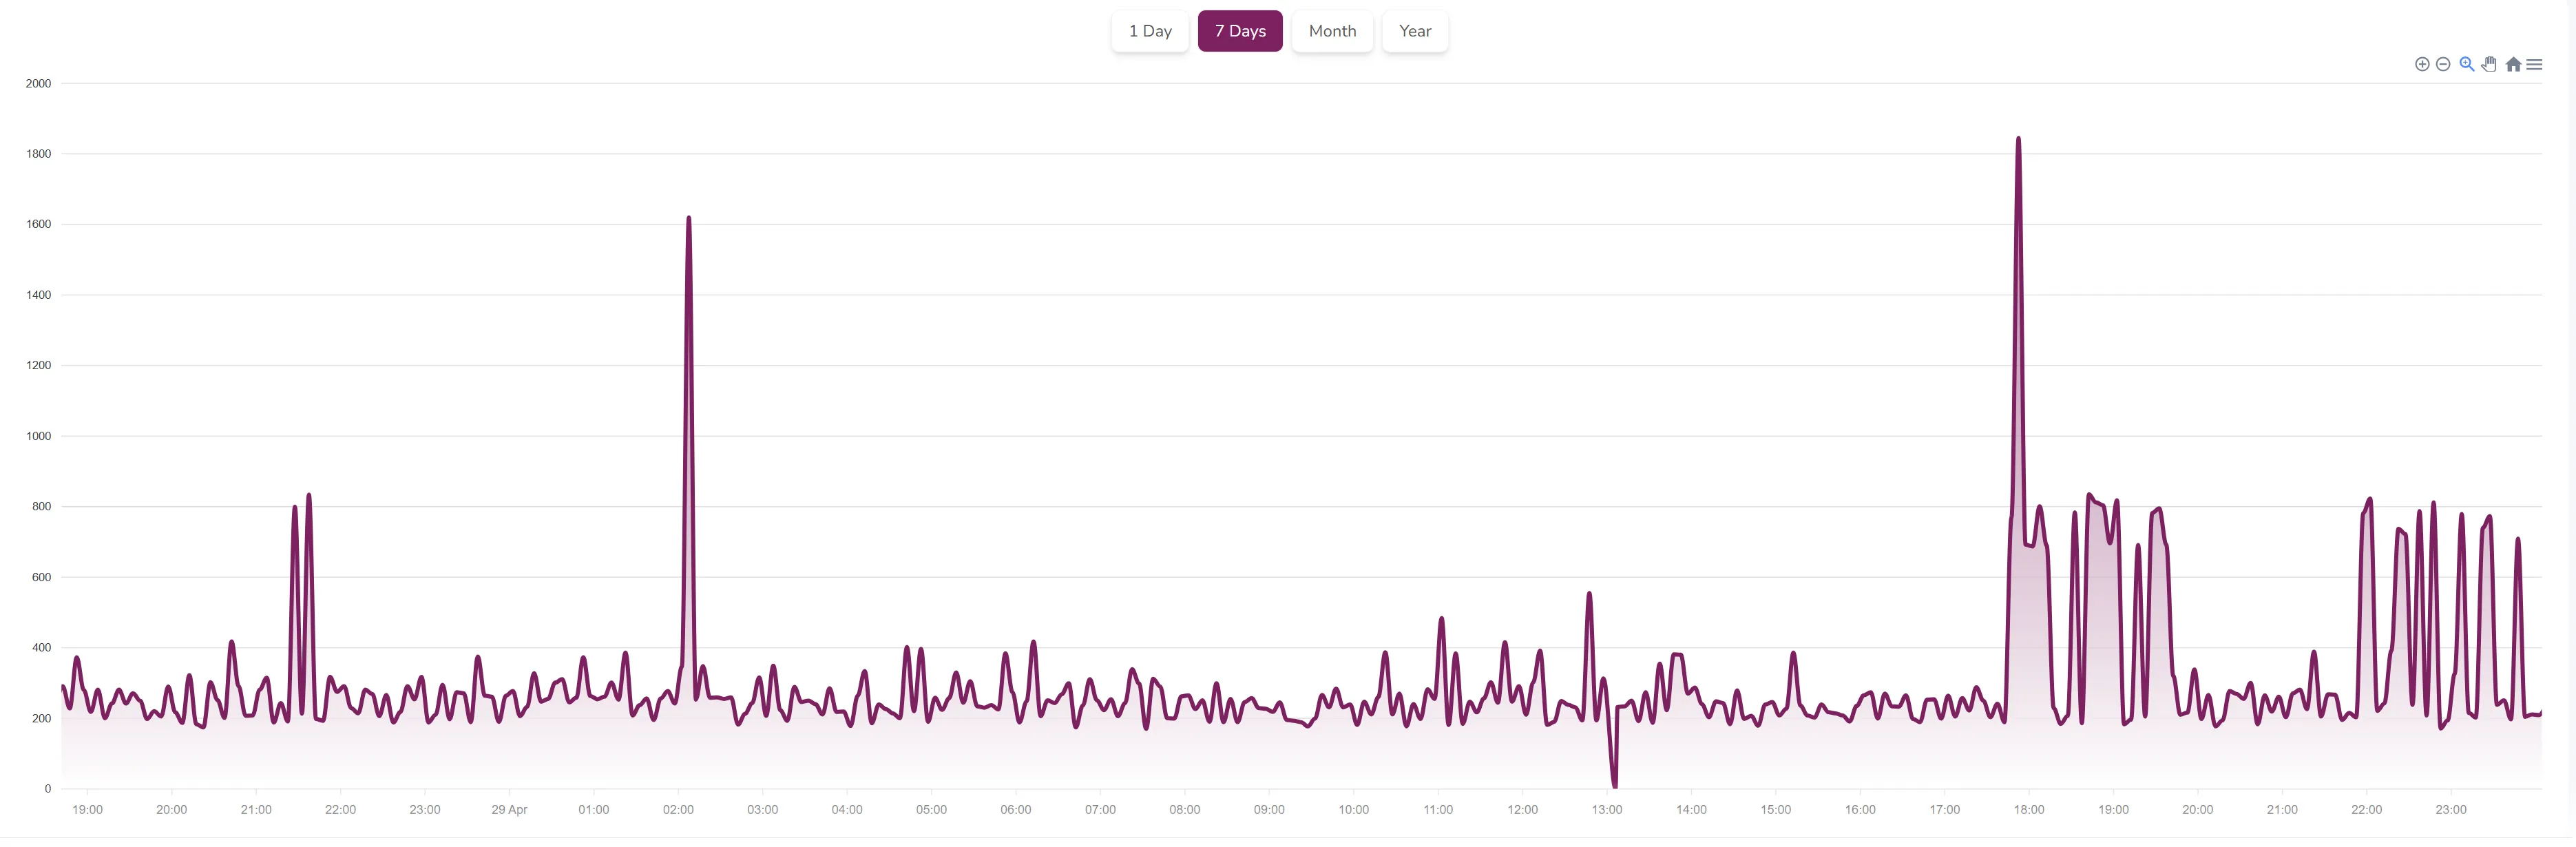
This is a bit different guide than I usually publish, but I really wanted to write about the best WordPress cache plugin I found and personally use. Recently, I needed to manage a WordPress installation, and this is what I observed:
As you can see, my monitoring shows that the WordPress website mostly responds between 200 & 400ms, which I think is acceptable. However, there are several instances above 1 second, and very often it was around 800ms, which was definitely disappointing.
Long story short, I spent one night figuring out how to make it faster. The solution was to use Cloudflare with the Super Page Cache WordPress plugin.
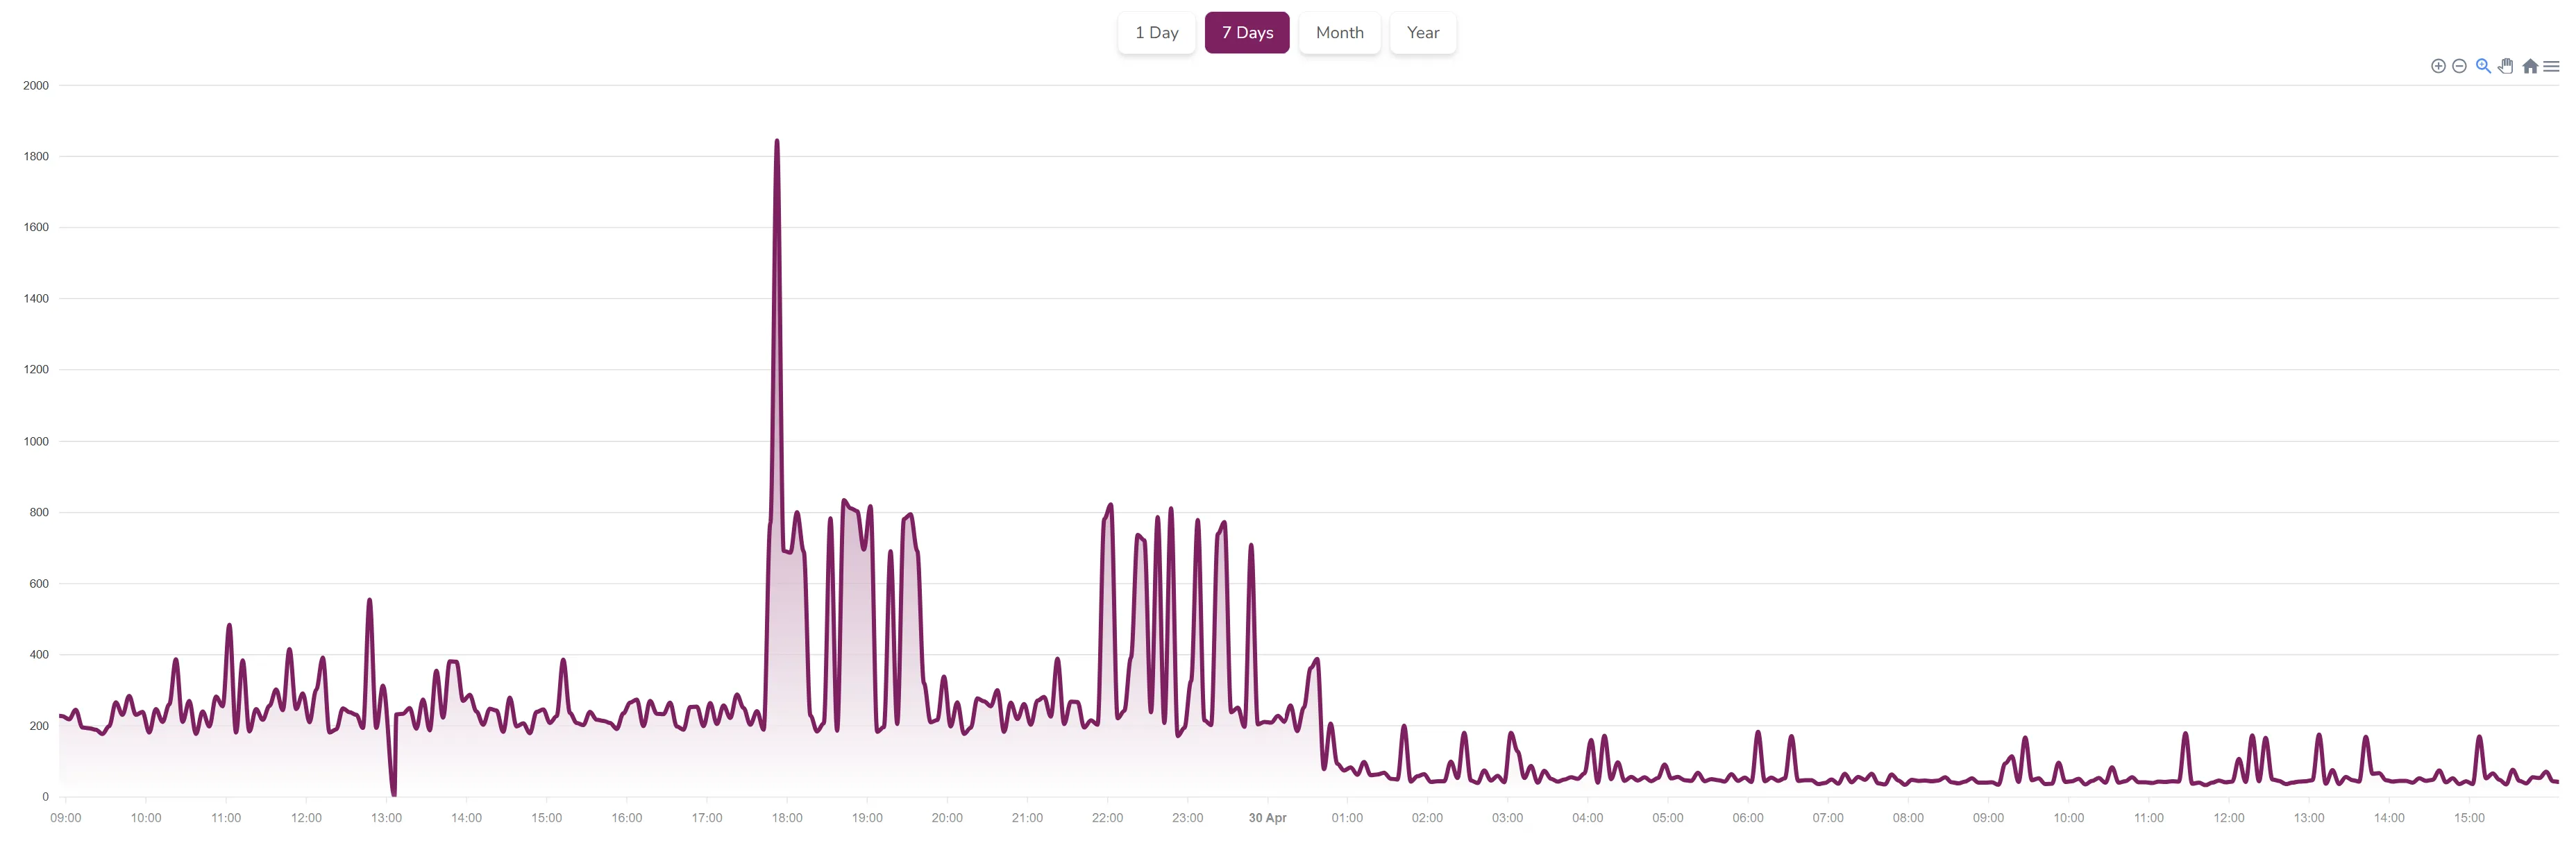
After successful deployment, you can see a new graph from my monitoring. I deployed the Super Page Cache WordPress plugin around 1:00, and now all requests are between 30ms and 200ms, which is amazing. Basically, I have the same statistics from my static websites that I host on S3!
Below, I provide a step-by-step guide to deploy the Super Page Cache WordPress plugin the same way I did.
Requirements
So, the first and most obvious requirement is a WordPress website that you want to speed up. Second, you need a free Cloudflare account. Just go to cloudflare.com and register there.
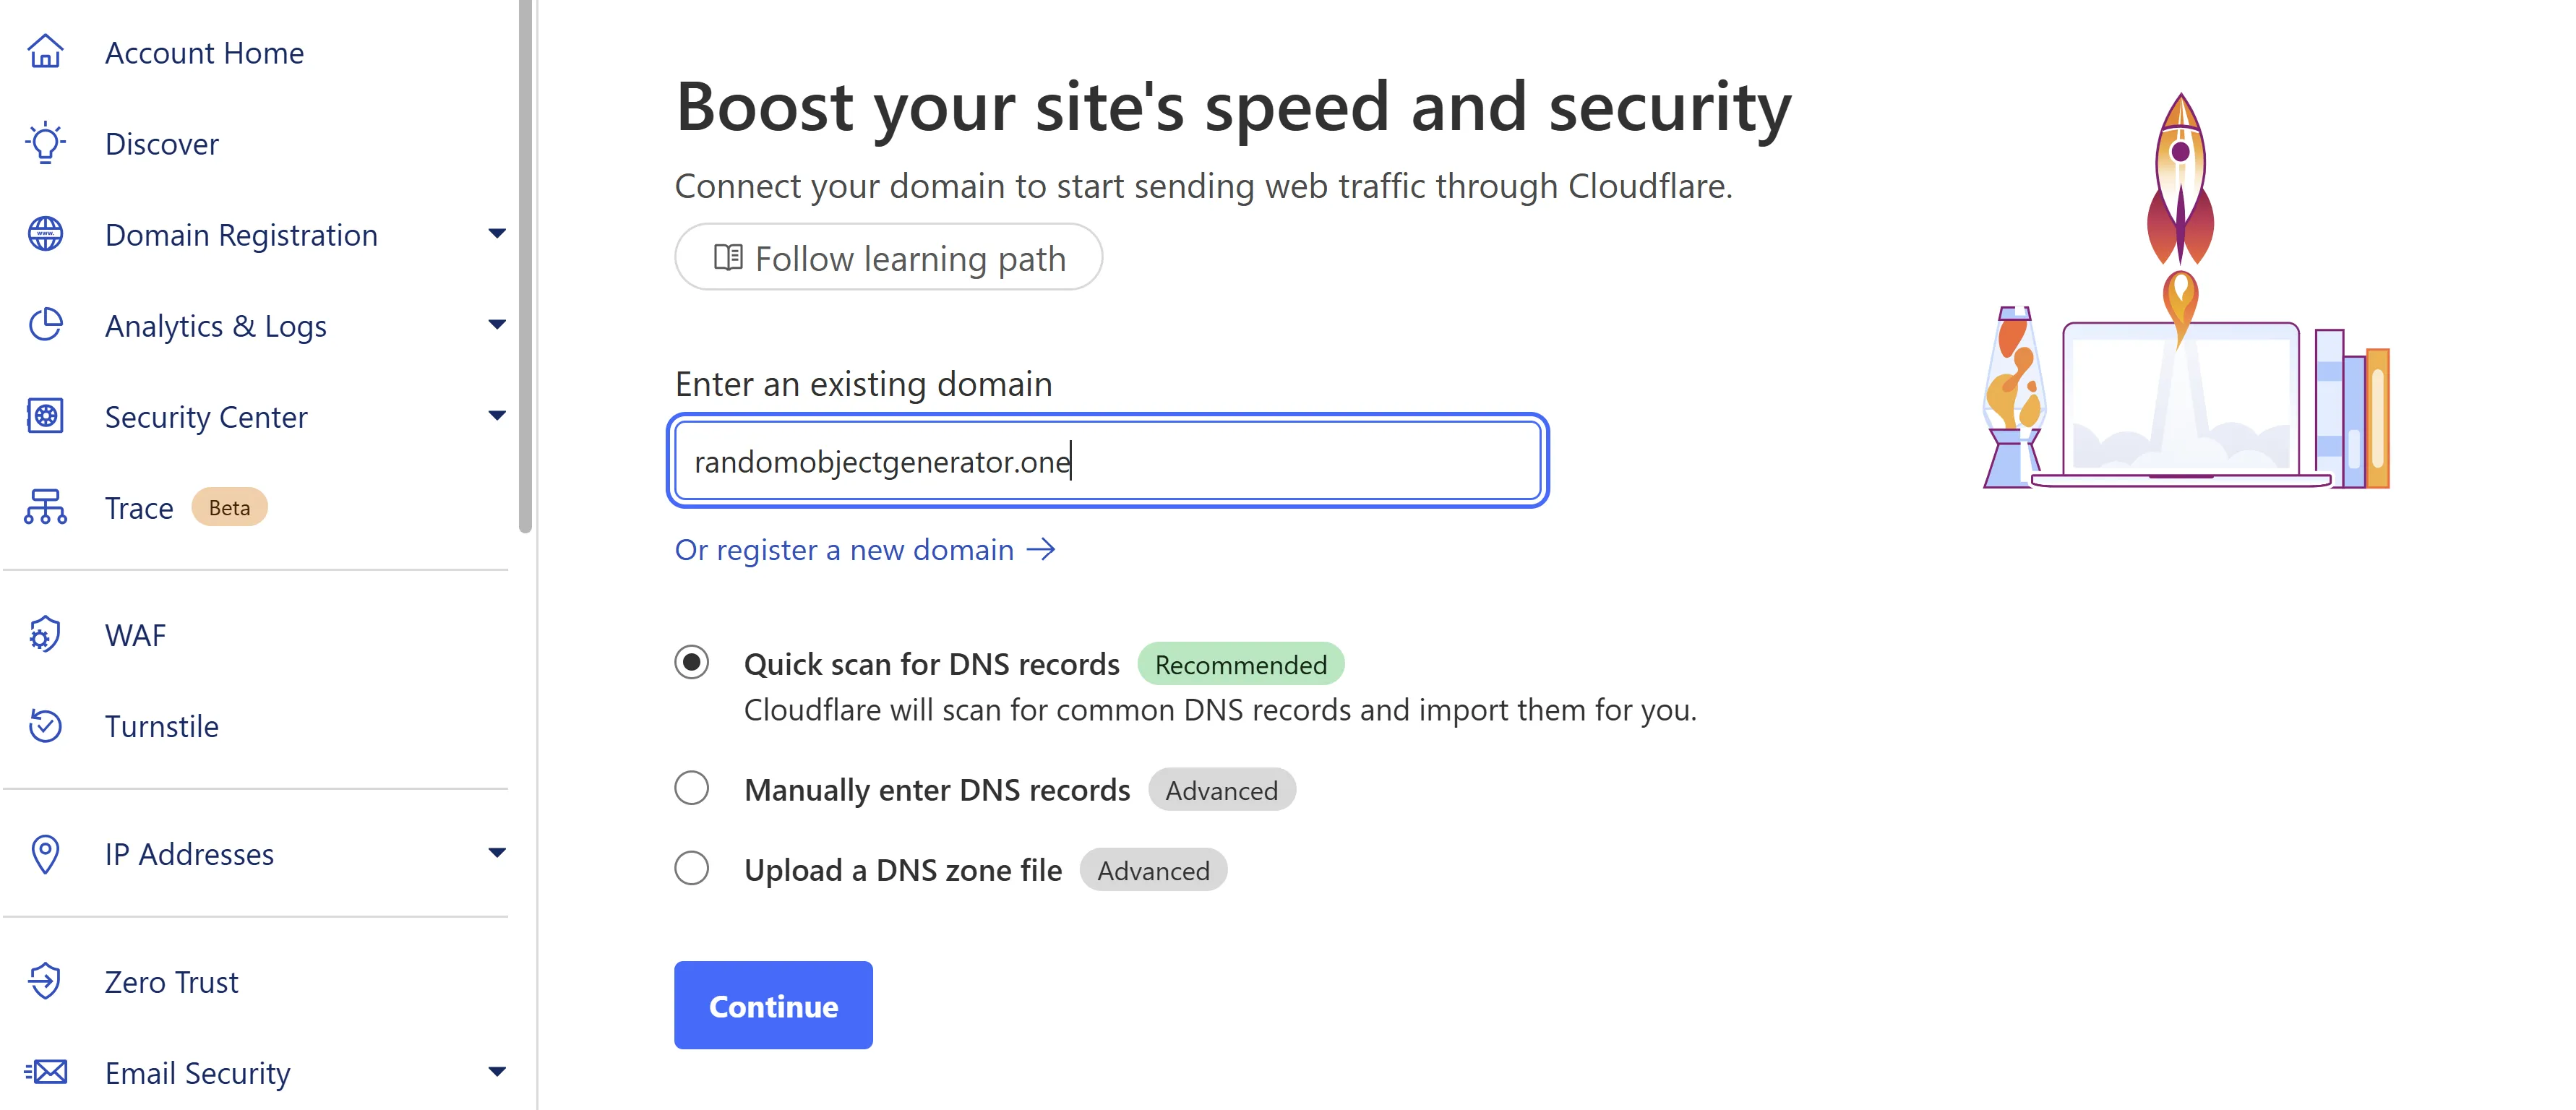
Add domain to cloudflare
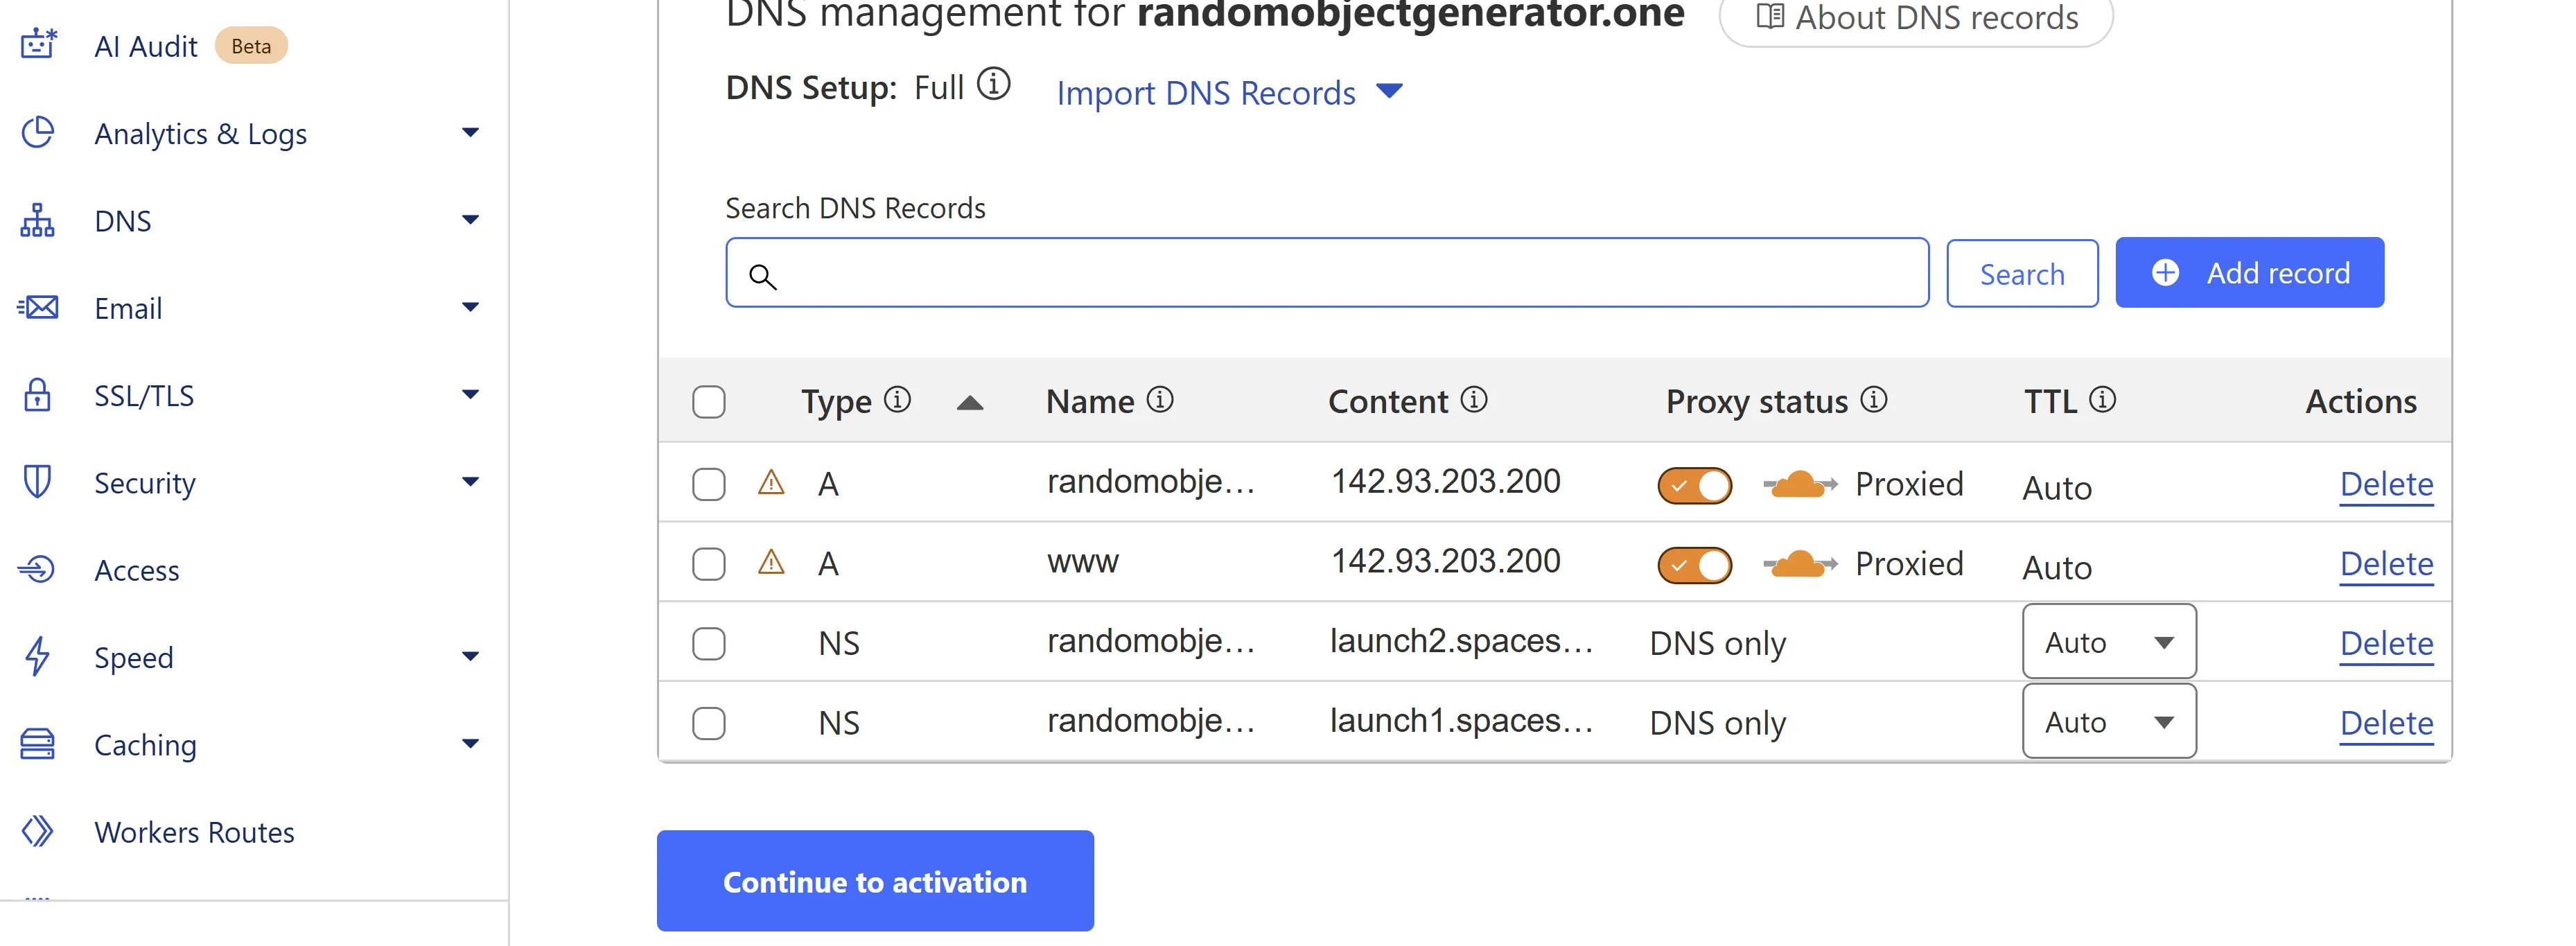
When you have a Cloudflare account, please log in to Cloudflare and on the main screen, add your domain and select quick scan, which should scan your existing DNS records and set up all accordingly.
Then select the free plan, then continue to activation:
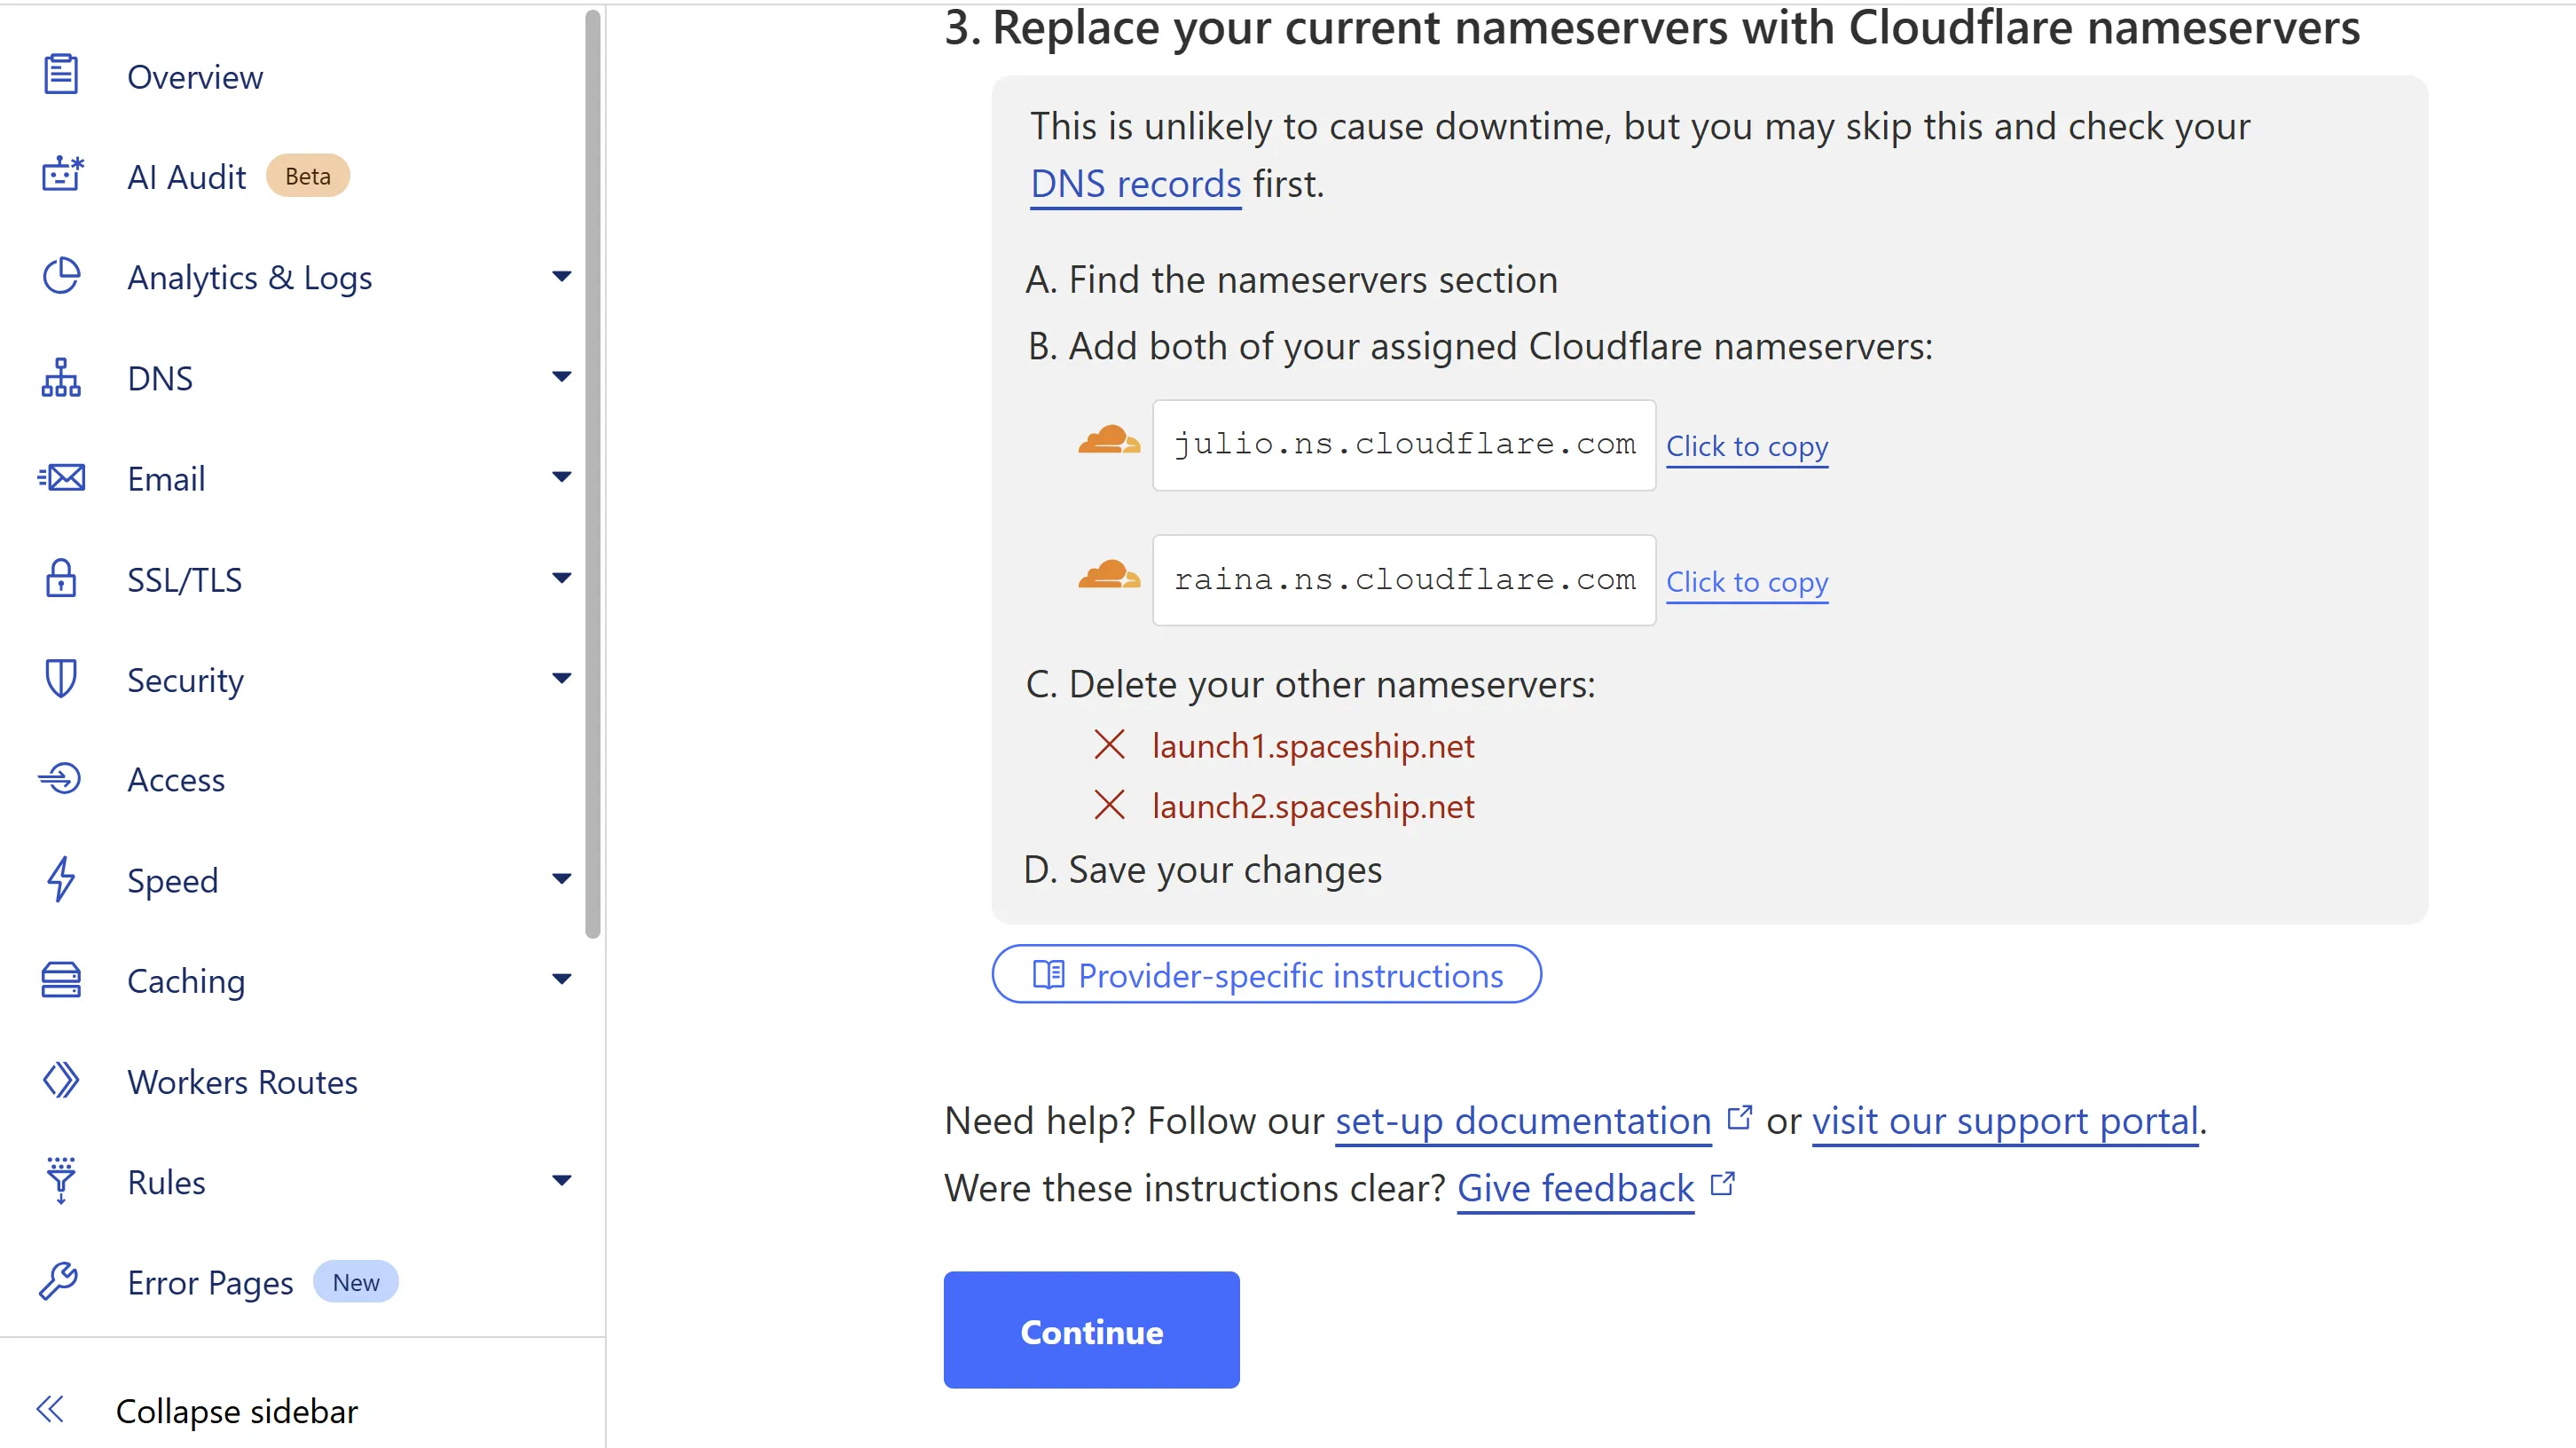
Then you will get to the page where you should get nameservers:
Now those nameservers you should put in your registrar.
When you set up your registrar, press continue and then press check nameservers.
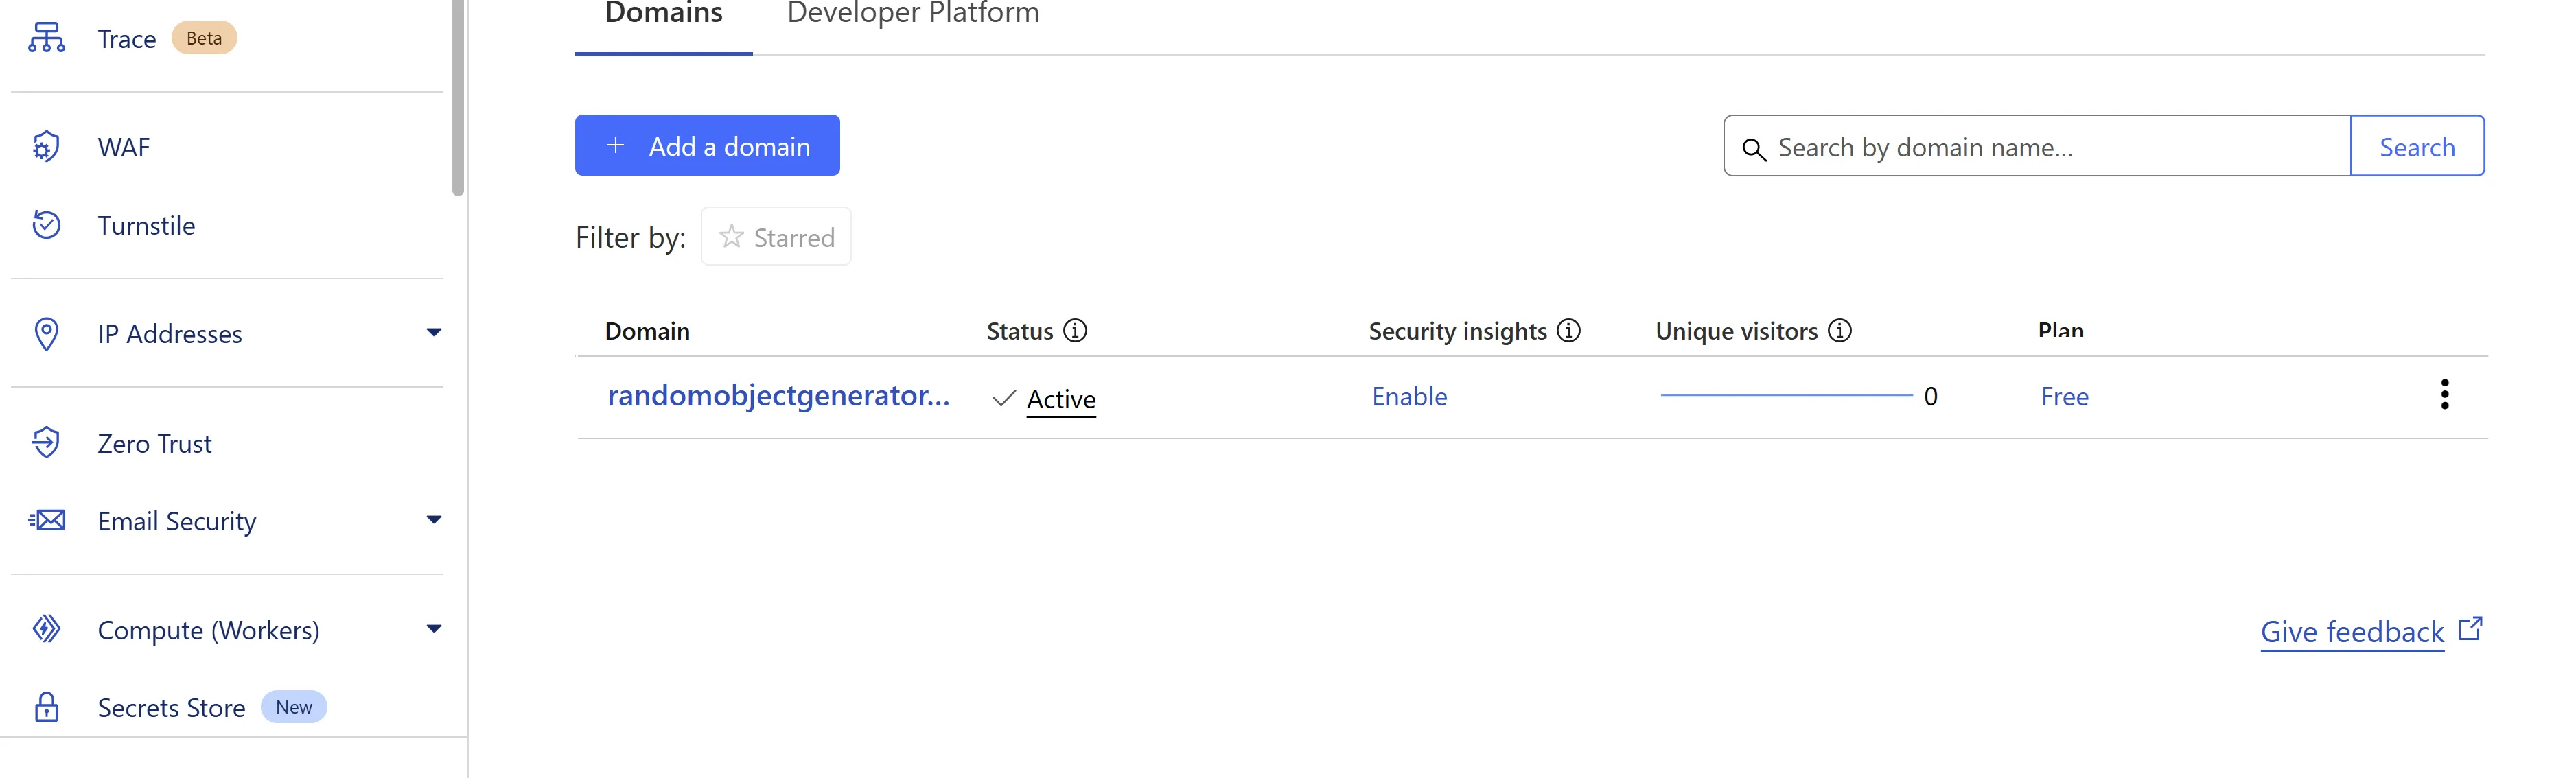
In a few minutes, you should get an email that all is good, and then you can go to the main screen and see that your server is active:
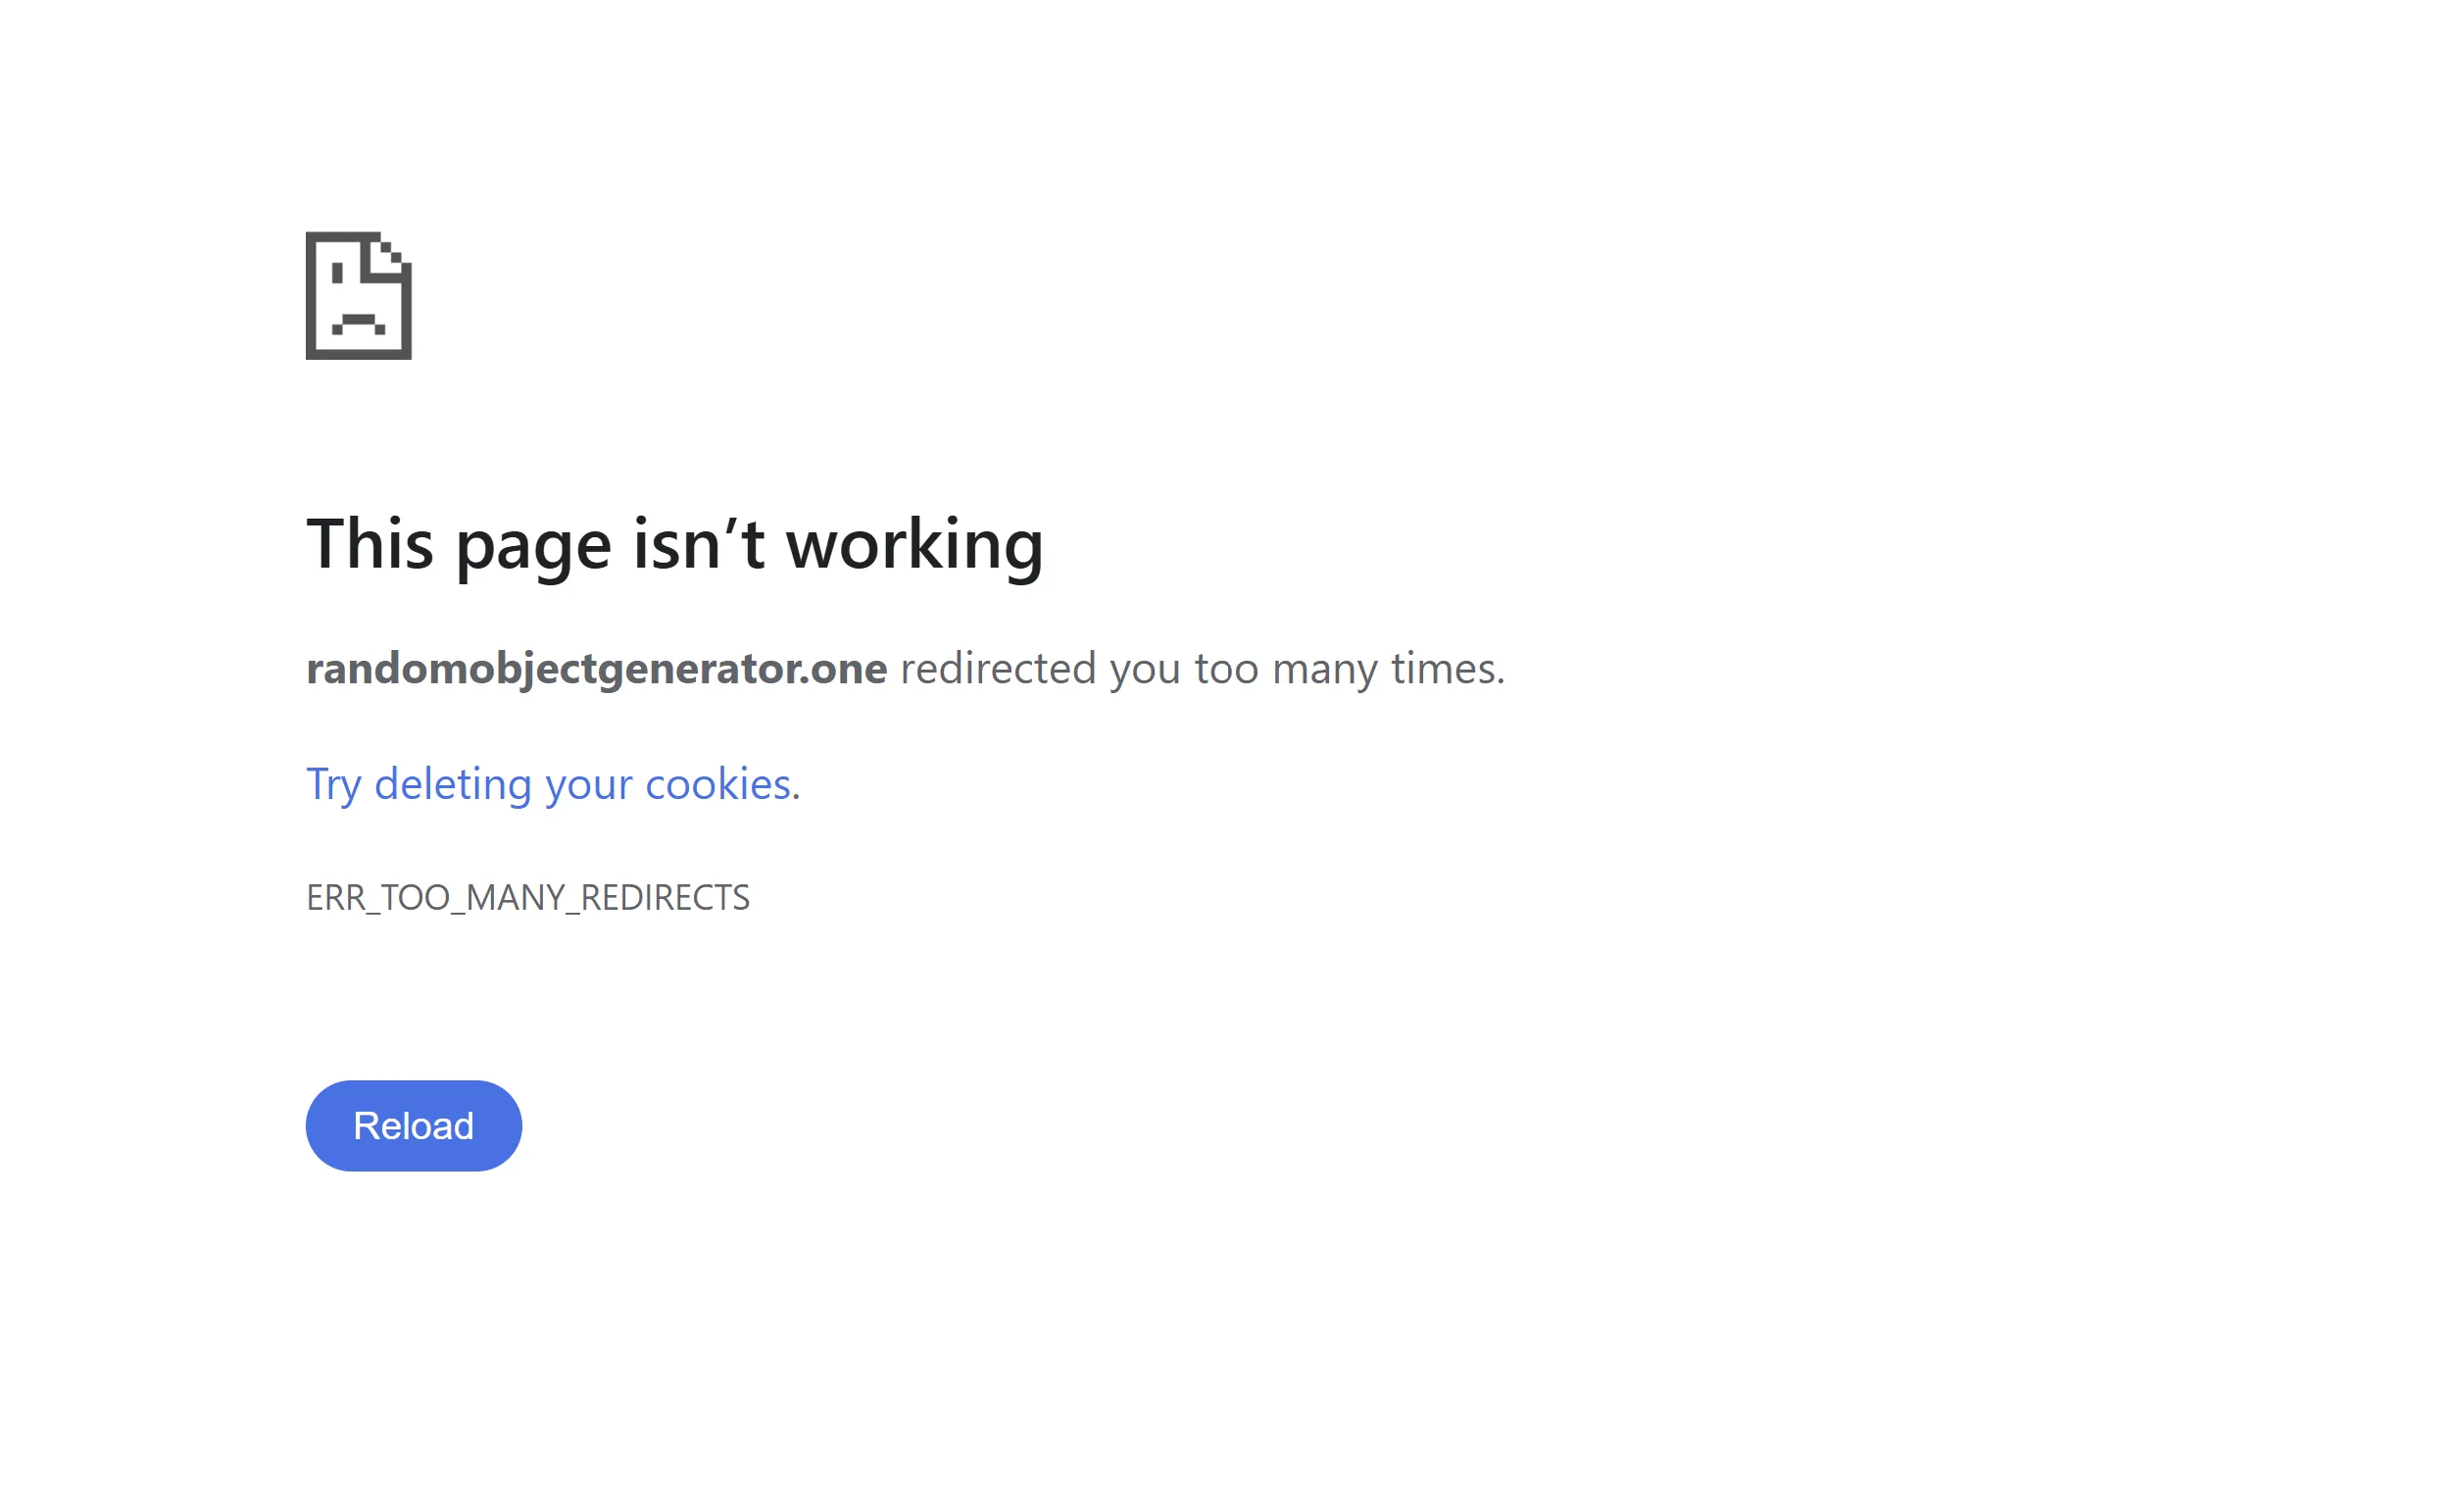
Obviously, your setup may differ, but on my test installation, I instantly got:
ERR_TOO_MANY_REDIRECTS:
That means the end-user connects to Cloudflare via HTTPS, and then Cloudflare tries to connect to your server via HTTP. My server sees the connection via HTTP, wants to redirect to HTTPS, and it creates a loop. It seems it is because, by default, Cloudflare uses encryption mode as Flexible:
To fix it, you can select either Full or Full (Strict) encryption. So the connection from Cloudflare and to your server will be encrypted. If you use Full (Strict), make sure you use a valid certificate on your server or one which Cloudflare provides, otherwise, you will face issues. And if you stick with Full (Strict), make sure you don’t forget to renew the expiring certificate, otherwise, you might end up in the same troubles as some big corporate companies.
Long story short, after setting to Full (Strict), my WordPress website was online again!
Configure Super Page Cache WordPress plugin
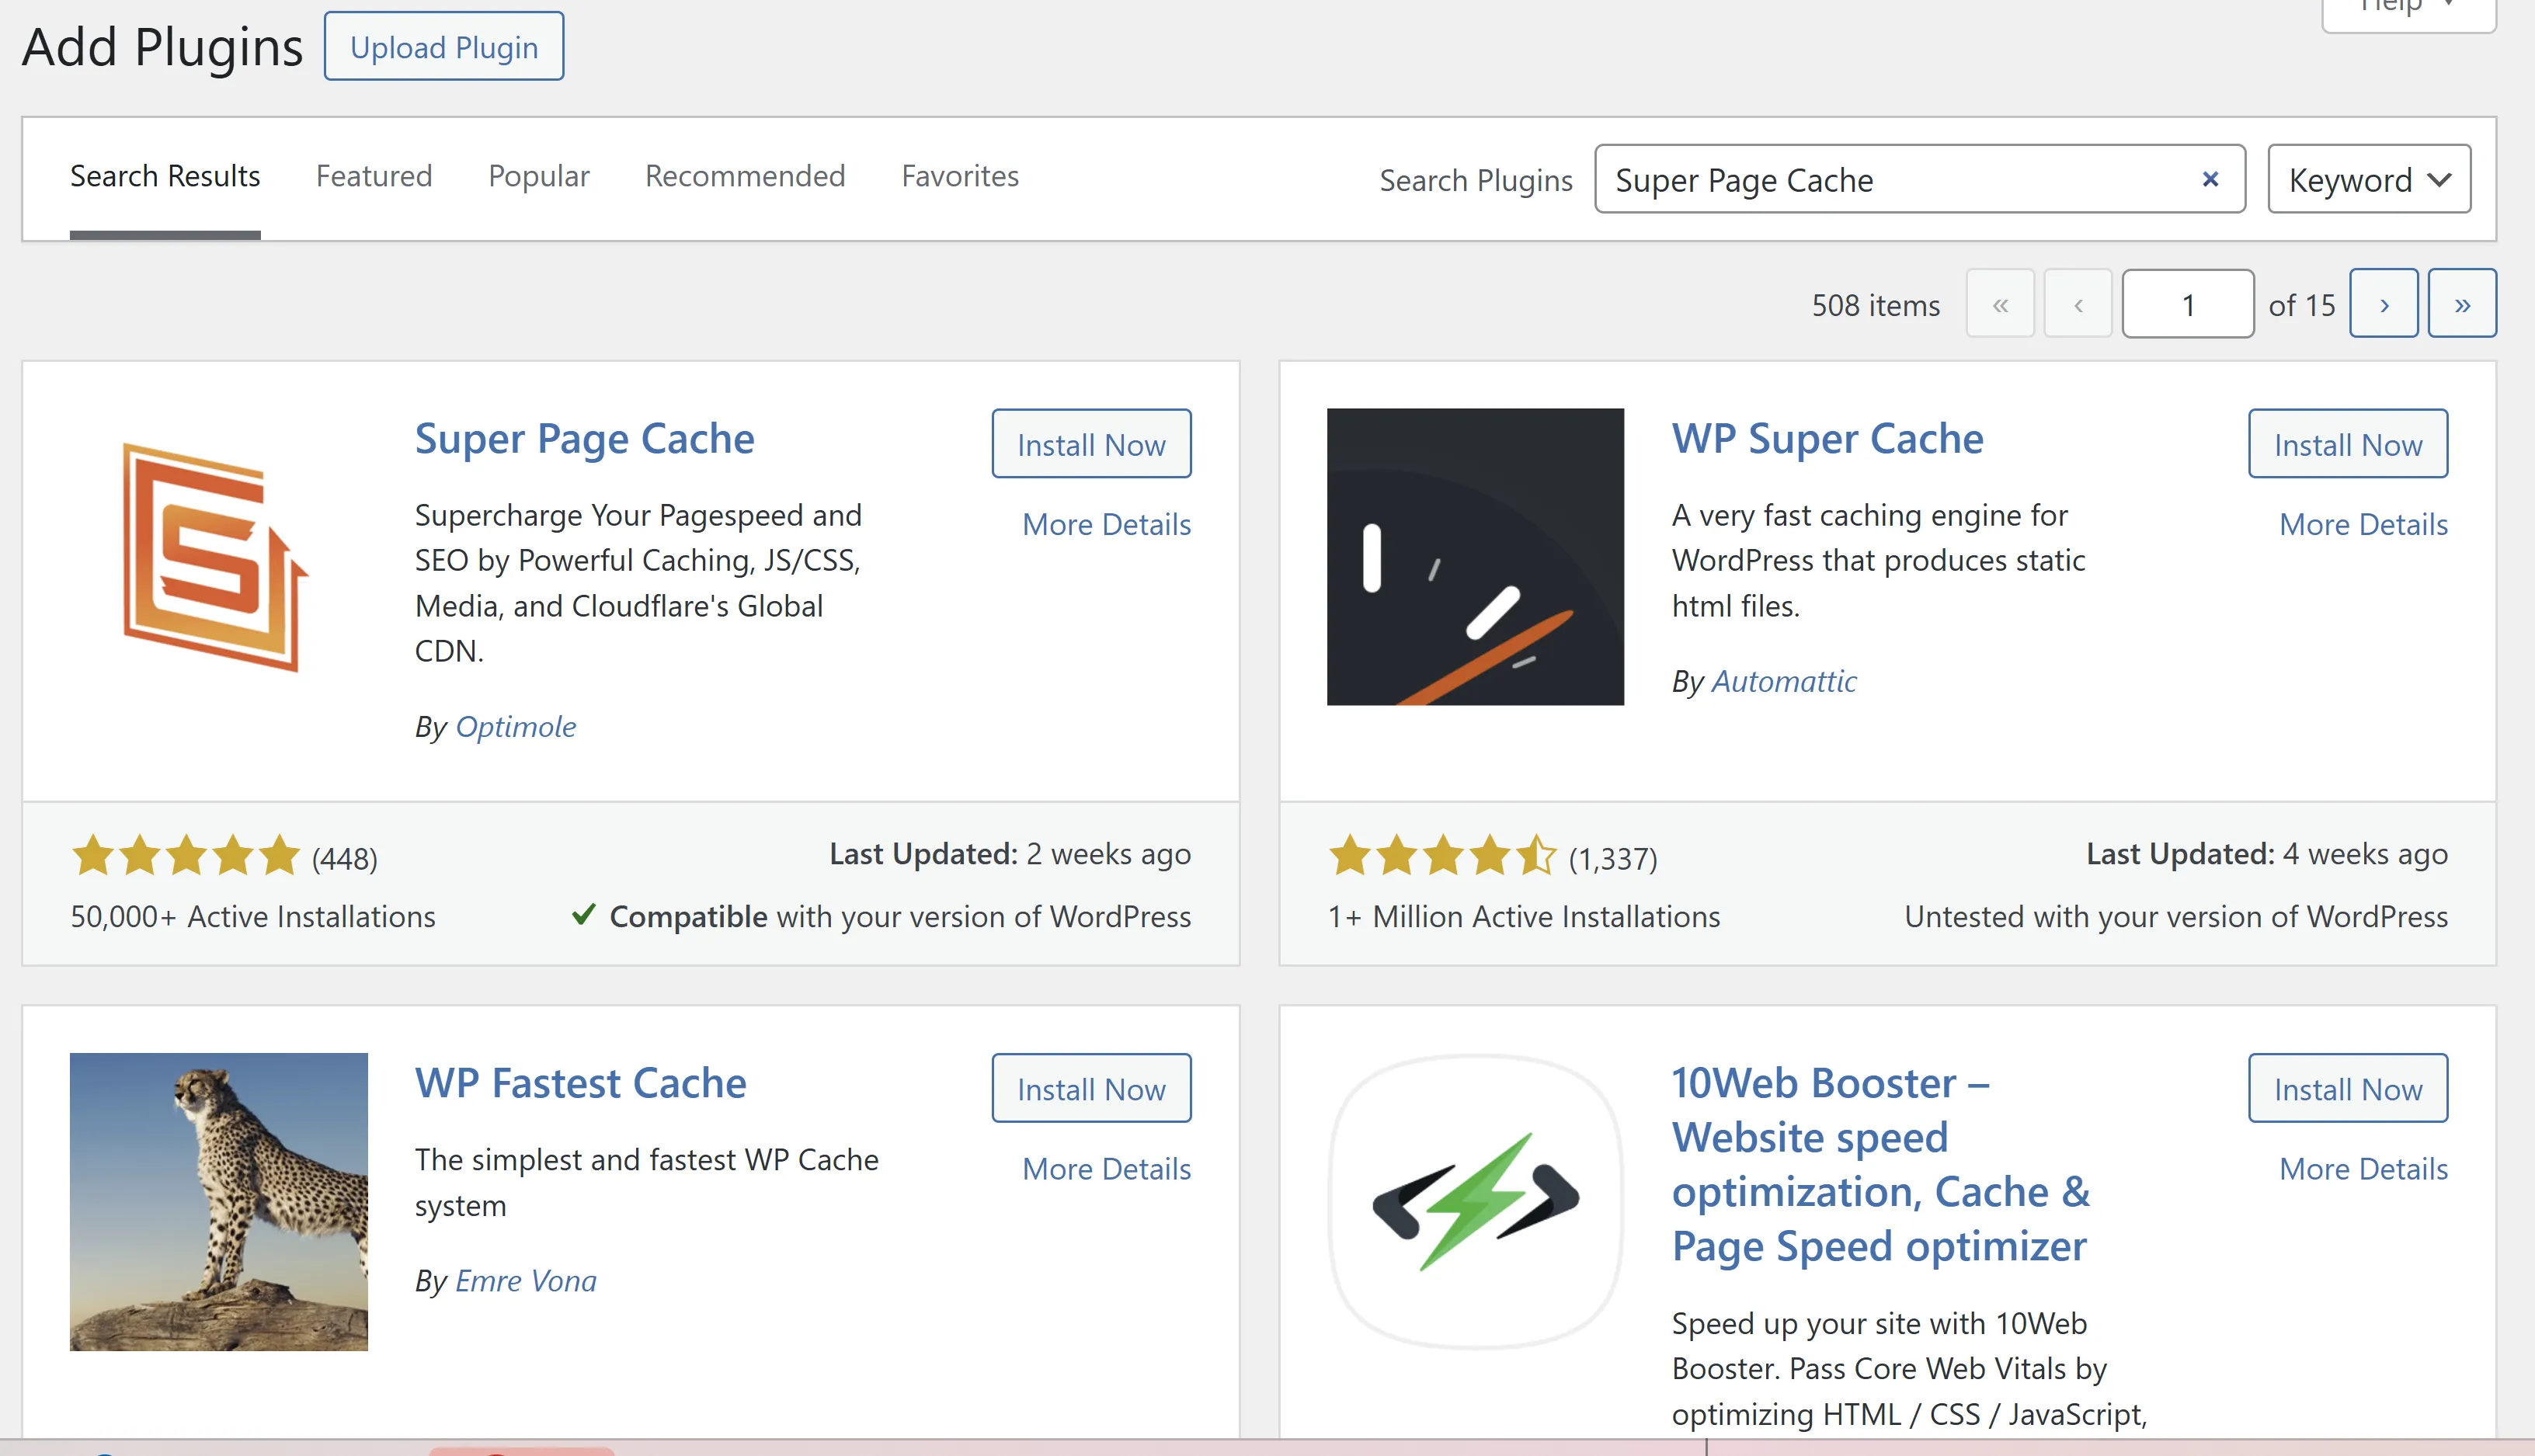
Next step would be to install the plugin on your WordPress. Just go to your WordPress admin panel, then to plugins, and hit Add Plugin, and in the search bar, put Super Page Cache:
Click Install Now and then click Activate, then it will open new screen:
Please make sure you disabled caching of any other plugins if there were any!
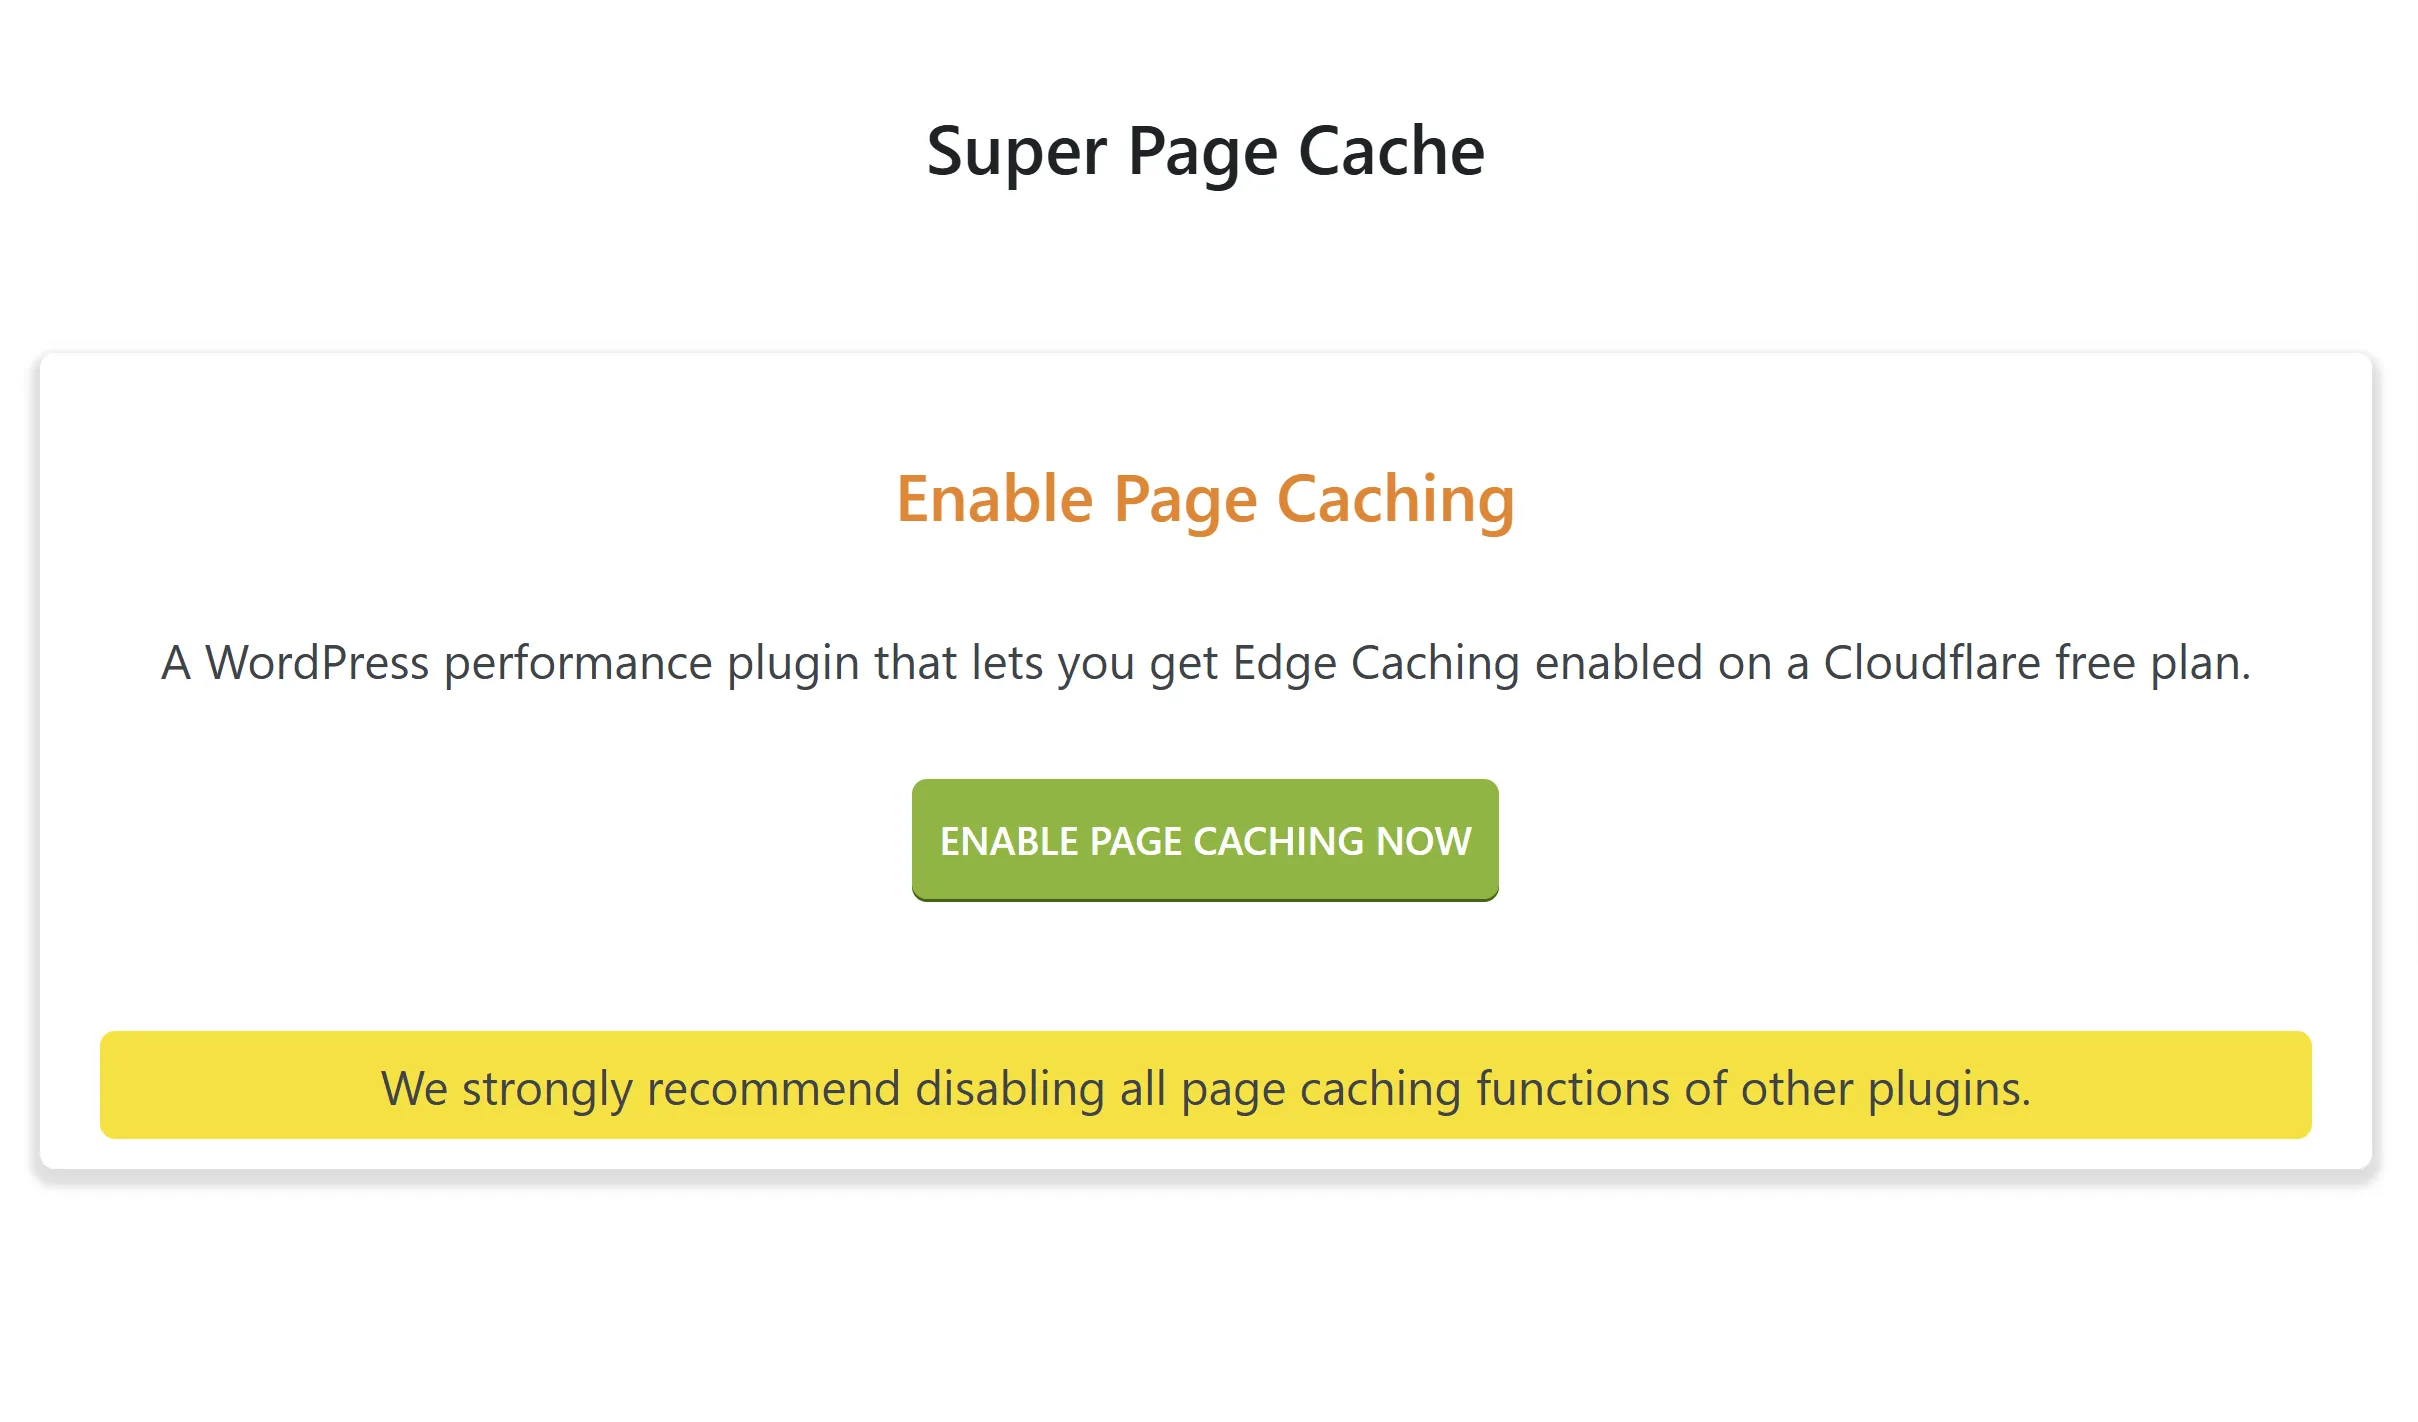
Then hit ENABLE PAGE CACHING NOW
You should see confirmation with Page cache enabled successfully
Getting cloudflare API key
Next, we need to get an API key so we can set up the Super Page Cache plugin to authorize and update necessary settings in Cloudflare.
To get the API key, go to Profile => API Tokens and click View under Global API Key. Make sure you secure your API key, don’t share it with anyone!
When we have the key, we can continue with the Super Page Cache plugin
Configuring Cloudflare (CDN & Edge Caching) in plugin
Go back to your WordPress admin page => Plugins => Super Page Cache => Settings => Cloudflare (CDN & Edge Caching). Under Cloudflare e-mail, put your Cloudflare email, and under Cloudflare API Key, the key we just grabbed from Cloudflare, and press UPDATE SETTINGS:
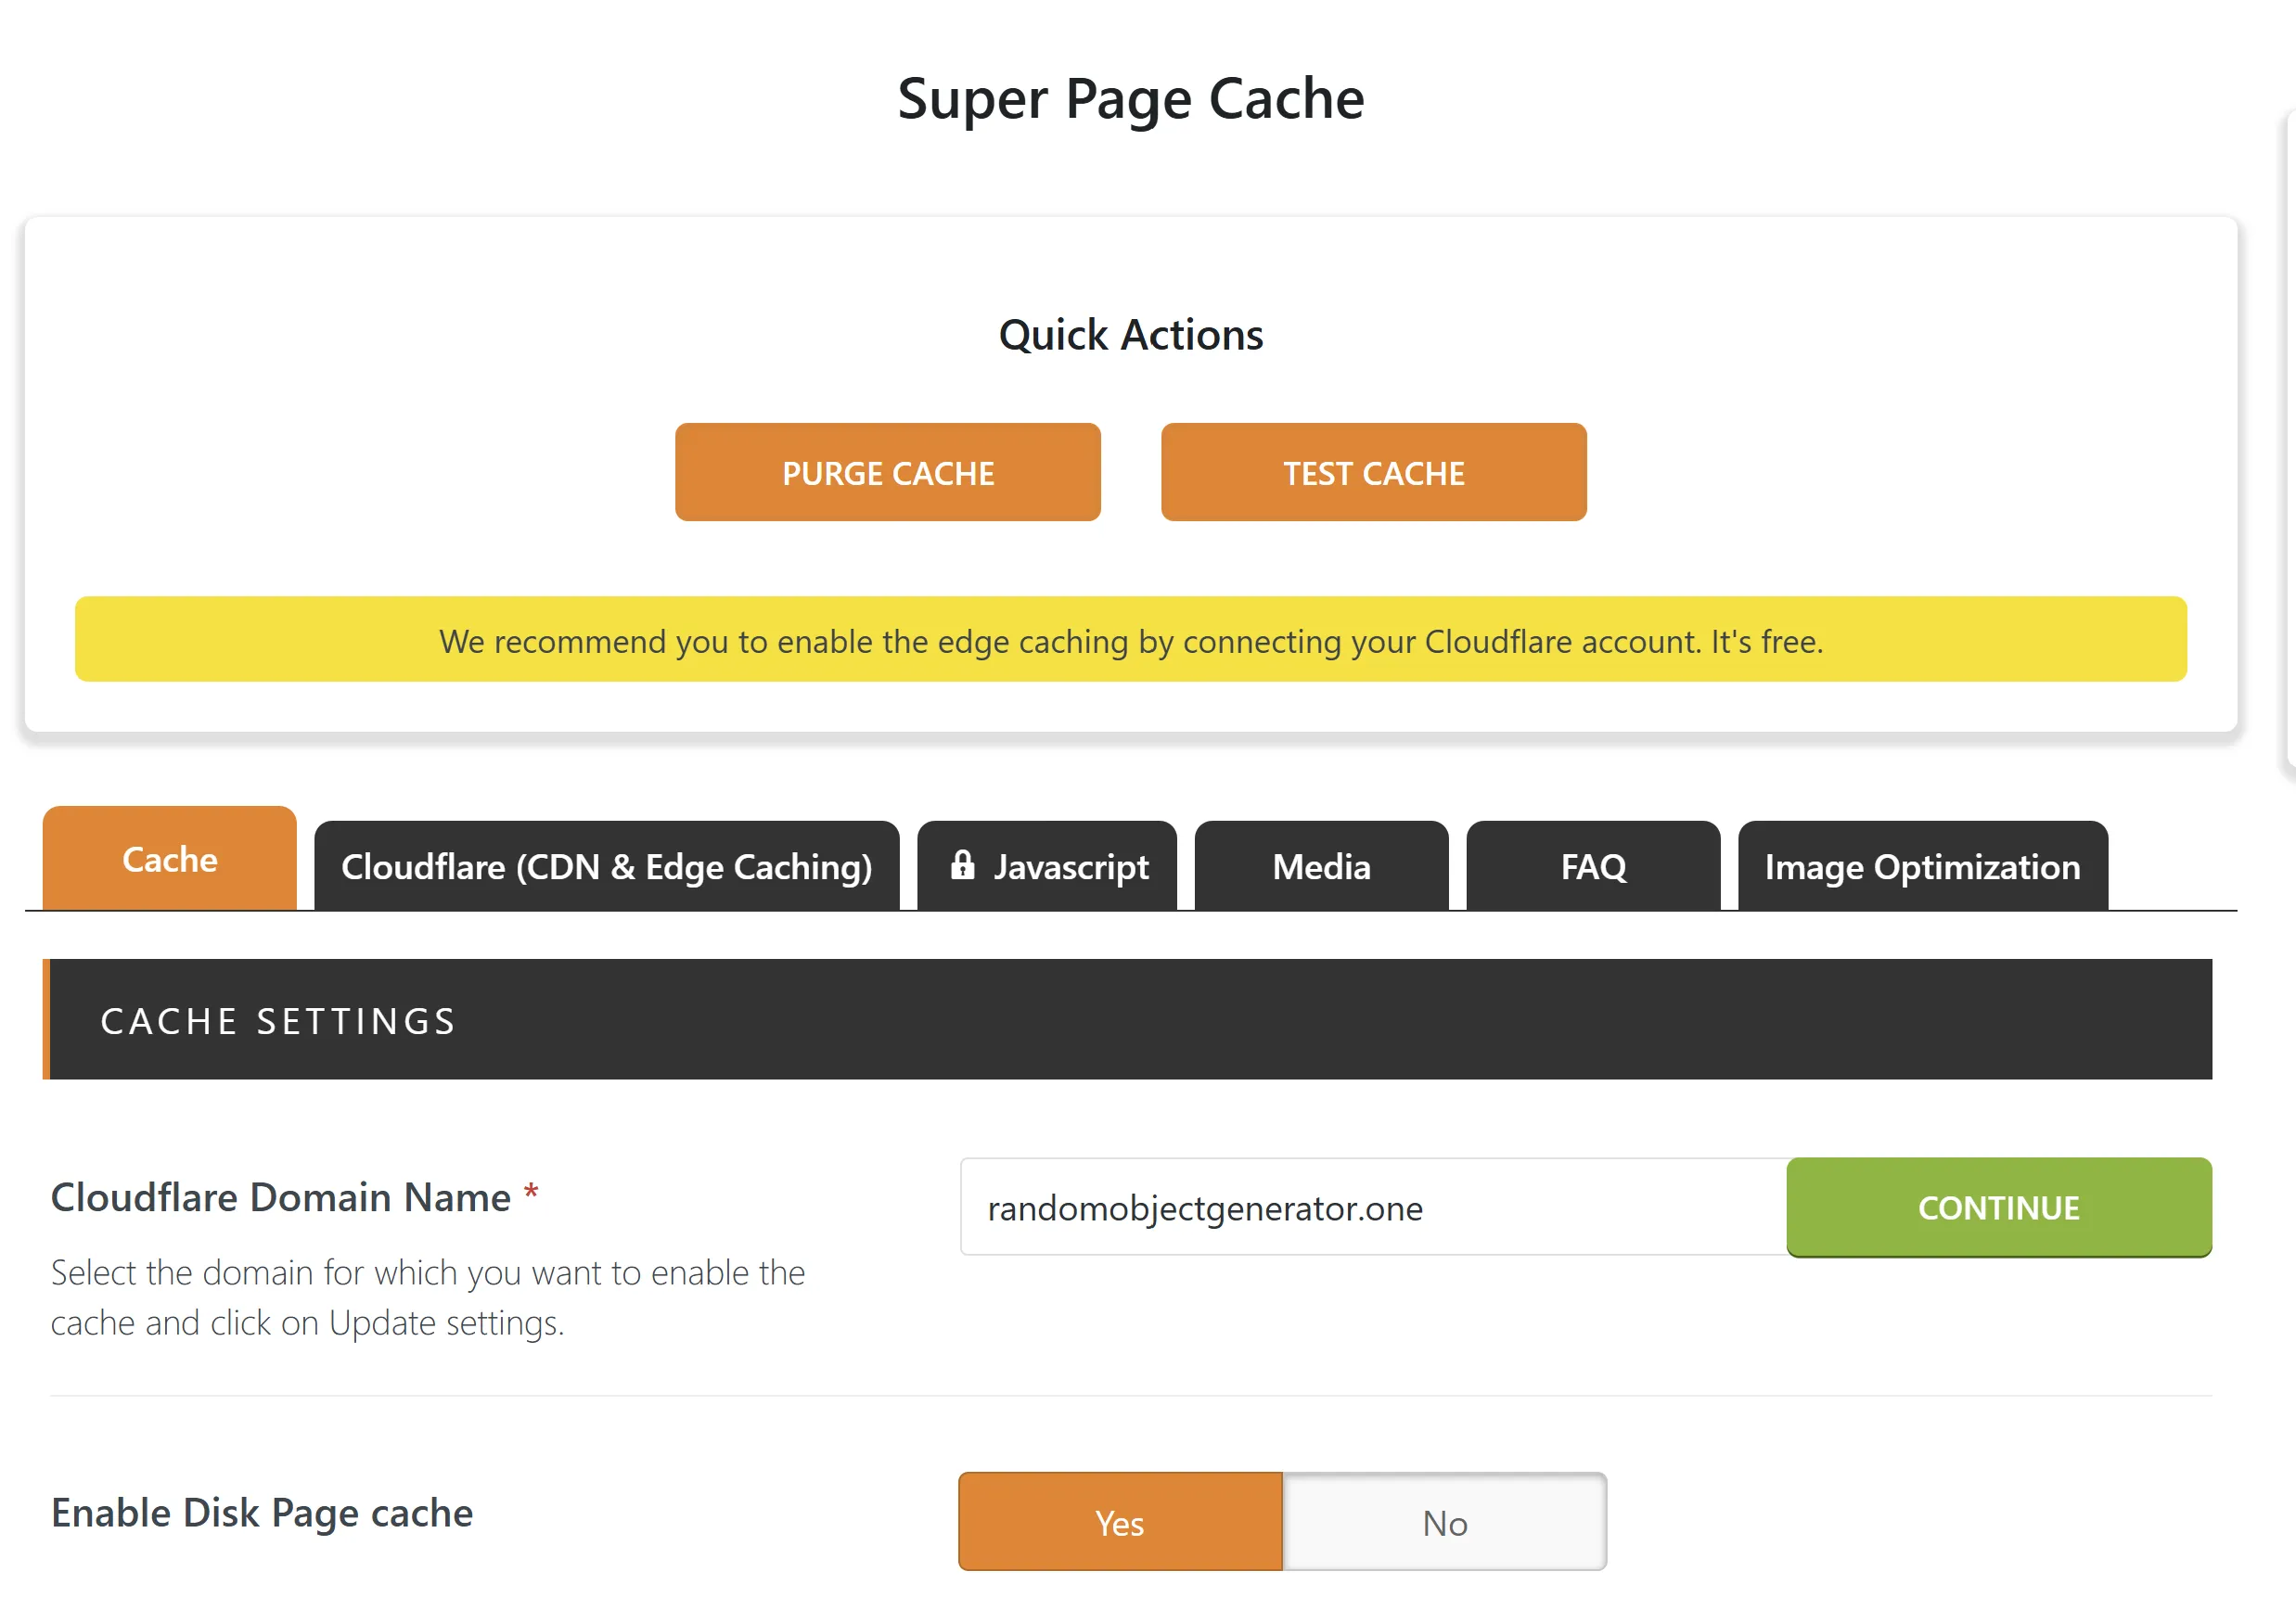
Then on the new window, make sure you have the correct domain name under Cloudflare Domain Name. If you have several ones, for me, it took straight away the correct one:
Hit Continue, and you should be good!
Validate Super Page Cache plugin
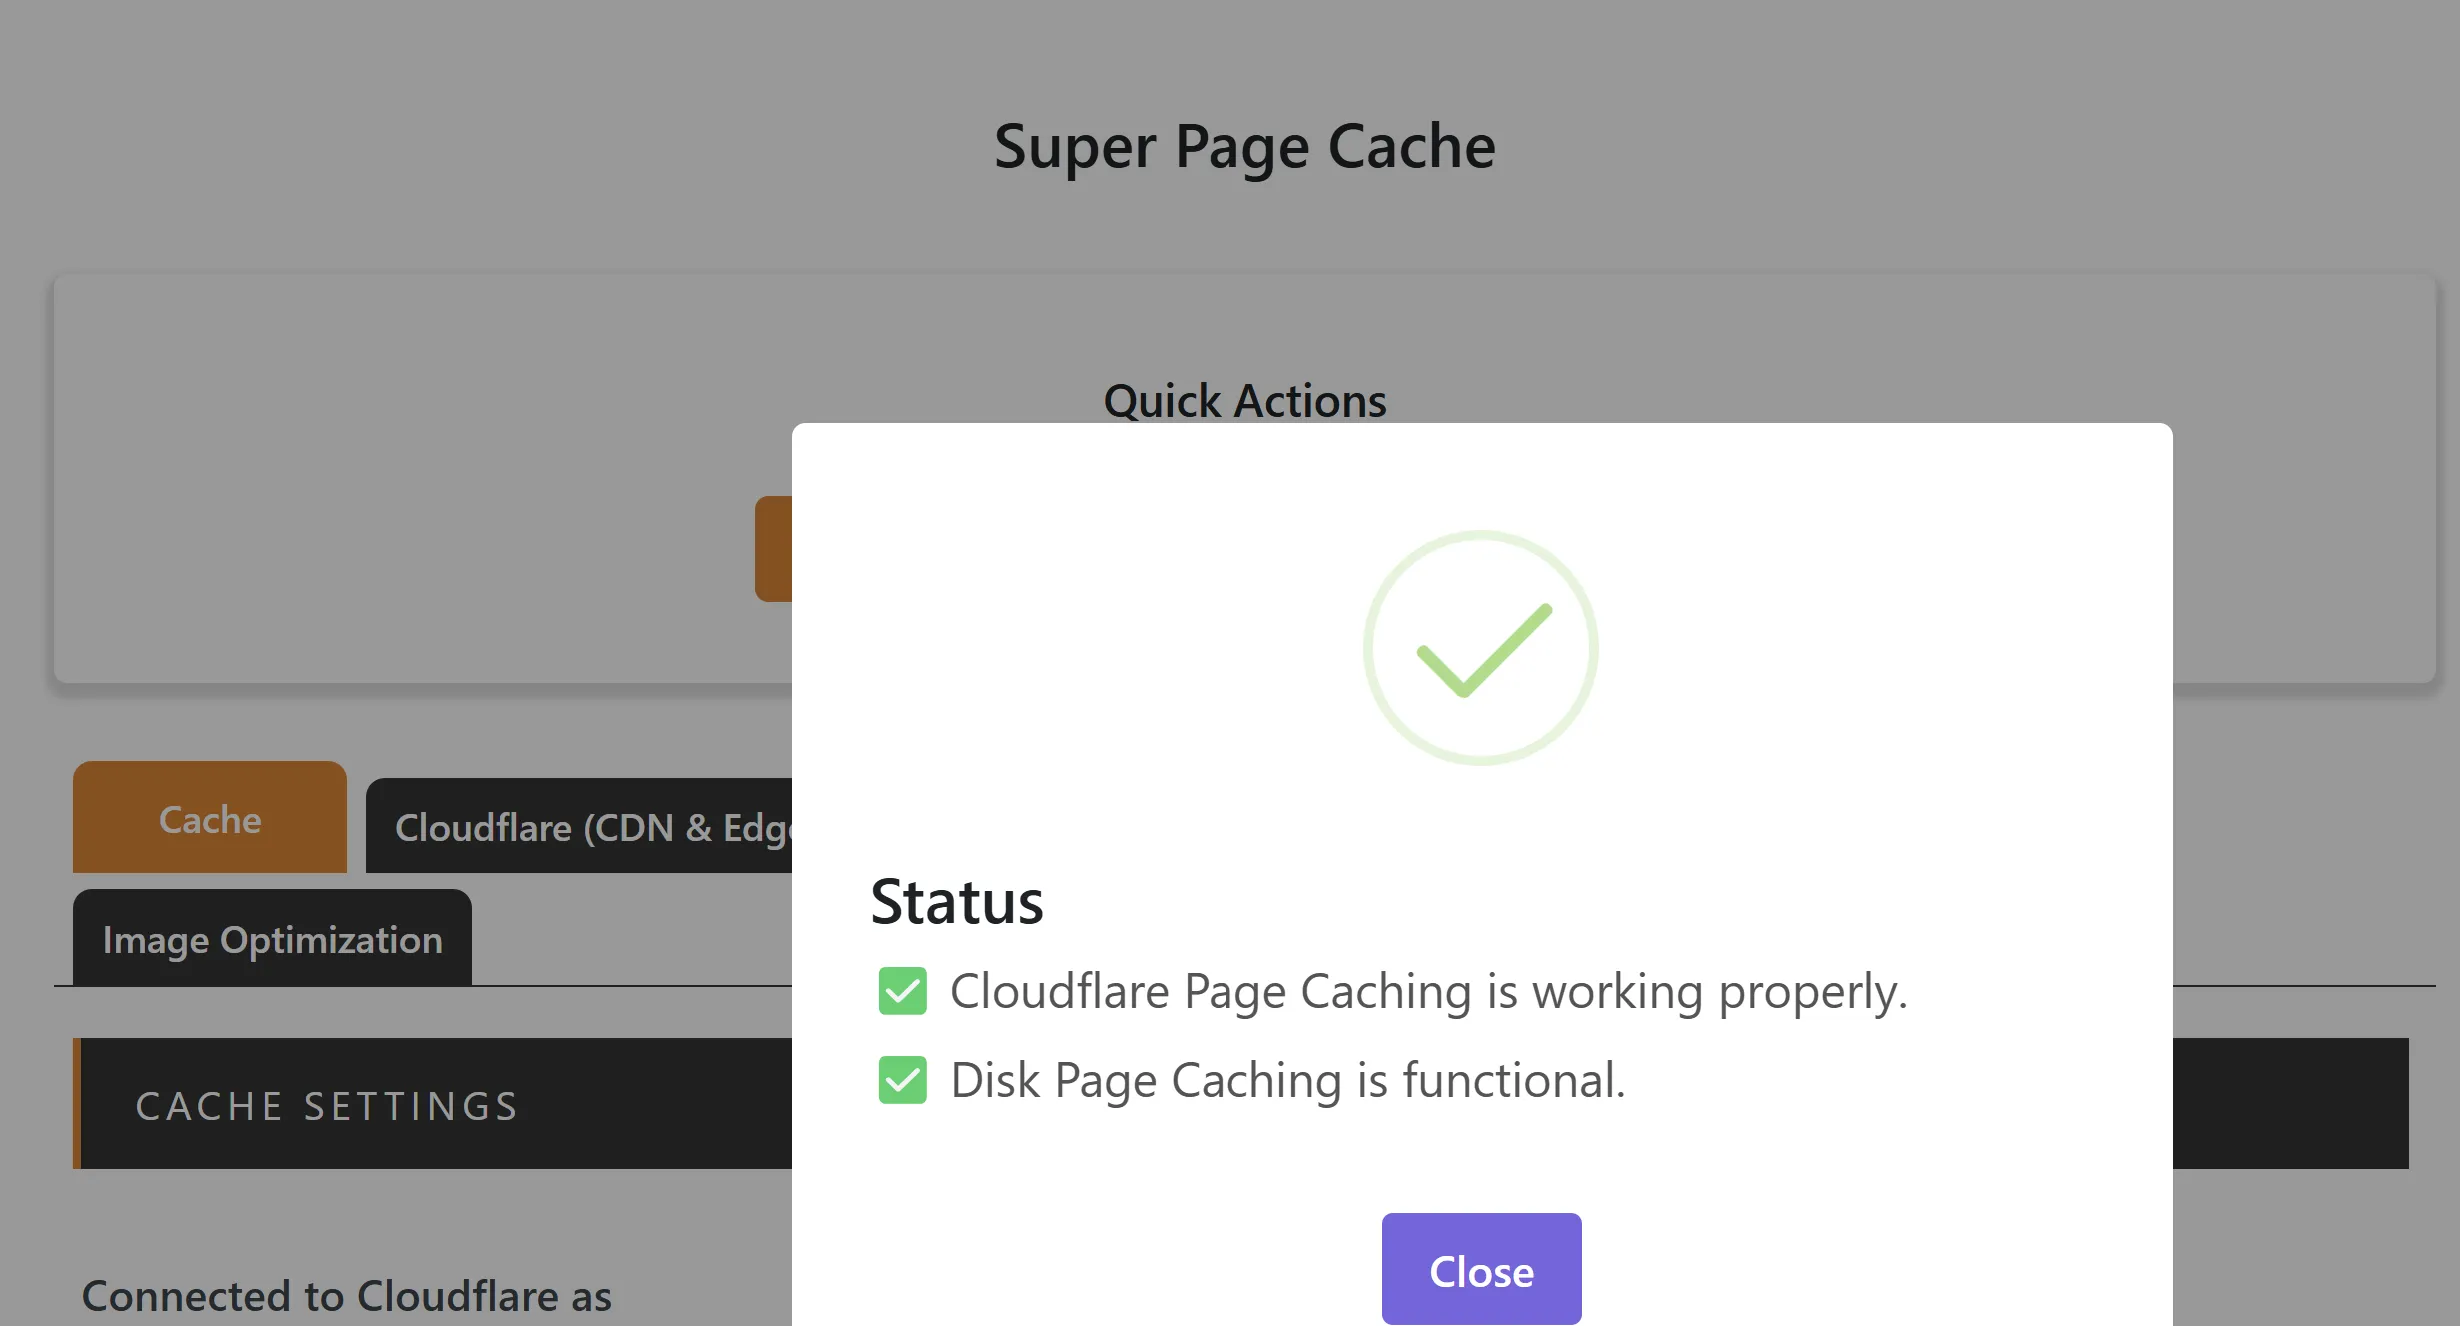
Next, a good idea would be to double-check that all is good, so on the same page, just click TEST CACHE, and if all is good, you should see this screen with 2 green ticks - Cloudflare Page Caching is working properly & Disk Page Caching is functional:
And we are done!
Conclusion
Obviously, the Super Page Cache plugin is just one piece of your infrastructure/deployment, and it is not a silver bullet, and if you have several underlying issues with your setup, I doubt that it will help a lot. Nevertheless, it can speed up your WordPress significantly, which is not just promises but backed up with statistics from my monitoring of my WordPress setup before and after I installed the plugin. I was not paid or sponsored by the author of the plugin, I just felt that I must share this with others, because for me, this plugin worked really well and way above my expectations, and most importantly, this costs nothing. You get all this performance improvement for free!
]]>Jurijs Ivolgajurijs.ivolga@gmail.comHow to manage Let’s Encrypt certificate on EC2 instance2025-03-31T08:00:00+00:002025-03-31T08:00:00+00:00https://www.cyberpunk.tools/jekyll/update/2025/03/31/lego-ec2In this guide, I’ll provide a short manual on how to create and manage Let’s Encrypt certificates on your EC2 instance using Lego (a Let’s Encrypt/ACME client and library written in Go). We’ll use the DNS-01 challenge, and the instance will have an appropriate IAM role so only the instance itself can manage the _acme-challenge TXT record for the domain.
Why use Let’s Encrypt on EC2?
Why even bother using Let’s Encrypt in AWS? First of all — simpler setup. You don’t need an ALB or CloudFront, which also means lower cost. Sometimes, your application isn’t something you can easily put behind a load balancer — for example, any SIP proxy. So in some cases, you’ll want Let’s Encrypt certs directly on the EC2 instance.
Why DNS-01 challenge?
If you’re running a SIP application, why open port 80 at all if you don’t need to? Or maybe port 80 is already being used by another service. Personally, I just prefer the DNS-01 challenge — fewer firewall holes to worry about.
Overview
We’ll create an instance profile and assign it to our EC2 instance so the instance itself can have permissions to add or remove DNS records, which is required for the DNS-01 challenge.
Requirements
I assume you already have an EC2 instance up and running. Here’s an example Terraform configuration to spin up a test instance:
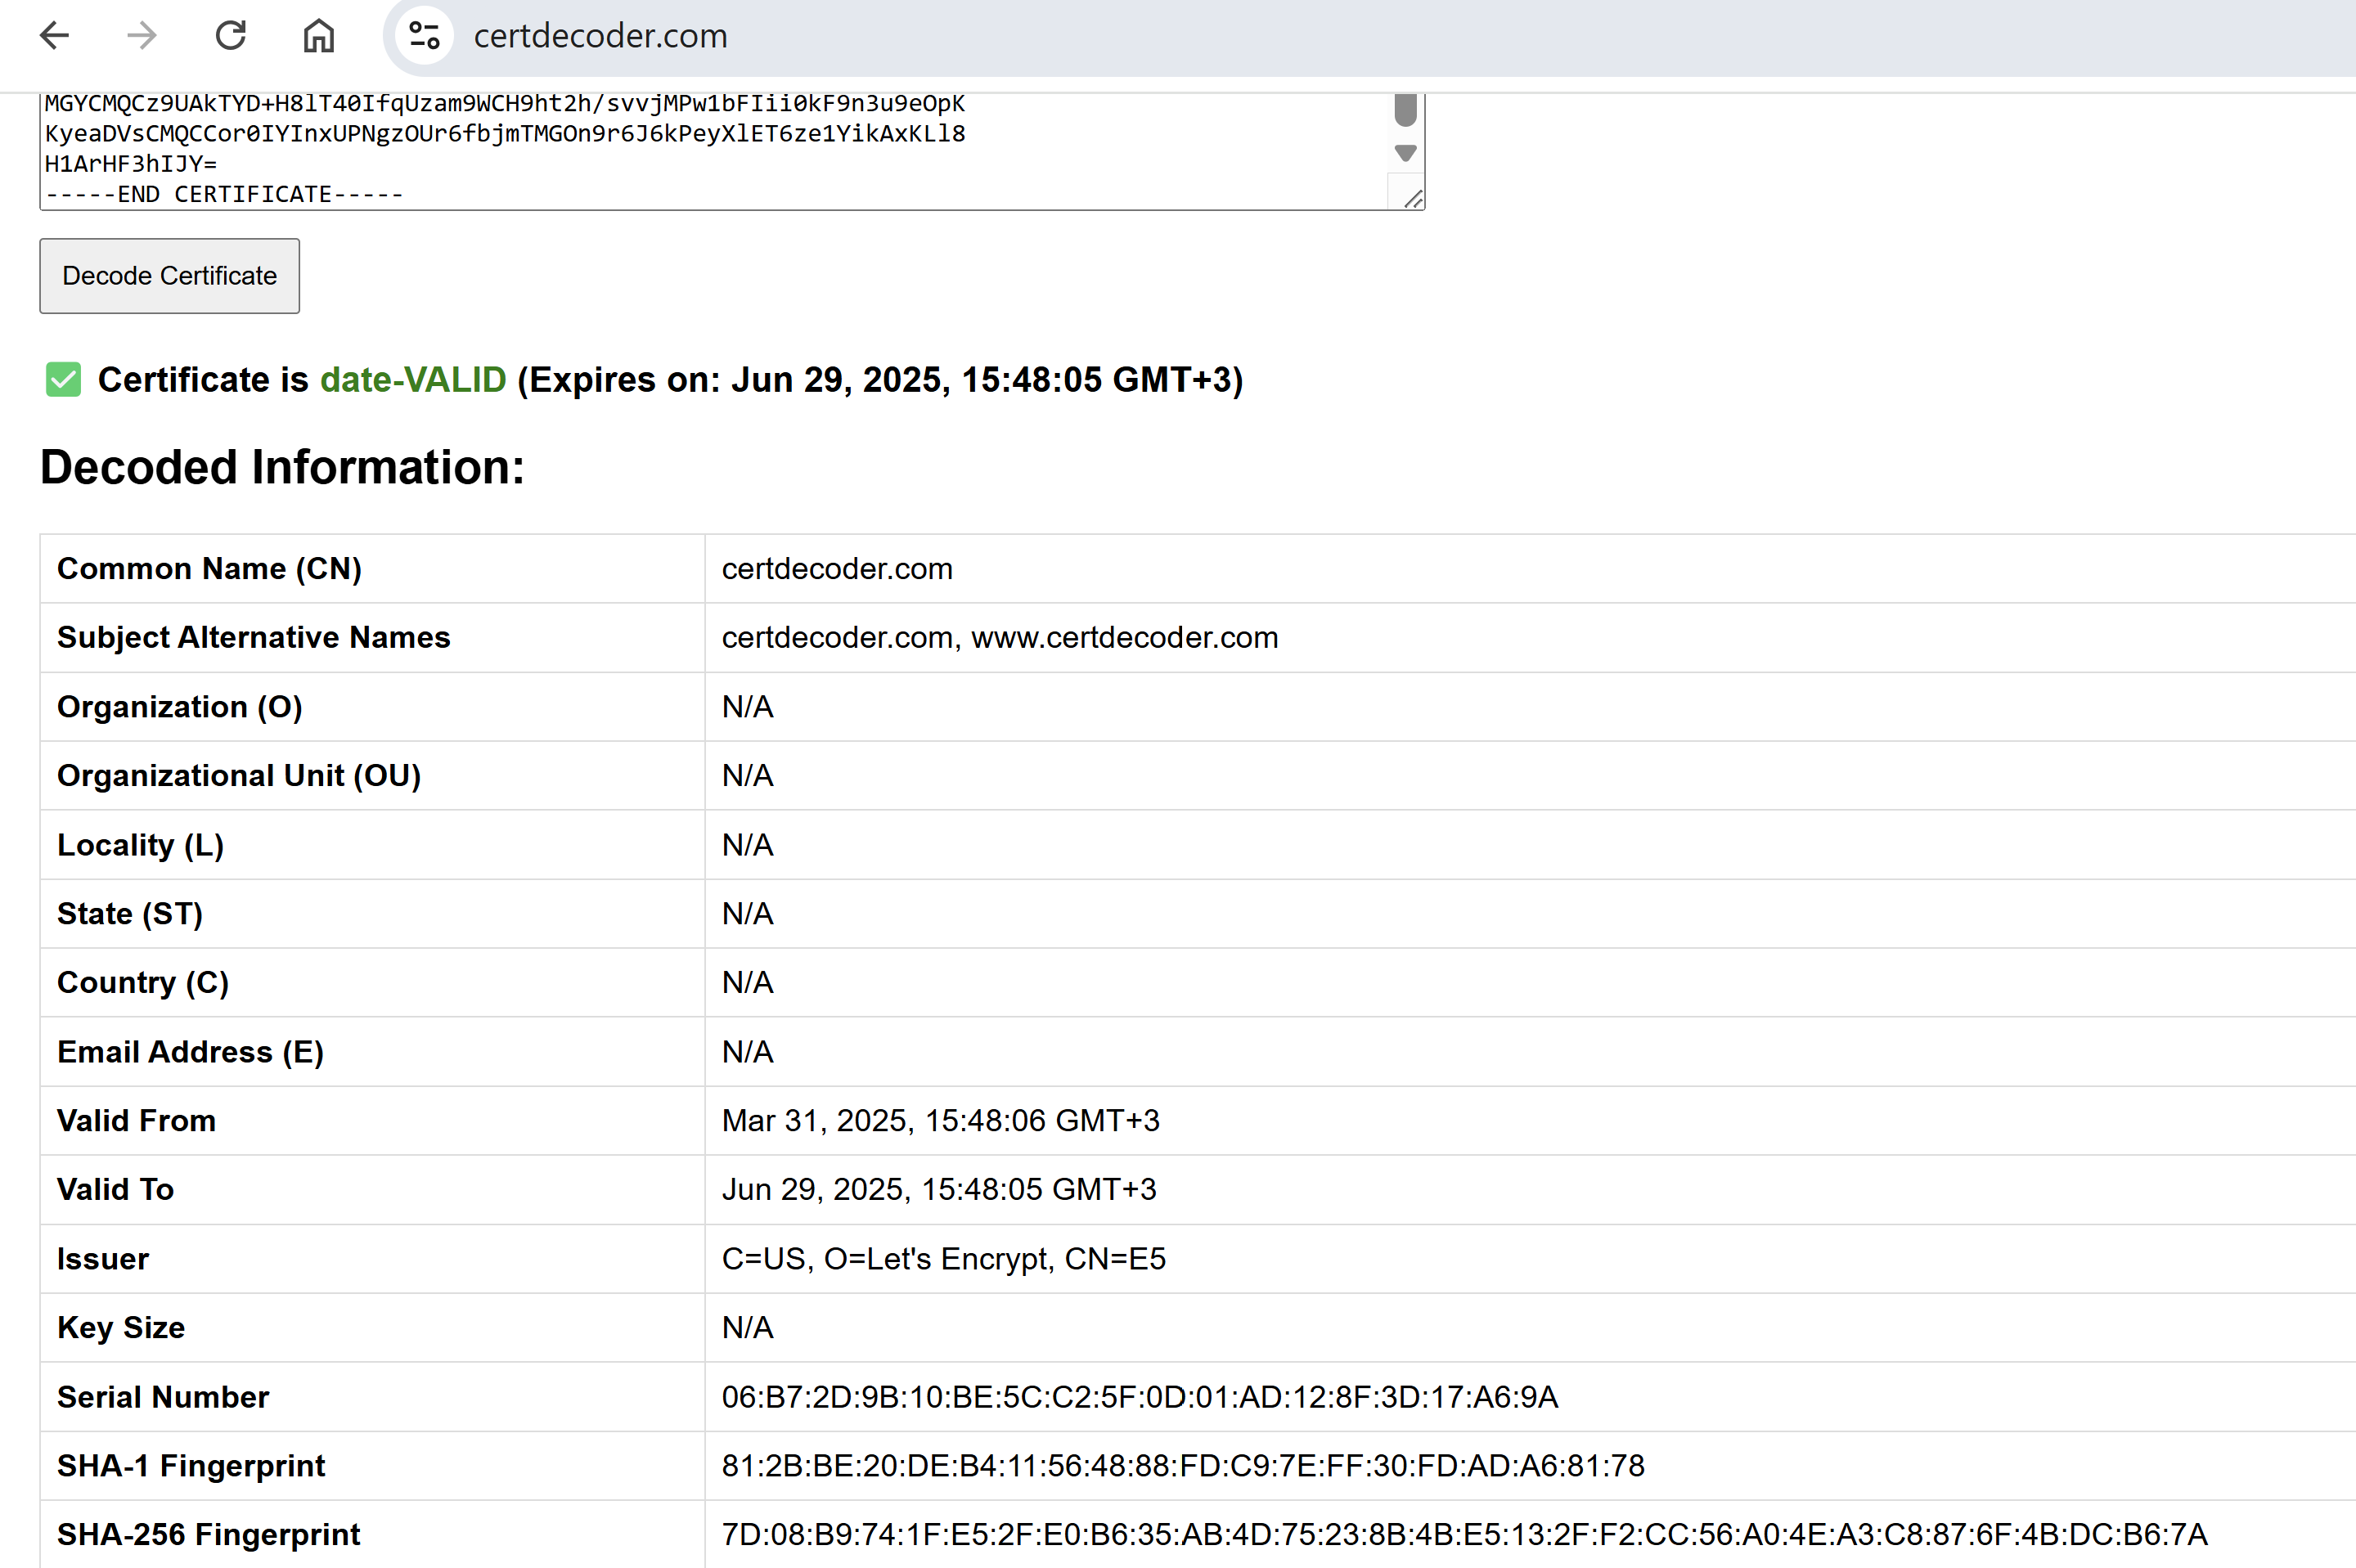
The first certificate is for my-domain.com and www.my-domain.com.
Visit https://certdecoder.com/ to verify the certificate. You should see that the Common Name is my-domain.com and the Subject Alternative Names (SANs) include both my-domain.com and www.my-domain.com.
Note: In the screenshot below, the example shows certdecoder.com instead of my-domain.com. The certificate is valid for 90 days.
The second certificate is Let’s Encrypt’s root certificate. You can inspect it if desired, though it is not essential for this guide.
Renewal via Cron
Set up a cron job for automatic renewal with these entries:
The third line reloads nginx so that any new certificate is applied. (If you’re using another service like Apache or Kamailio, replace this command accordingly.)
Conclusion
You now have Let’s Encrypt set up directly on your EC2 instance using the DNS-01 challenge with the proper IAM permissions. Certificates are issued and automatically renewed via cron.
Keep an eye on /var/log/lego.log — if renewal fails, you’ll find useful details there for troubleshooting.
]]>Jurijs Ivolgajurijs.ivolga@gmail.comHow to Store Terraform State in Azure with a Bit More Security in Mind2025-02-15T17:00:00+00:002025-02-15T17:00:00+00:00https://www.cyberpunk.tools/jekyll/update/2025/02/15/storing-terraform-state-securely-in-azureThank You “Ned in the Cloud”
First and foremost, I would like to thank “Ned in the Cloud” for this video:
That video was a starting point for this article, and I used it extensively to write my code here. Thank you!
Initial Setup Using Official Microsoft Documentation
So, you are ready to deploy your first resource in Azure using Terraform, and obviously, you want to save the state in Azure storage, just like you do with AWS in S3. That should not be difficult, right?
Okay, let’s Google “Terraform state in Azure storage.” The first link, at least for me, is this manual from Microsoft:
Official documentation—wow, that should be the best place to start, right?
At this point, you should suspect that something is not quite right. Too many “right?”
In any case, let’s follow the documentation and set up everything as it says. Wow, that was easy, great!
But wait. Some eagle-eyed readers probably noticed something a bit off… Like this:
In this example, Terraform authenticates to the Azure storage account using an Access Key. In a production deployment, it’s recommended to evaluate the available authentication options supported by the azurerm backend and to use the most secure option for your use case.
What the hell?? What does this mean in plain English? Let me translate this for you: “You should never ever use this in production; this is a huge security flaw.”
Don’t believe me? Just Google “why is it bad to use Access Key to access Azure storage account”:
Okay, now we know that even official documentation is not always the best way to start.
Other Bloggers and Articles
So, I started to look beyond official documentation and tried to find some simple and straightforward manuals that just work. Unfortunately, the majority of what I found was quite bad, if not very bad. I stumbled upon one document where it was recommended to set up your Azure storage account with allow_blob_public_access = true!!!! That is a legacy setting now, but nevertheless, if you see “public access” in your config, you should suspect something is wrong! You don’t want any public access to your Terraform state, which could contain sensitive data! Never ever do this!
So, after searching and mostly watching “Ned in the Cloud” over and over, I came up with my own setup.
Solution: Use Entra ID (Formerly Azure AD)
In my opinion, the best approach is using Entra ID (formerly Azure AD). This eliminates the need for Access Keys, which are a huge security risk and difficult to rotate. With Entra ID, you get more granular access control, better auditing, and overall tighter security.
Requirements
Before we can start deploying this code, we will need to make sure you have everything that is needed. First and foremost, you need an account in the Azure portal, plus OpenTofu or Terraform and Azure CLI installed. Here, I will use OpenTofu.
If you’re ready, then log in with Azure CLI by running az login. It will give you a link that you need to open in a browser and log in to Azure, just like when you visit https://portal.azure.com/. Pick your account and log in. Then, return to the command line and select a subscription if you have more than one. You will see something like this:
[Tenant and subscription selection]
No Subscription name Subscription ID Tenant
-----------------------------------------------------------------------------[1] * Free Trial axxxxxxx-12xx-4xxx-bxxx-fxxxxxxxxxxx Default Directory
Press enter or select your subscription by providing the respective number (1 in our case) and pressing enter. Now you should be logged in.
Terraform Code to Set Up Storage Account and Container
Create main.tf and put this code there:
terraform {
required_providers {
azurerm ={source="hashicorp/azurerm"
version ="~>3.0"}
random ={source="hashicorp/random"
version ="~>3.0"}}}
provider "azurerm"{
features {}
storage_use_azuread =true}
resource "random_string""resource_code"{
length = 5
special =false
upper =false}
resource "azurerm_resource_group""tfstate"{
name ="tfstate"
location ="eastus2"
tags ={
ManagedBy ="Terraform"}}
resource "azurerm_storage_account""tfstate"{
name ="tfstate${random_string.resource_code.result}"
resource_group_name = azurerm_resource_group.tfstate.name
location = azurerm_resource_group.tfstate.location
account_tier ="Standard"
account_kind ="StorageV2"
account_replication_type ="GRS"
min_tls_version ="TLS1_2"
shared_access_key_enabled =false
default_to_oauth_authentication =true
allow_nested_items_to_be_public =false
blob_properties {
versioning_enabled =true
change_feed_enabled =true
change_feed_retention_in_days = 90
last_access_time_enabled =true
delete_retention_policy {
days = 30
}
container_delete_retention_policy {
days = 30
}}
tags ={
ManagedBy ="Terraform"}}
resource "azurerm_storage_container""tfstate"{
name ="tfstate"
storage_account_name = azurerm_storage_account.tfstate.name
container_access_type ="private"}
output "storage_account_name"{
value = azurerm_storage_account.tfstate.name
}
output "storage_container_name"{
value = azurerm_storage_container.tfstate.name
}
Explanation of the Code
Generating a Unique Resource Code
This code generates a random 5-character alphanumeric string using Terraform’s random_string resource. We will later use this string as a suffix for the storage account name.
resource "random_string""resource_code"{
length = 5
special =false
upper =false}
Secure Authentication
This code ensures that we use Azure AD/Entra ID to access the storage account instead of access keys, which are a major security risk.
provider "azurerm"{
features {}
storage_use_azuread =true}
Geo-Redundant Storage (GRS)
Using GRS replication ensures that our data is available across multiple regions, providing better redundancy and resilience.
Delete Retention: Allows recovery of deleted blobs and containers for 30 days.
For even more security, consider infrastructure_encryption_enabled, which enables double encryption or managing your own encryption keys instead of relying on Microsoft.
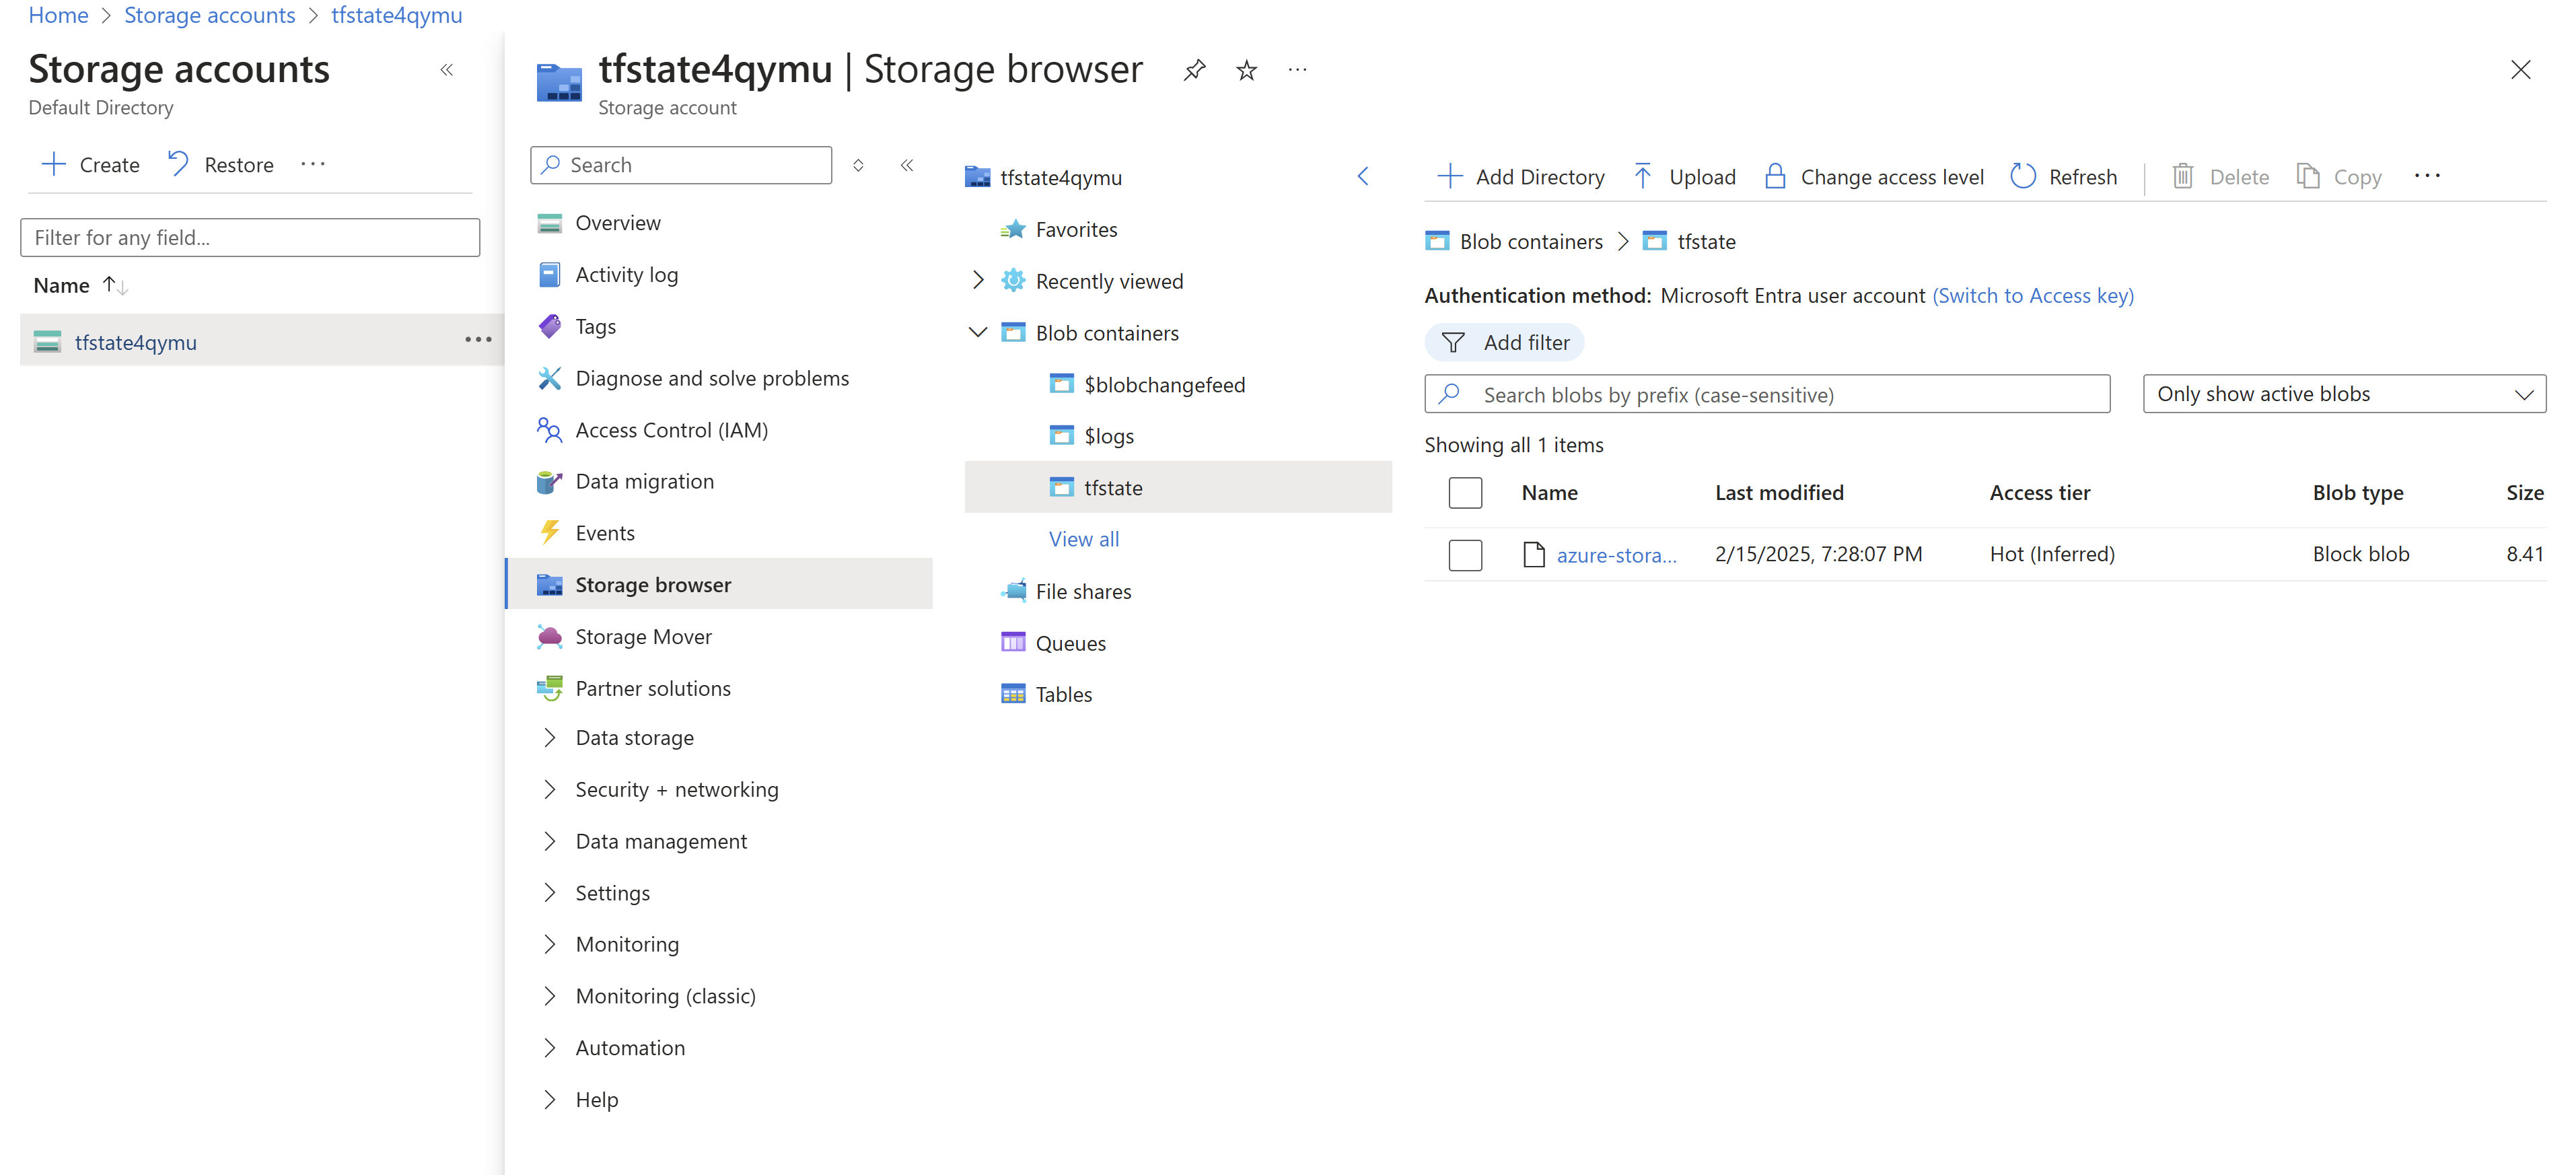
As you can see from the Terraform output, the storage account was created with the name tfstate4qymu. In your case, the name will be different, so update your code accordingly.
Setting Up Access to Azure Storage for Your User
Now we need to assign ourselves and anyone who requires access to the Terraform state in Azure storage the “Storage Blob Data Contributor” role.
To do this, go to portal.azure.com → Storage accounts → tfstate4qymu → Access Control (IAM) → Add → Add role assignment → Assign “Storage Blob Data Contributor” to your user.
Saving State to Azure Storage
At this point, you’re done! You can go ahead and store state for other projects in Azure, so feel free to skip this section and head straight to the last one—“Saving State for Other Resources”.
But if you’re feeling a bit playful, you can try saving the state for this project itself in Azure Storage, kind of like a snake eating its own tail.
This will migrate the state of the storage account and container to the blob storage.
Confirm with yes, and once the process is complete, your Terraform state configuration will be securely stored in the tfstate container under the key azure-storage-terraform-backend.tfstate.
Saving State for Other Resources
Whenever you need to add a new resource in Azure, simply include the backend configuration as shown below, ensuring that each project has a unique key. Also, make sure to use the correct storage_account_name, as it will be different from the one in our example:
And that’s it! This is all you need. Simple, right?
]]>Jurijs Ivolgajurijs.ivolga@gmail.comHow to Substitute SSH with AWS Session Manager2025-01-07T16:35:00+00:002025-01-07T16:35:00+00:00https://www.cyberpunk.tools/jekyll/update/2025/01/07/aws-systems-manager-session-managerIn this article, I will explore AWS Systems Manager Session Manager and how anyone can use it as an alternative to SSH.
Why Replace SSH?
So why would we want to move away from SSH, a protocol that has worked very well for decades? In my environment, as the number of EC2 instances grew, I found that I sometimes needed to give access to parts of my infrastructure. This wasn’t just about accessing an EC2 instance but often included access to the AWS account as well. In such cases, we not only need to manage AWS accounts but also access to EC2 instances—creating users, generating SSH keys, and so on. When someone leaves, we have to remove access to both the AWS account and the EC2 instances, deleting keys and users accordingly.
The Idea Behind Session Manager
Imagine we have a tool that combines both SSH and AWS access. All we need to do is create an AWS user with working keys or tokens, and as long as the user has the necessary credentials, they can log in to EC2 instances. When we want to remove their access, we simply remove their access to the AWS console. This was the main reason I wanted to try out Session Manager.
Alternatives to Session Manager
To be fair, there are several alternatives to SSM, such as EC2 Instance Connect, but we will focus on Session Manager for now.
Setup Plan
My initial goal was to follow the steps described here:
I opted for a paranoid configuration that includes using KMS, generating separate keys for encrypting S3 buckets, and an additional layer of encryption for session data. However, there were a few challenges with this setup.
Challenges of a Paranoid Setup
Session Manager is region-based, meaning we need to configure it separately for each region. This includes setting up region-specific KMS keys (which cannot be reused across regions), creating separate S3 buckets for each region (since you can’t use multiple keys for encrypting the same bucket), and making sure CloudWatch log groups are in the same region.
Long story short, while it’s good to be paranoid, the overhead was significant, so I opted for a more pragmatic approach.
Pragmatic Approach
In my setup, I removed KMS and CloudWatch, and I’m using one bucket for all regions. Logs are still written to S3 buckets, and they are encrypted with AWS-managed keys.
Code Template
I used the following resource as a template for my code:
It’s a good starting point, but unfortunately, it had too many issues and bugs, so I don’t think it’s production-ready in its current state.
EC2 Instance Requirements
EC2 instances no longer require SSH access! You can remove port 22 from your security groups. Additionally, there’s no need to add any key to your EC2 instance. All that’s required is for your EC2 instance to have the AWS Systems Manager (SSM) Agent installed. This software is typically included in most popular AMIs, such as Ubuntu.
Also, the EC2 instance needs internet access. If the instance is in a private VPC, review this part of the code and apply the appropriate security group rules to your VPC:
EC2 SG Configuration
Creating the IAM Role and Resources
At the end of the day, I wrote a module that configures the IAM role, which needs to be attached to the instance and S3 bucket, along with other necessary resources. Using my module, you will still need to create the aws_ssm_document document as described below. Here’s a link to the module I wrote on GitHub:
Terraform Session Manager Module
Example Terraform Configuration
Here’s my main.tf to deploy Session Manager. I assume the module code is located in ../modules/ssm:
First, we call the module in us-east-1 to create the IAM role, bucket, and other necessary resources using this code:
terraform {
required_providers {
aws ={source="hashicorp/aws"
version ="~> 5"}}}
provider "aws"{
region ="us-east-1"
profile ="my-profile-name"}
module "ssm"{source="../modules/ssm"}
This part of the code will output the IAM role name that should be attached to your instances:
output "ssm_profile_name"{
value = module.ssm.ssm-profile-name
}
Region-Specific Configuration
The last part needs to be copied and pasted for each region where you plan to use Session Manager. Remember, Session Manager config is region-specific.
Creating Providers for Each Region
First, create a provider. Each region should have a separate provider like this:
provider "aws"{
region ="us-east-1"
profile ="my-profile-name"alias="useast1"}
Configuring Session Manager for us-east-1
Then, configure Session Manager in that region, ensuring the provider is set accordingly (in our code, it’s aws.useast1):
Documentation for the Schema Elements of a Session Document
You can find more information about the input parameters and options available for aws_ssm_document in the official AWS documentation:
AWS Systems Manager - Session document schema
Conclusion
As you can see, we need to create an Aliased Provider Block, then add a new configuration for Session Manager, referencing the newly created alias.
As an improvement, I could put the Session Manager configuration in a separate module, but in my environment, I don’t think it’s worth the extra complexity, as I don’t have many regions with infrastructure.
]]>Jurijs Ivolgajurijs.ivolga@gmail.comJekyll Blog with Terraform (OpenTofu) Using GitLab Pipelines2024-12-19T16:30:00+00:002024-12-19T16:30:00+00:00https://www.cyberpunk.tools/jekyll/update/2024/12/19/%20jekyll-terraform-gitlab-pipelineIn this guide, I will provide a short manual for deploying a static blog, in this case Jekyll (with minor changes, you should be able to make it work for any other static website), to Amazon S3 using GitLab pipelines. All infrastructure will be managed in Terraform (or OpenTofu, as in our case).
This manual assumes that you are using Route 53 as your DNS provider, and all AWS infrastructure will be deployed to the US East (N. Virginia) region. If you want to use a different region, set the aws_region variable accordingly in blog.tfvars.
Step 1: Credential Setup and Creating the S3 Bucket
First, we need to set up AWS credentials and ensure that AWS CLI and Terraform (or OpenTofu) are already installed.
Once the installation is complete, set up your AWS credentials using the profile prod (you can choose any profile name, but prod is used for this manual):
aws configure --profile prod
After setting up your credentials, verify them by running cat ~/.aws/credentials — it should return something like:
Now, create the S3 bucket where the Terraform state file will be saved. Keep in mind that this name might already be taken, so use something unique. If you use a different name, make sure to update main.tf accordingly.:
However, I encountered a few issues with this code. First, it was missing the mandatory aws_s3_bucket_ownership_controls resource. The solution was to add the aws_s3_bucket_ownership_controls resource and update the aws_s3_bucket_acl accordingly. Here is the full code snippet for the relevant part:
resource "aws_iam_user""deploy"{
name ="${var.domain}-deploy"
path ="/"}
resource "aws_iam_access_key""deploy"{
user = aws_iam_user.deploy.name
}
resource "aws_iam_user_policy""deploy"{
name ="deploy"
user = aws_iam_user.deploy.name
policy = data.aws_iam_policy_document.deploy.json
}
Add this code snippet to outputs.tf to output the credentials needed for the pipeline:
output "AWS_ACCESS_KEY_ID"{
sensitive =true
description ="The AWS Access Key ID for the IAM deployment user."
value = aws_iam_access_key.deploy.id
}
output "AWS_SECRET_ACCESS_KEY"{
sensitive =true
description ="The AWS Secret Key for the IAM deployment user."
value = aws_iam_access_key.deploy.secret
}
To make things easier, I’ve consolidated all the code into a single repository:
I chose to use a monolithic approach instead of modules for simplicity. You just need to set at least the domain and route53_zone_id variables in blog.tfvars and you’re ready to deploy the infrastructure in AWS:
tofu init
tofu plan -var-file="blog.tfvars"
tofu apply -var-file="blog.tfvars"
or using Terraform:
terraform init
terraform plan -var-file="blog.tfvars"
terraform apply -var-file="blog.tfvars"
Once applied, the output will display variables to use later in the pipeline:
When you fork that repository or copy the files, you will need to set the following variables in GitLab CI/CD settings. Ensure they are masked and protected to safeguard sensitive information:
AWS_ACCESS_KEY_ID
AWS_SECRET_ACCESS_KEY
CLOUDFRONT_DISTRIBUTION_ID
S3_BUCKET
Next, add your actual Jekyll code to the repository, commit, and push it:
cd ~
git clone https://github.com/daattali/beautiful-jekyll.git
rm-Rf ./beautiful-jekyll/.git* ./beautiful-jekyll/README.md
cp-a ./beautiful-jekyll/* ./deploy-jekyll-to-s3/ # Assuming your code with the pipeline is in ~/deploy-jekyll-to-s3 directorycd ~/deploy-jekyll-to-s3
git add .
git commit -m"added jekyll"
git push
And you’re done! Once the build completes, your website will be deployed, and you should see the Beautiful Jekyll template live.
]]>Jurijs Ivolgajurijs.ivolga@gmail.comHOMER 7 Packet Manipulation Using Lua2024-11-24T16:00:00+00:002024-11-24T16:00:00+00:00https://www.cyberpunk.tools/jekyll/update/2024/11/24/homer7-fix-packetsIn this guide, I will show how to manipulate data written in HOMER 7 using Lua scripts. Here is the official documentation:
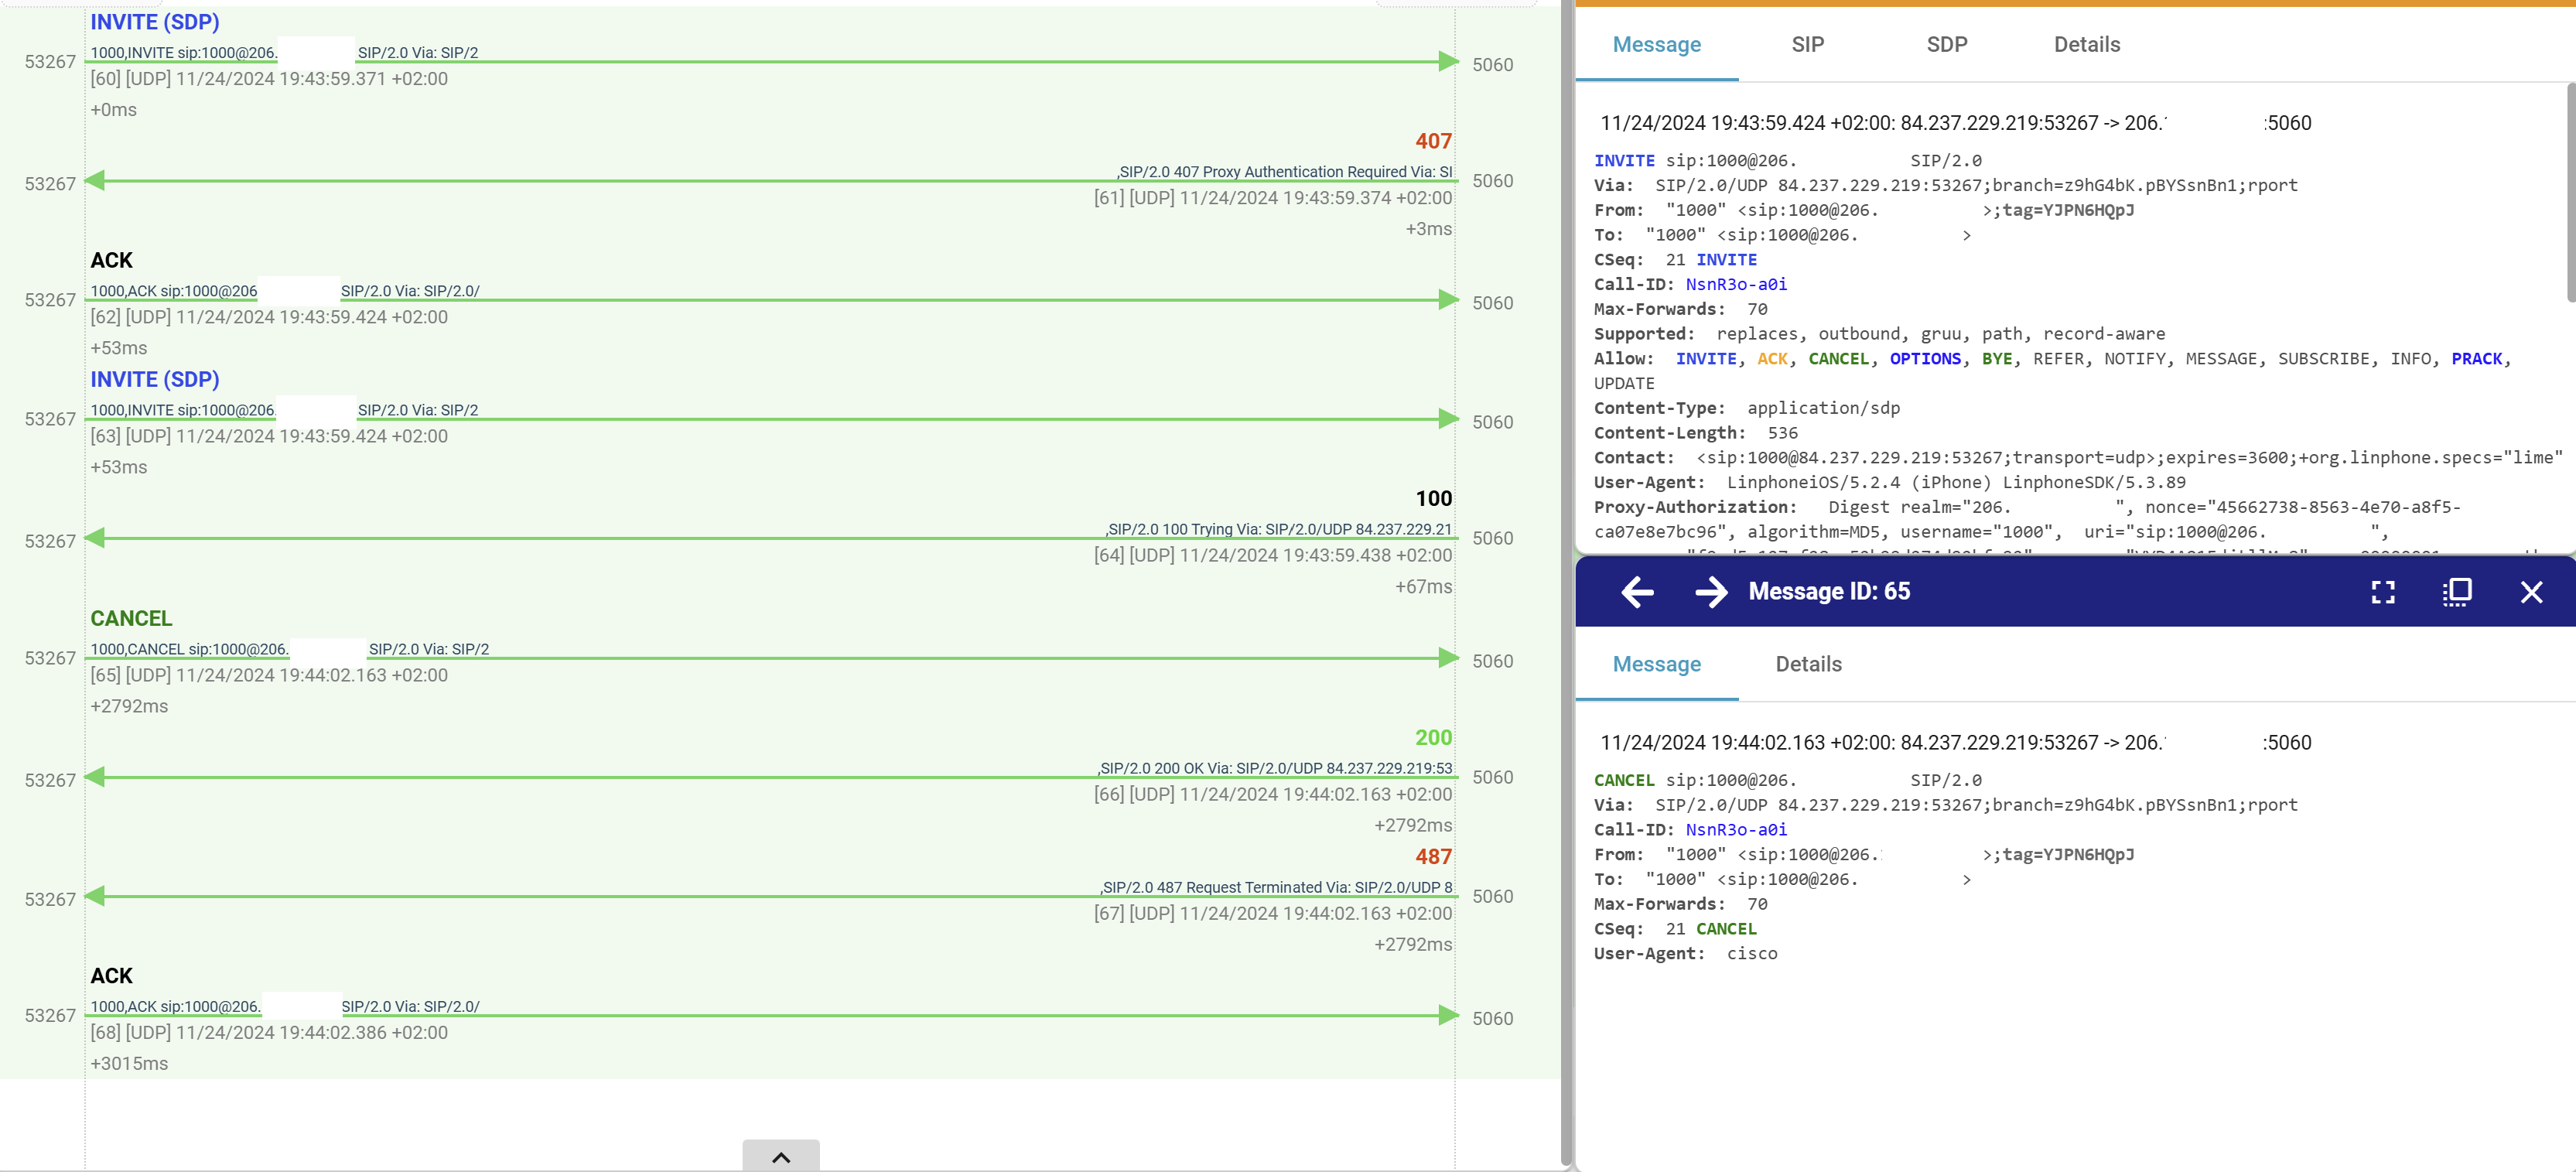
In this example, we’ll modify the “User-Agent” header in the CANCEL SIP method to “cisco”.
This tutorial assumes you already have HOMER 7 up and running, and that your PBX is sending data to it. We are also assuming HOMER 7 is running in Docker.
Step 1: Create the lua Directory
First, create a ./lua directory in the folder where your docker-compose.yml file is located. Then, add this directory as a bind mount for the heplify-server container by adding the following code to the relevant section:
volumes:
  - ./lua:/lua
Additionally, set the following environment variables in your docker-compose.yml:
Now, create a file named my.lua in the newly created ./lua folder. Use the following code:
-- This Lua code modifies the "User-Agent" header to "cisco"in CANCEL methods.
-- If there are multiple "User-Agent" headers, it will update all of them.
-- This function will be executed first
function checkRAW()local protoType = GetHEPProtoType()-- Check if the packet is of SIP type
if protoType ~= 1 then
return
end
-- Get the original SIP message payload
local raw = GetRawMessage()-- Extract the method name from the first few characters
local method = string.sub(raw, 1, 6)if method =="CANCEL"then-- Replace "User-Agent" header with "cisco"local ripe, count = string.gsub(raw, "(User%-Agent:)(.-)(\n+)", "%1 cisco%3")if count > 0 then
Logp("ERROR", "ripe", ripe)
SetRawMessage(ripe)
end
end
return
end
Step 3: Restart Your Containers
Restart your Docker containers to apply the changes:
docker compose down
docker compose up -d--build
Step 4: Verify
Log in to HOMER and check the CANCEL method. The User-Agent header should now be cisco. As you can see in my example, the same call is used, but the Invite has an untouched user agent LinphoneiOS/5.2.4 (iPhone) LinphoneSDK/5.3.89, while the Cancel has it changed to cisco:
]]>Jurijs Ivolgajurijs.ivolga@gmail.comUsing Grafana Loki as a Centralized Logging Solution2024-11-10T14:20:00+00:002024-11-10T14:20:00+00:00https://www.cyberpunk.tools/jekyll/update/2024/11/10/grafana-lokiToday, I’ll explain how to use Grafana Loki as a centralized logging solution for all your Docker containers. As your infrastructure grows and more containers are added, troubleshooting via logs becomes increasingly important. You might need to diagnose issues like a database failure or an SSL certificate that didn’t renew. Personally, I used to check logs with the docker logs command, but this approach isn’t efficient. Imagine trying to filter logs for a specific time window — like 12:00-12:05 UTC on May 5 — or investigating issues that span multiple containers, such as when a database failure causes an error on an Nginx container. Instead of manually piecing logs together from different machines, it’s more efficient to store all logs centrally, enabling simultaneous searches across all containers. With Loki, you can set up alerts, filter specific log entries using regex, and much more.
In this post, I’ll walk you through how I set up a centralized logging solution for all my Docker containers using Grafana Loki.
Step 1: Install Loki
I recommend installing Loki with Docker Compose. Here is Grafana’s default docker-compose.yaml file for Loki:
You should see your newly installed Docker plugin:
ID             NAME          DESCRIPTION           ENABLED
ddd2367c8693   loki:latest   Loki Logging Driver   true
Next, configure each container to send logs to Loki by adding these lines in your docker-compose file (replace loki-ip with the actual IP of your Loki server):
Alternatively, configure Docker to send logs from all containers by creating an /etc/docker/daemon.json file (again, replace loki-ip with the actual IP of your Loki server):
After making these changes, recreate your containers to start logging to Loki. With Docker Compose, run the following:
docker-compose down
docker-compose up -d--build
If you chose the daemon.json approach, restart the Docker service:
systemctl restart docker
Loki doesn’t pull logs; instead, Docker pushes logs to Loki. Ensure Docker can reach Loki on port 3100 (if using the default). Test connectivity with telnet from the Docker host:
telnet loki-ip 3100
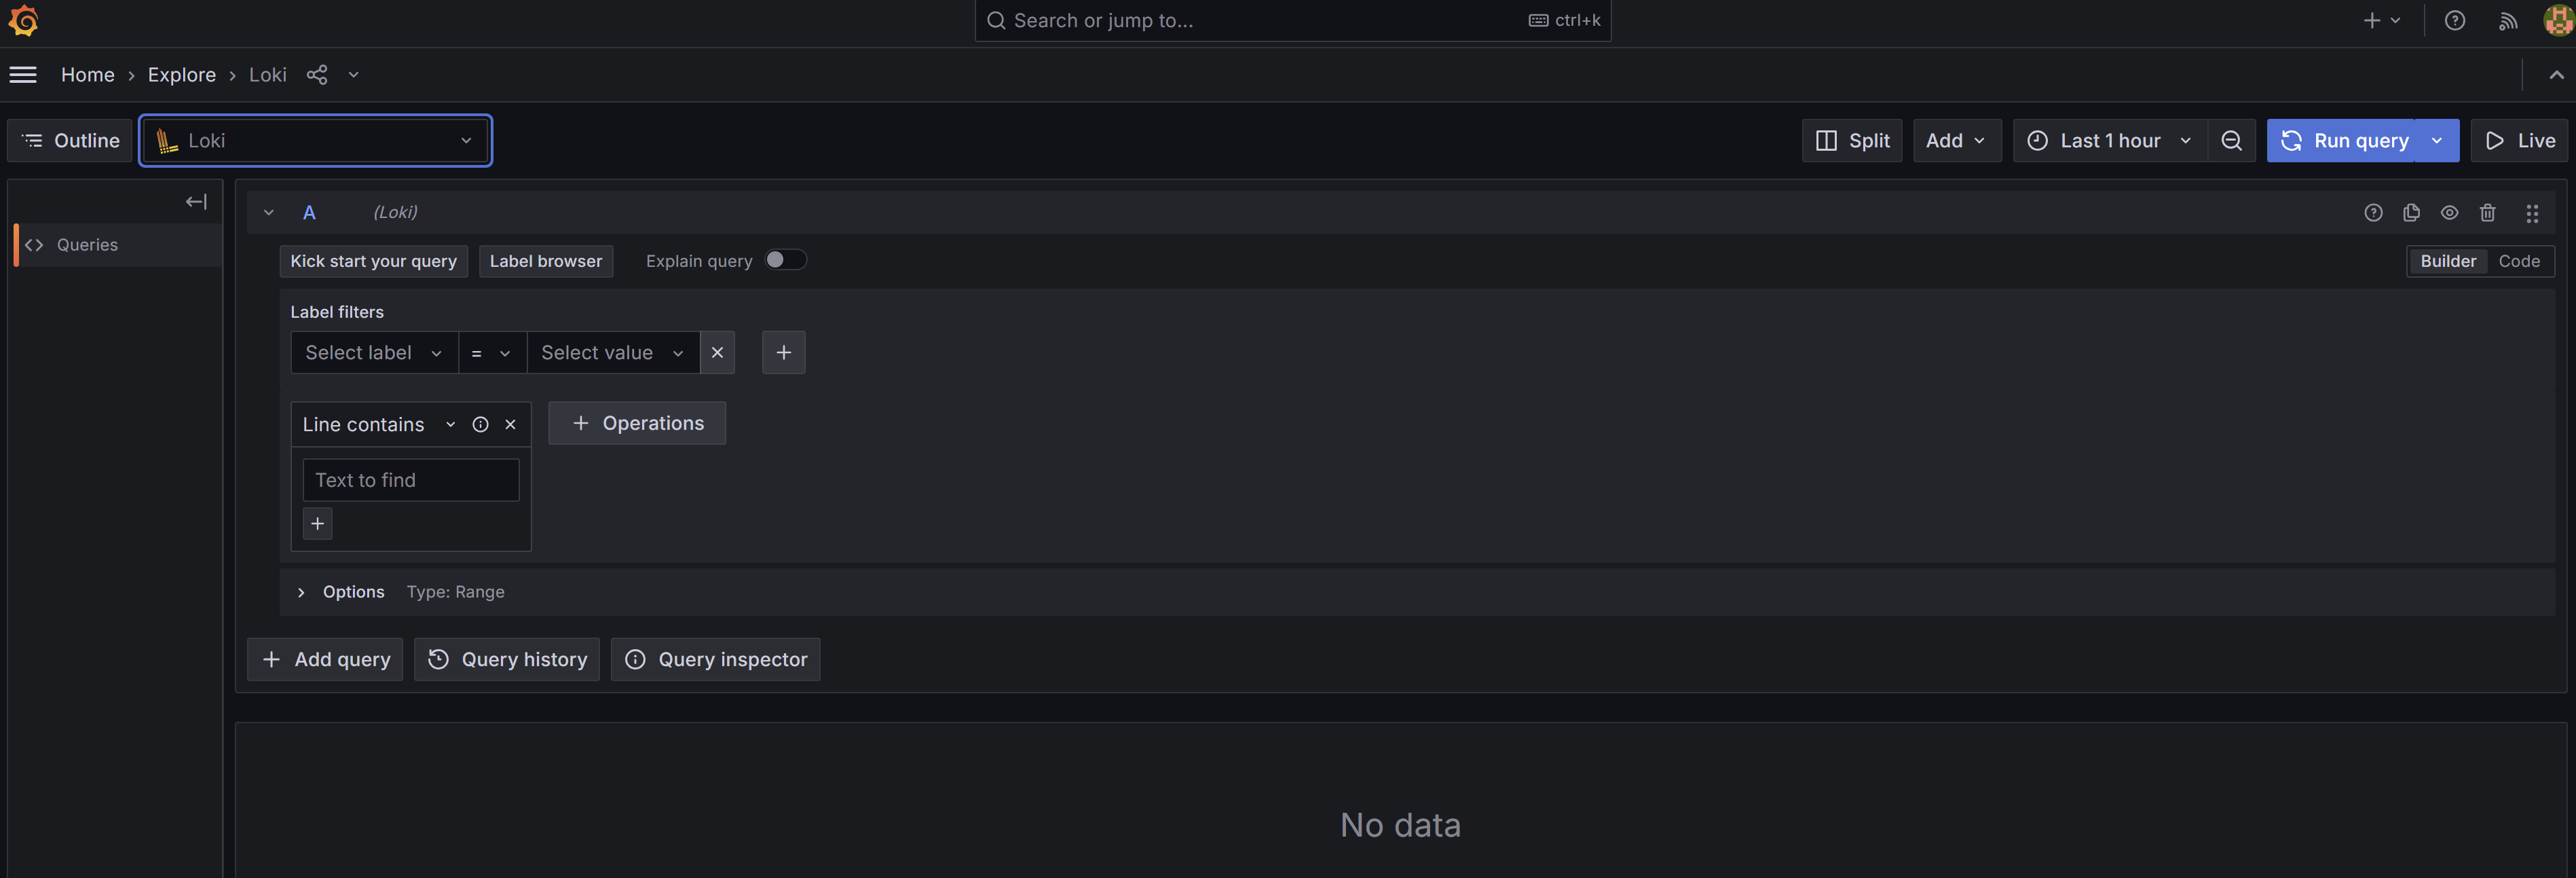
Step 3: Viewing Logs in Grafana
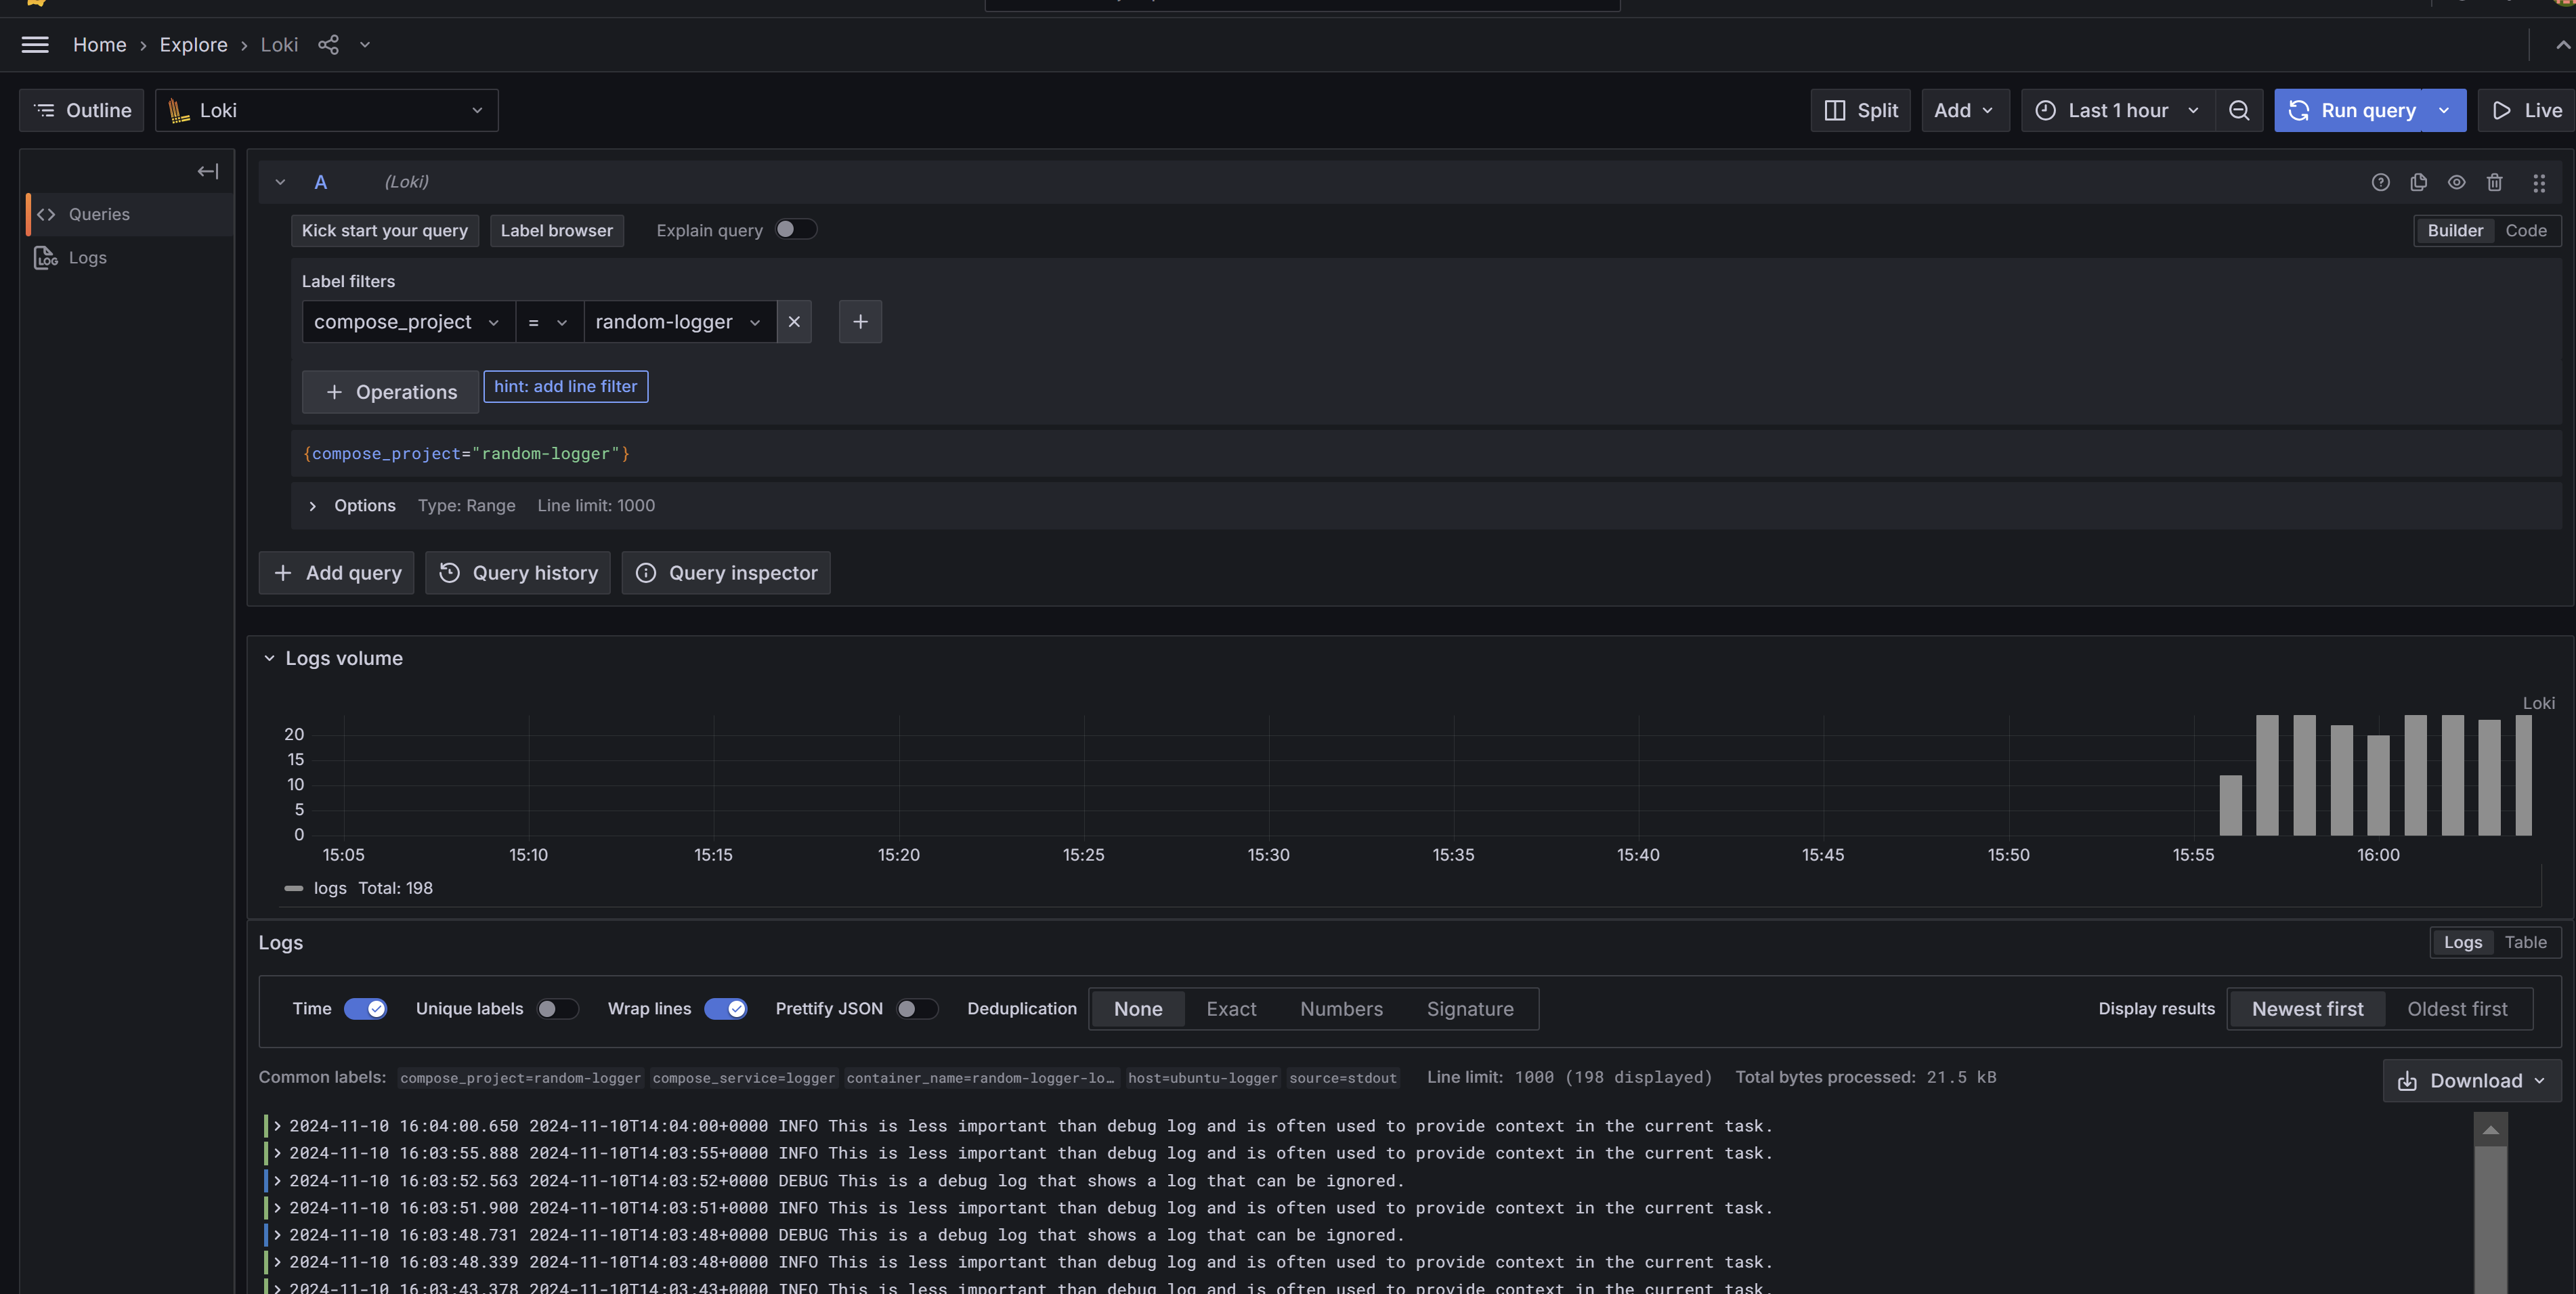
Now you should be able to see logs in Grafana. Go to the “Explore” section, and make sure “Loki” is selected in the top-left dropdown menu:
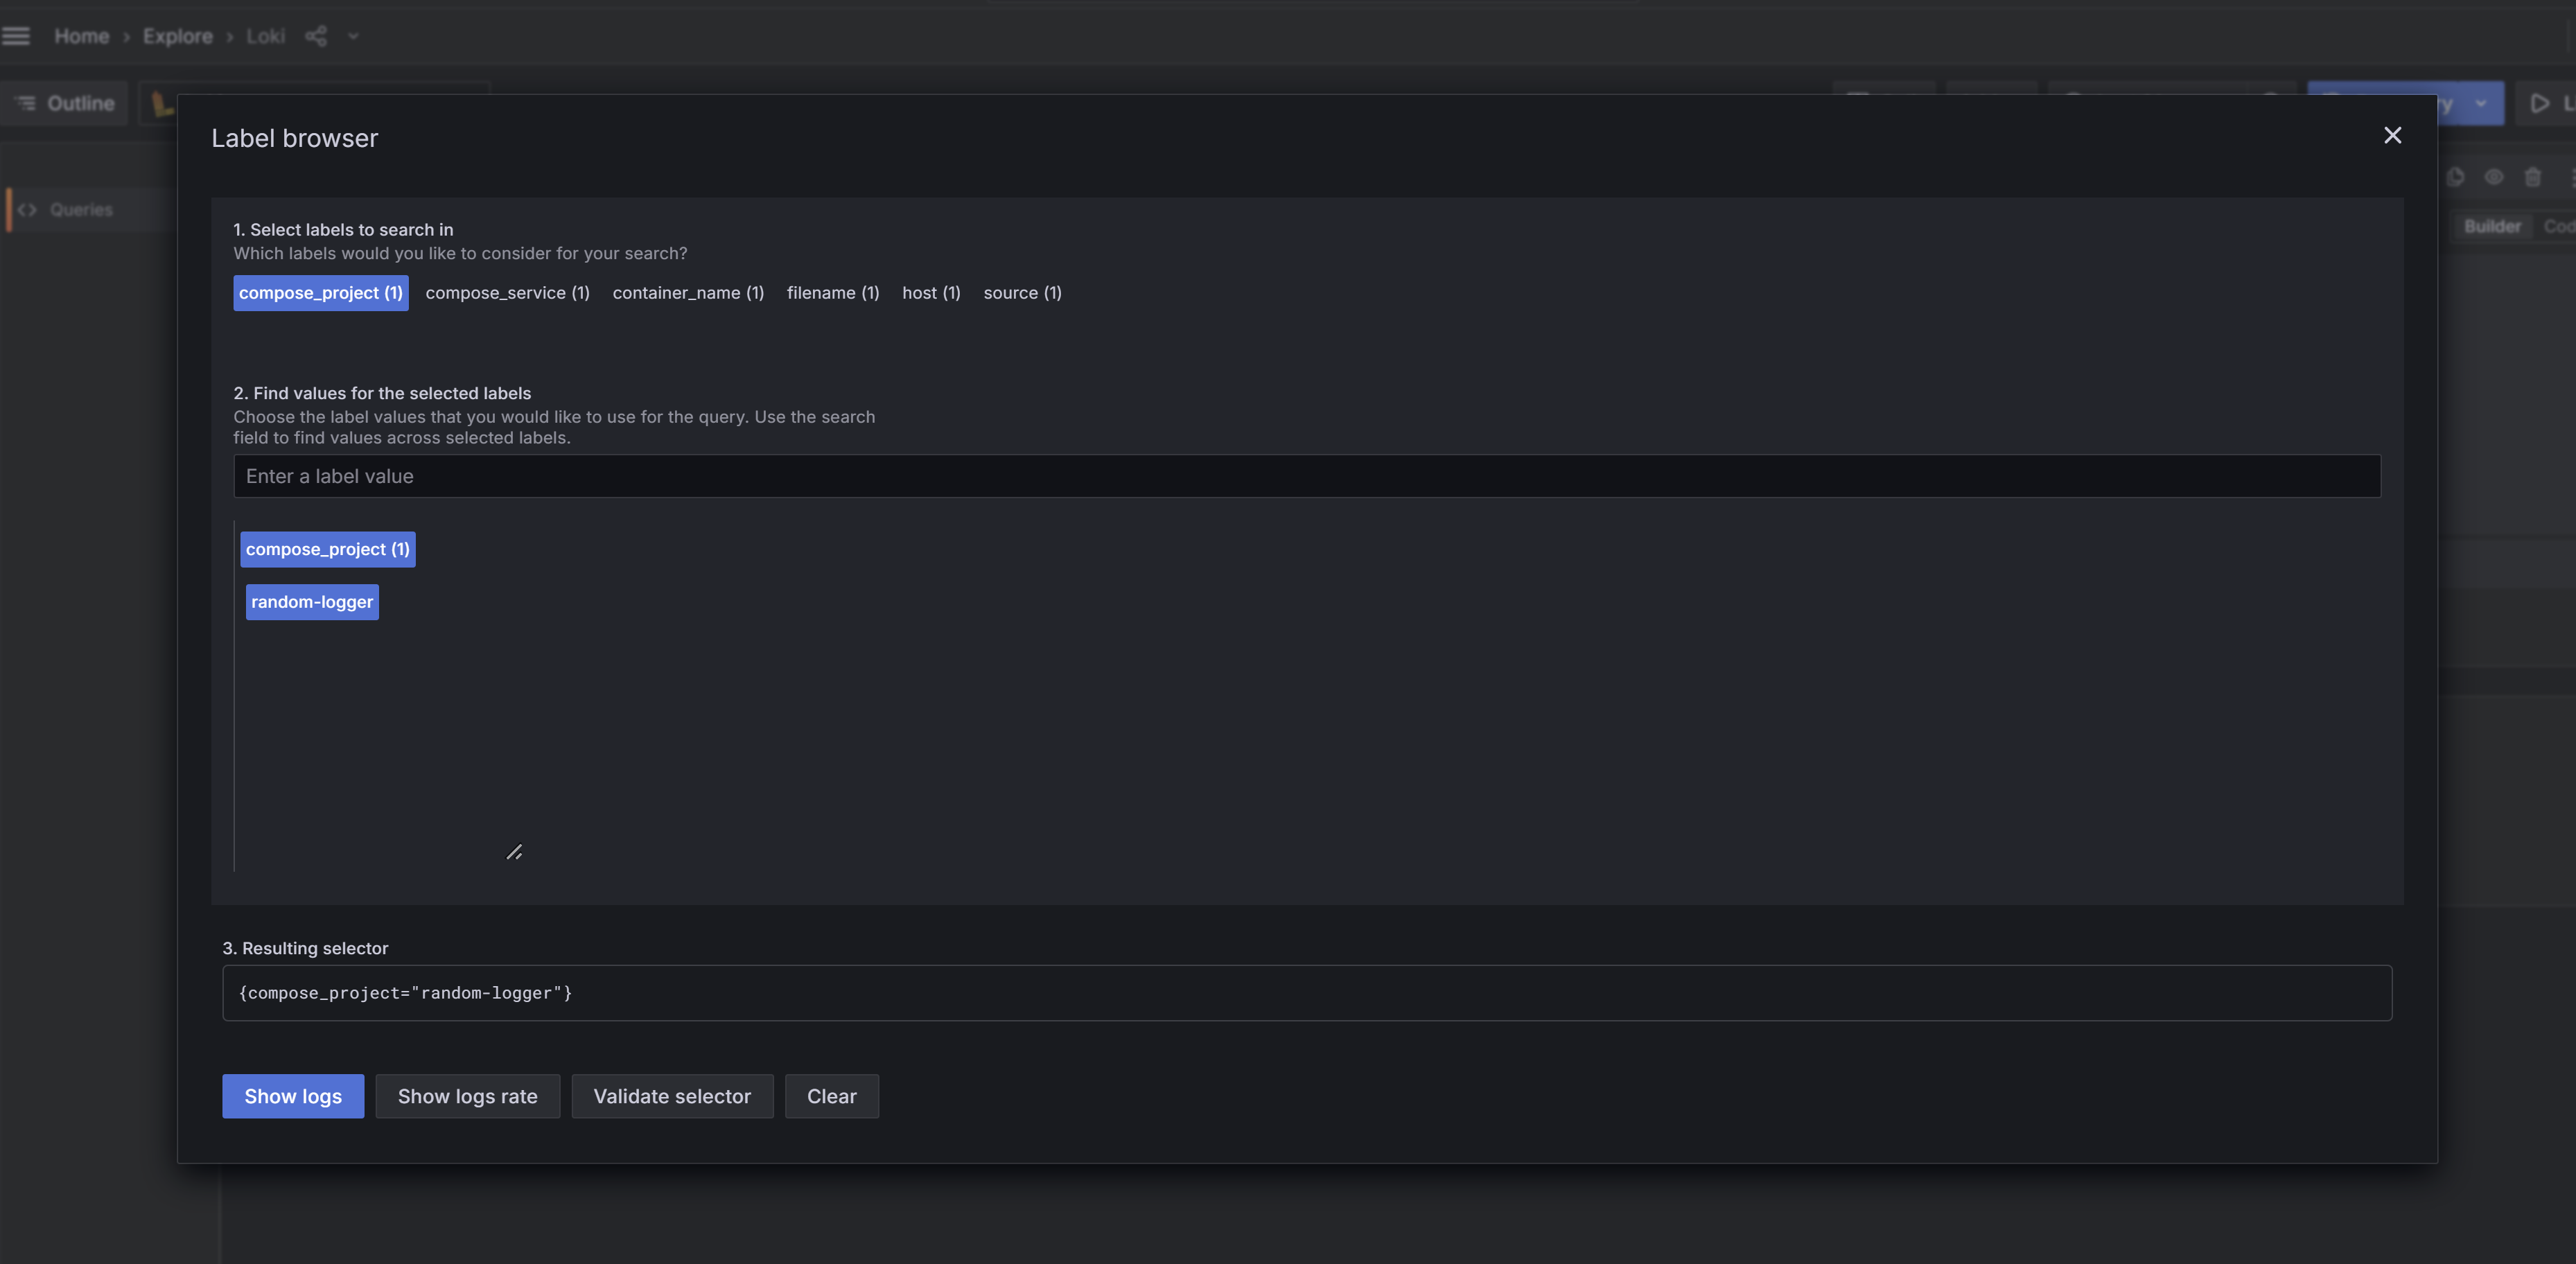
Then, click on “Label Browser” and select the appropriate label. In this example, it’s compose_project => random-logger. Then click “Show logs”:
After clicking “Show logs,” you should see your logs:
That’s it! At this point, you’ve successfully set up Grafana with Loki, and your Docker containers should be sending logs to it. For the next steps, you might consider setting up data retention policies in Loki and creating custom dashboards — I’ll leave that as a homework exercise.
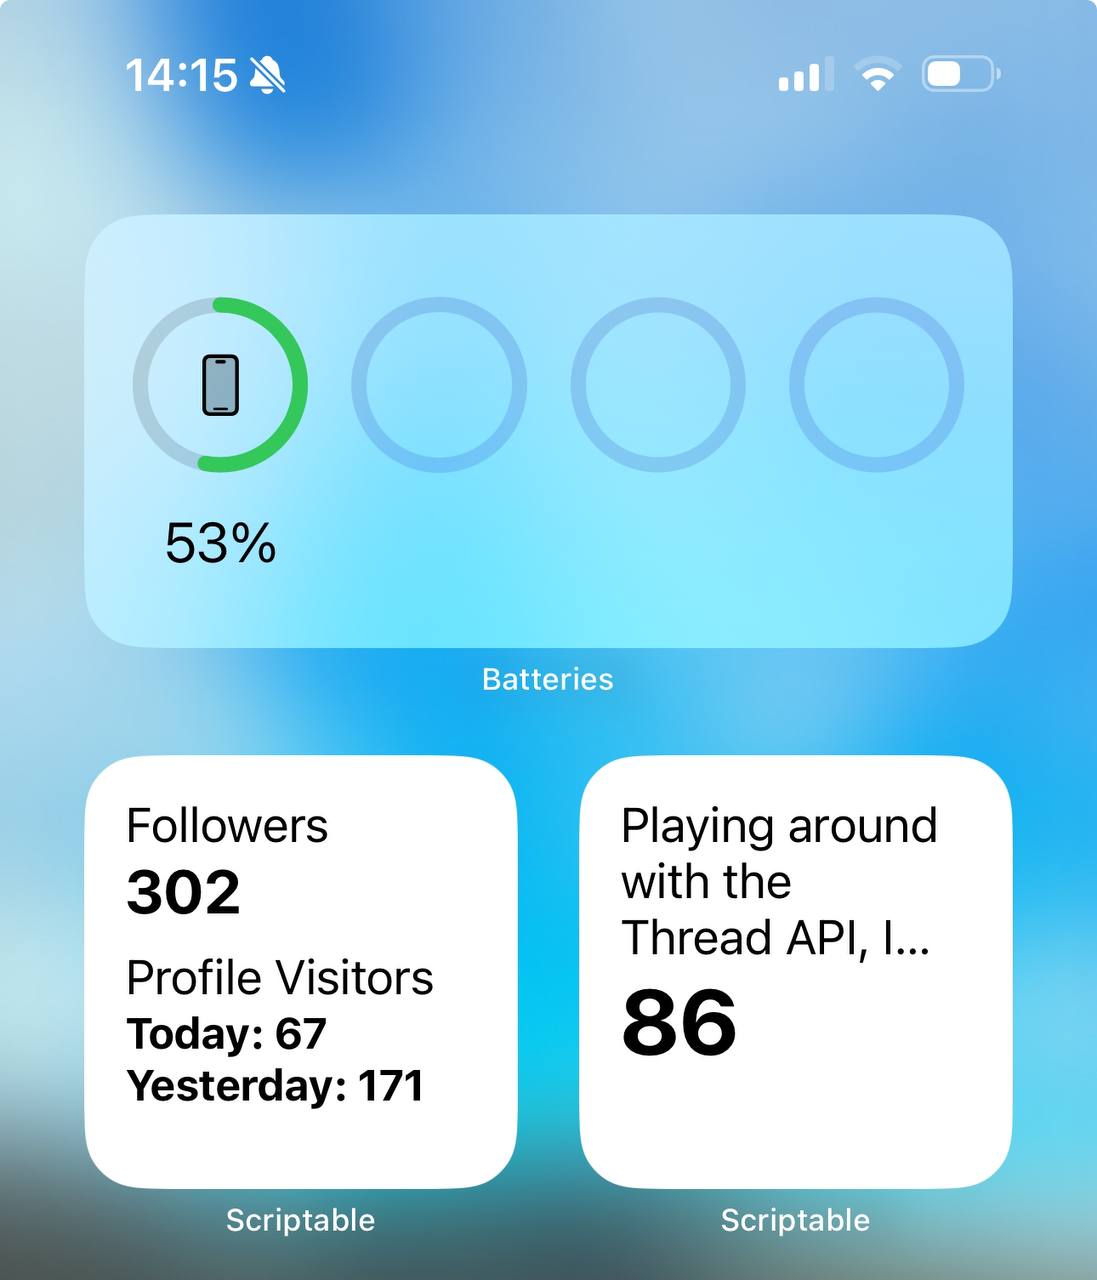
]]>Jurijs Ivolgajurijs.ivolga@gmail.comHow to Create a Widget for Meta Threads using Scriptable2024-10-26T14:01:00+00:002024-10-26T14:01:00+00:00https://www.cyberpunk.tools/jekyll/update/2024/10/26/how-to-create-threads-widgetsThis post will be a bit different. I recently started using Meta Threads, and I saw someone complaining that Meta should create a widget for certain stats. I replied, saying it should be possible using the Scriptable app. Long story short, I decided to dive into this rabbit hole and create some widgets for Meta Threads. I’ll be creating two widgets—one for follower counts and profile visitors for today and yesterday, and a second widget to display view counts for the latest post. I’ll be using the Scriptable app to make these, which you can download for free from the iOS App Store.
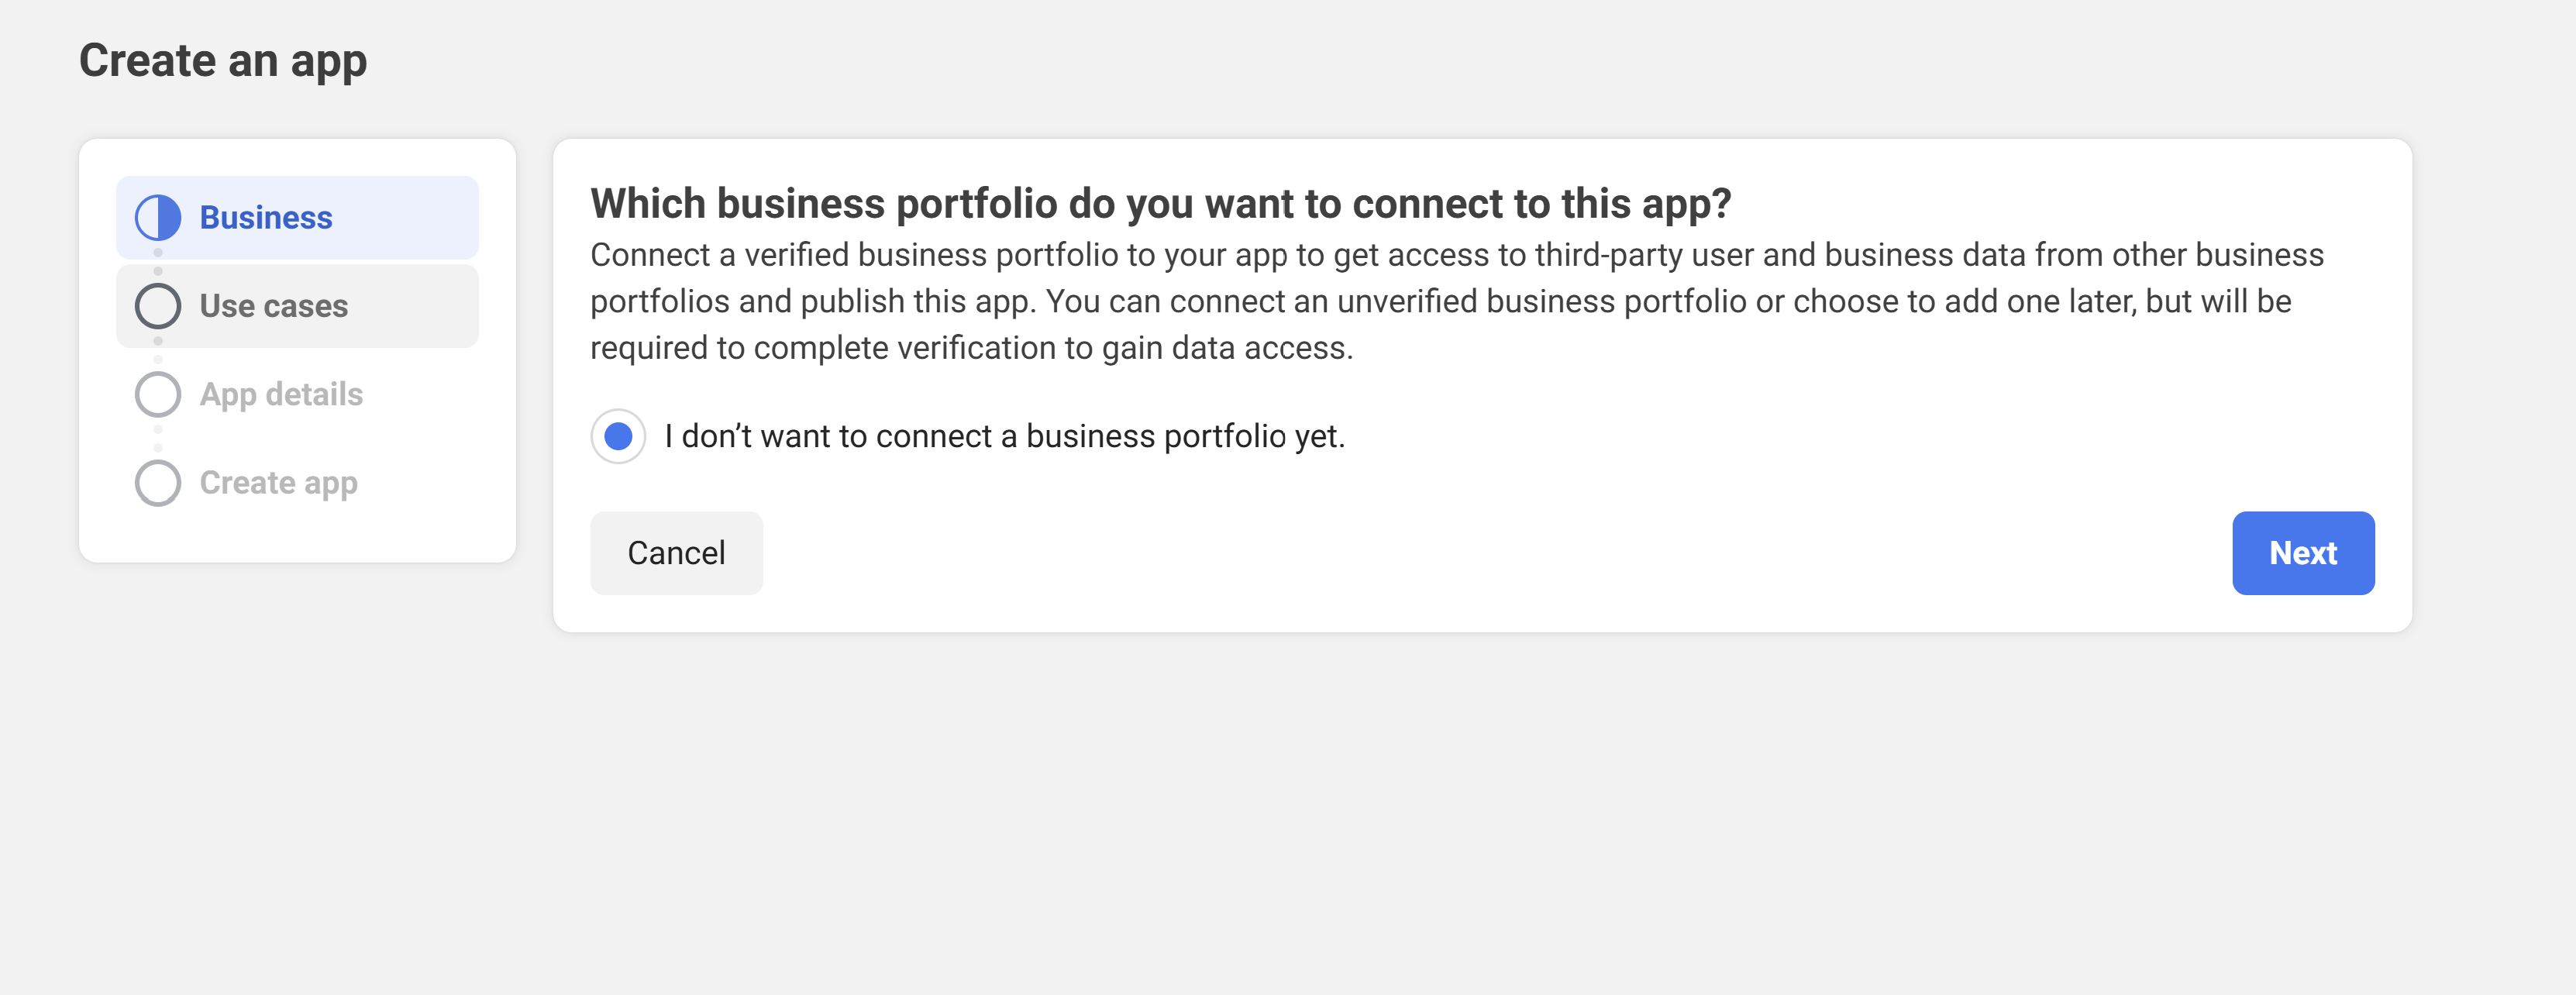
Once you’re there, the setup process is mostly “next-next-next.”
Select “I don’t want to connect a business portfolio yet.”
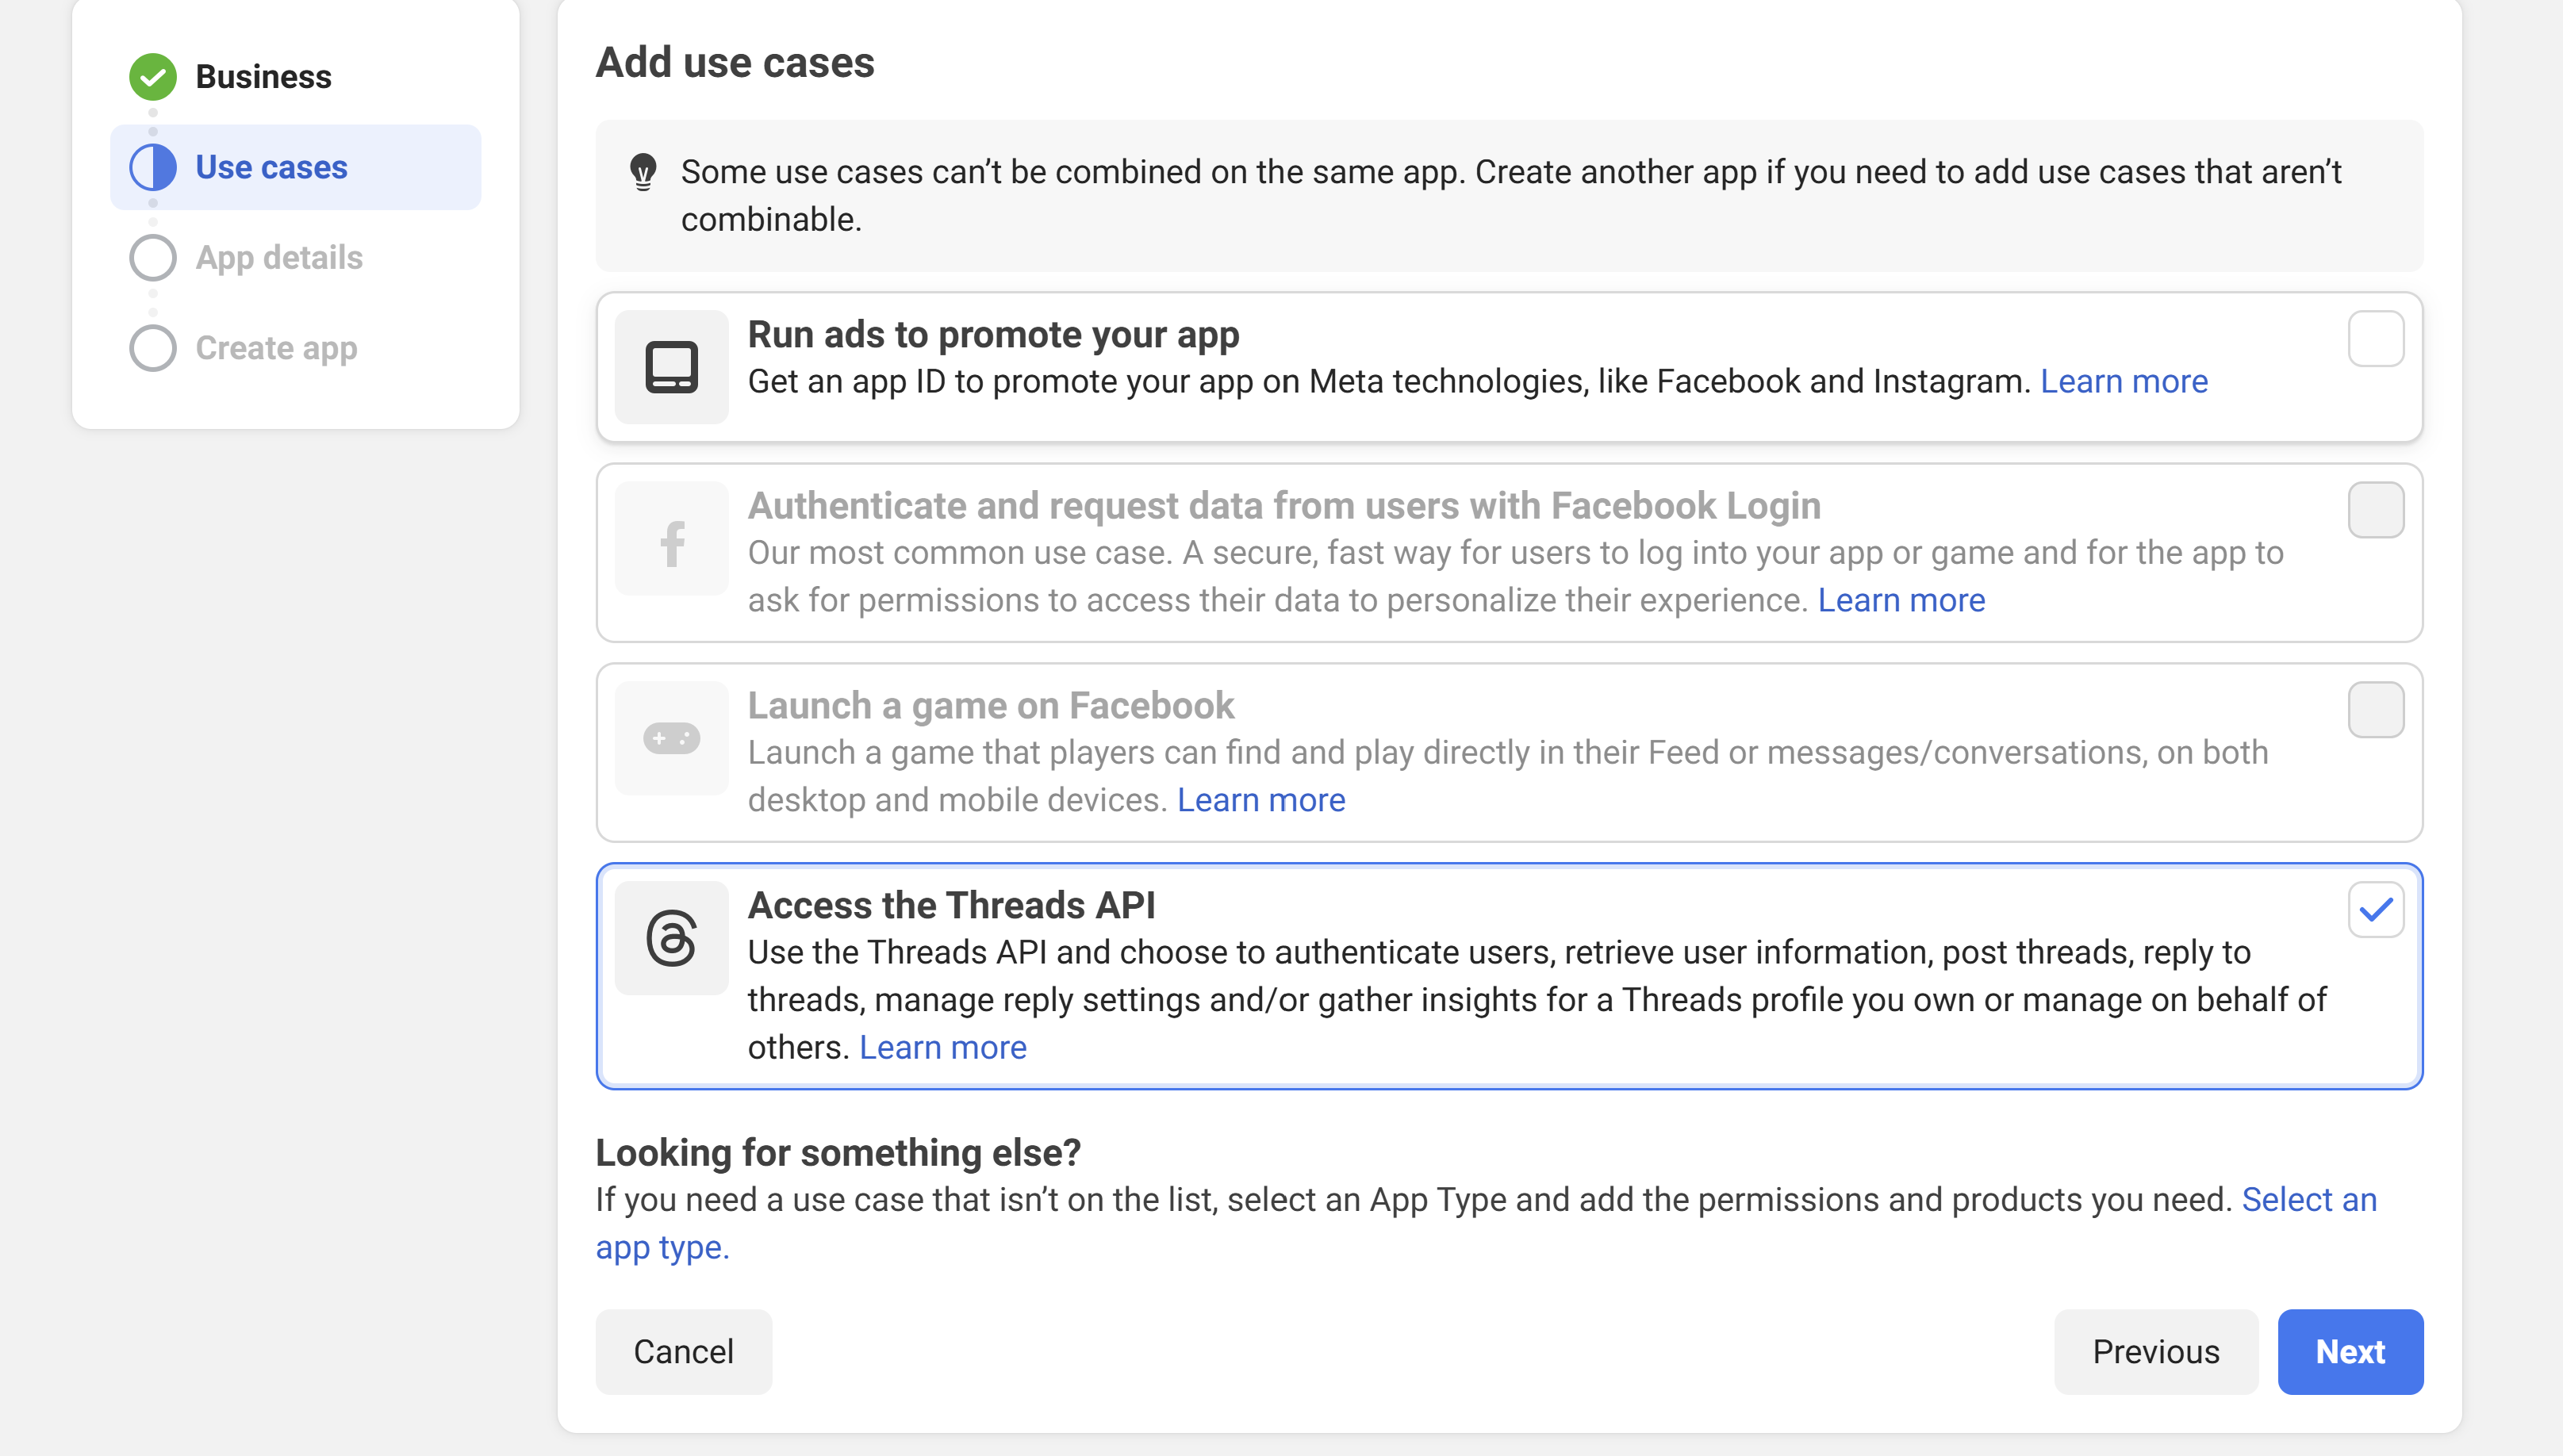
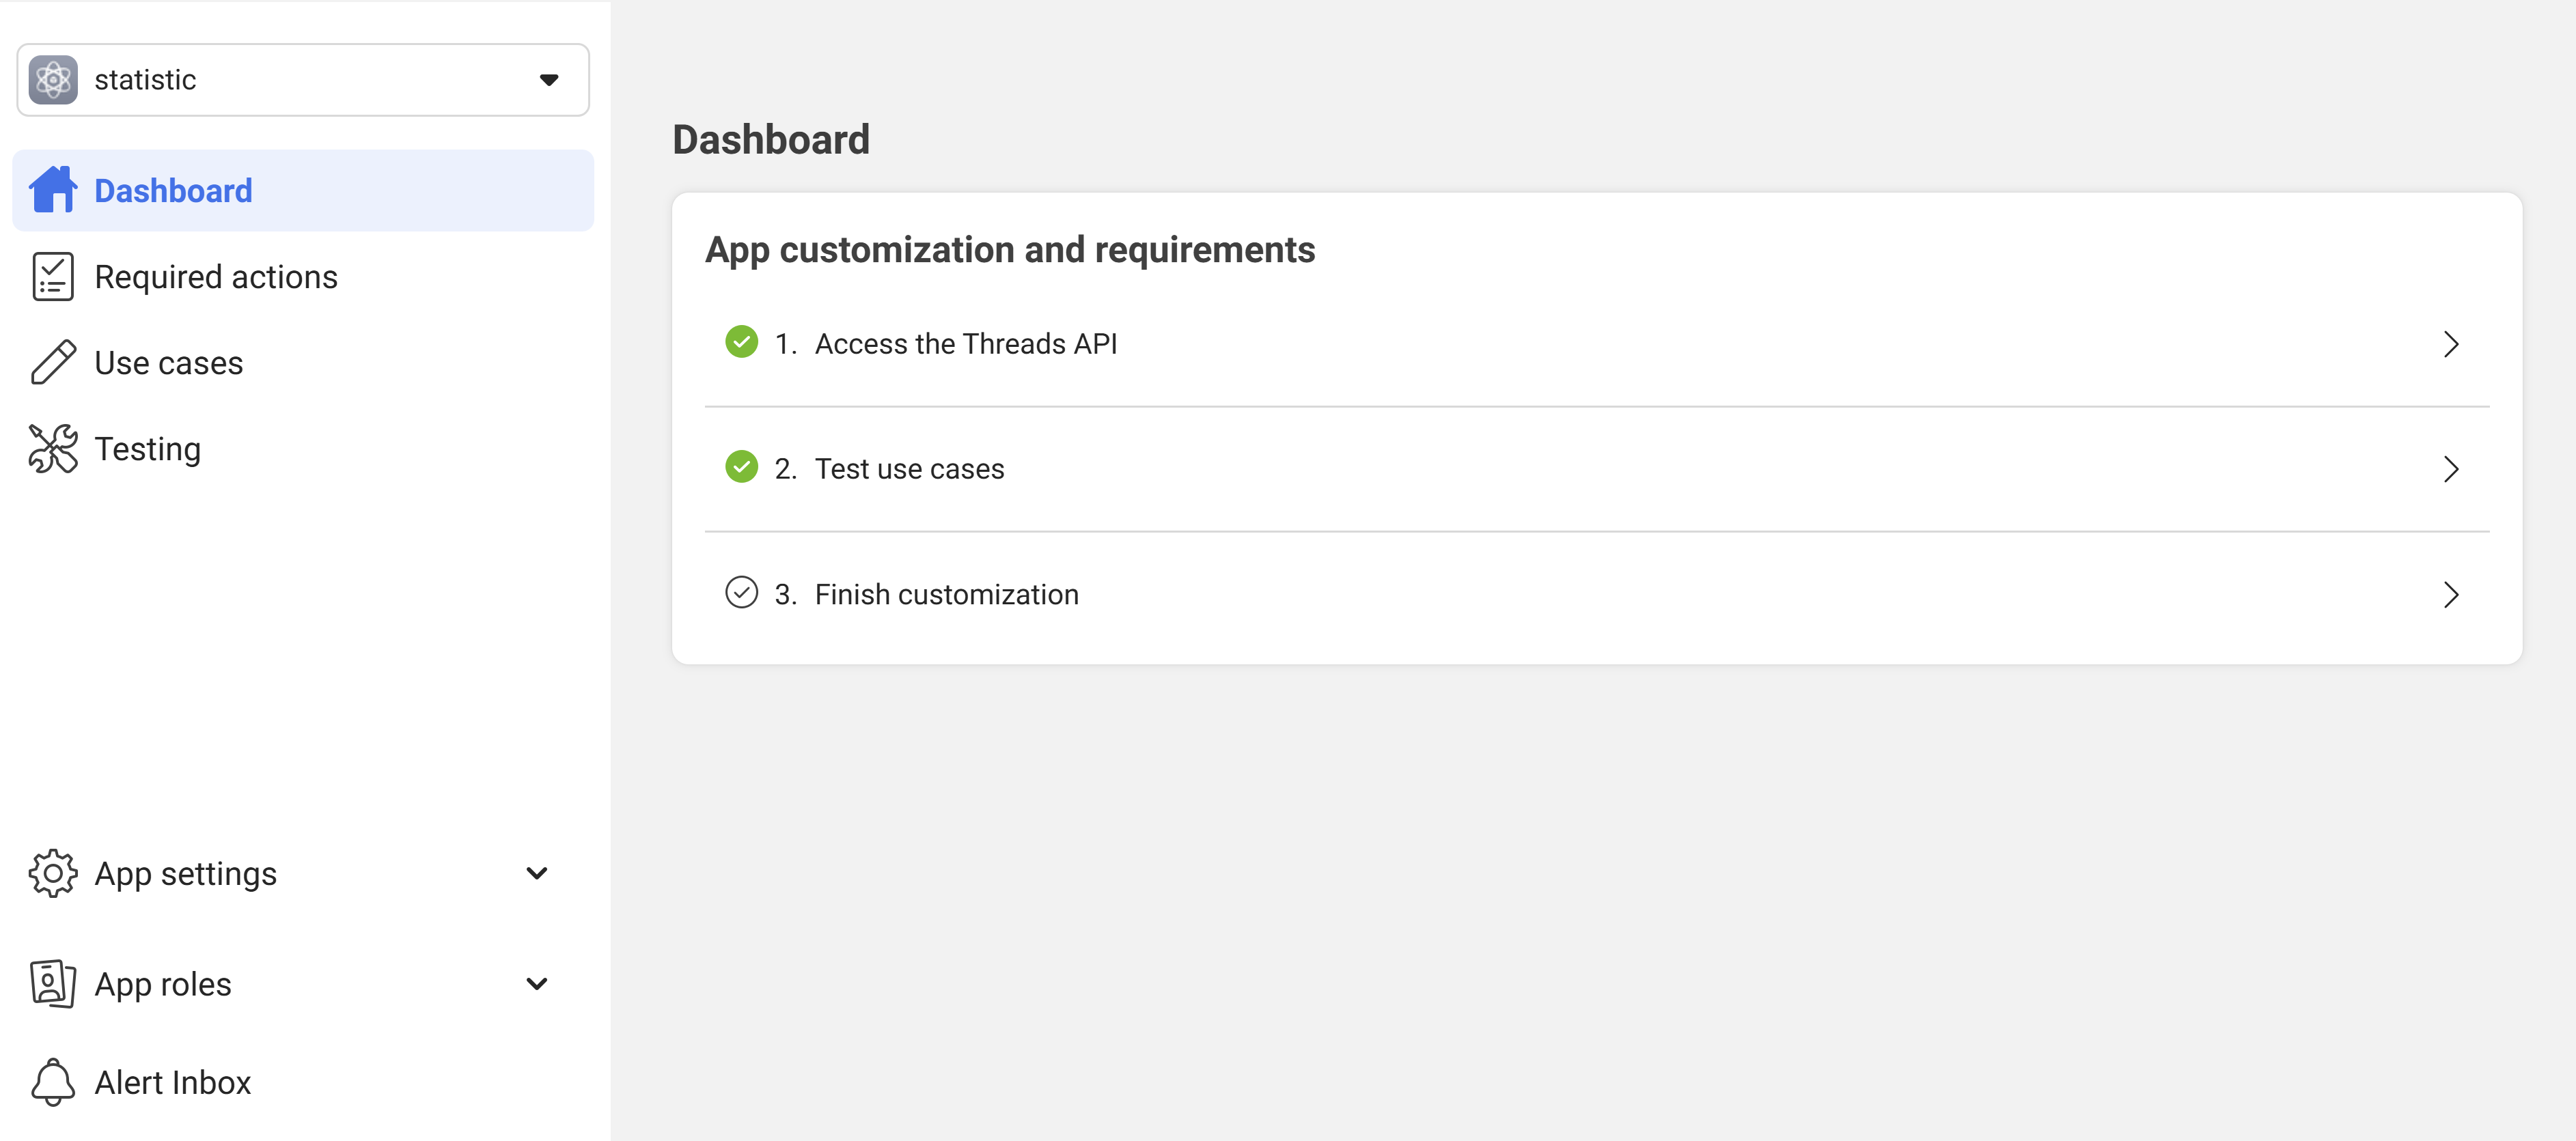
Then, choose “Access the Threads API”.
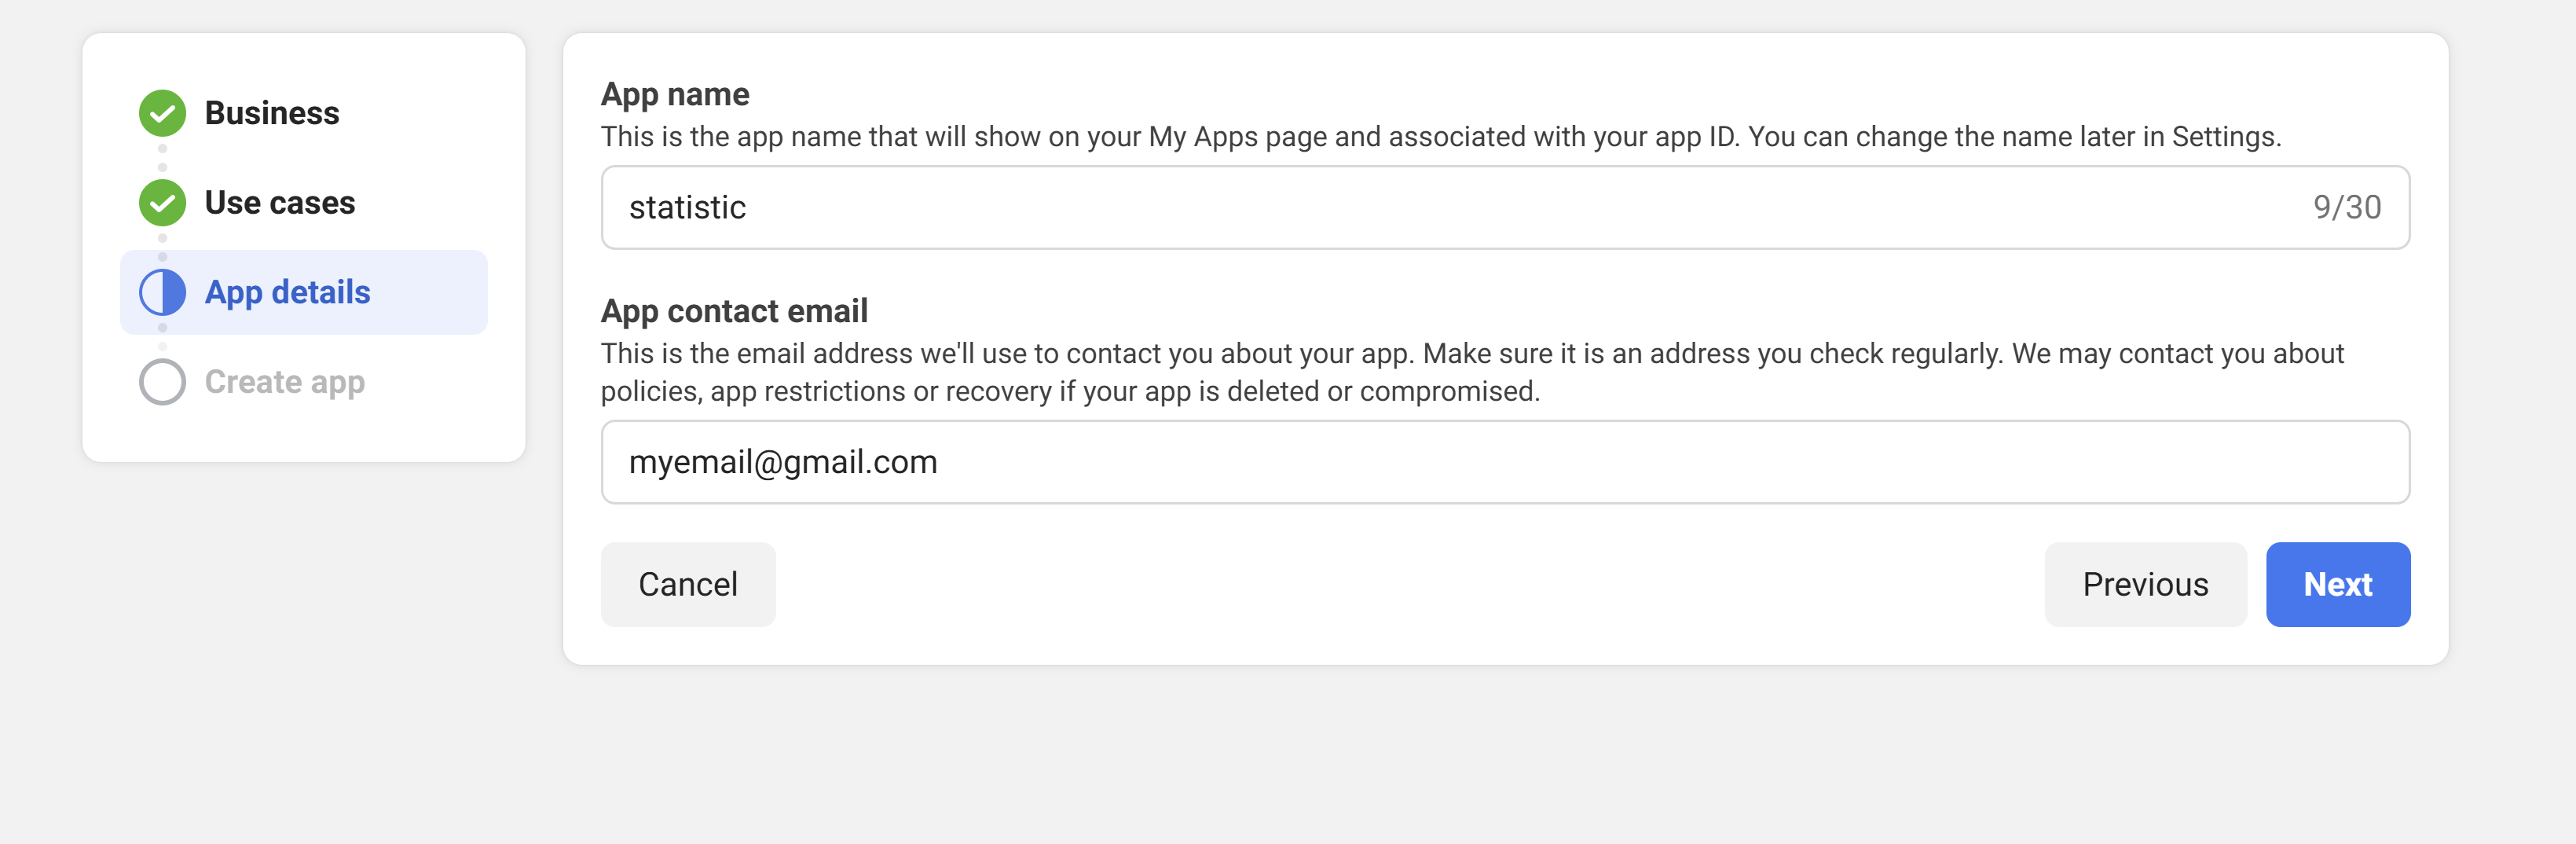
Enter your app name and email:
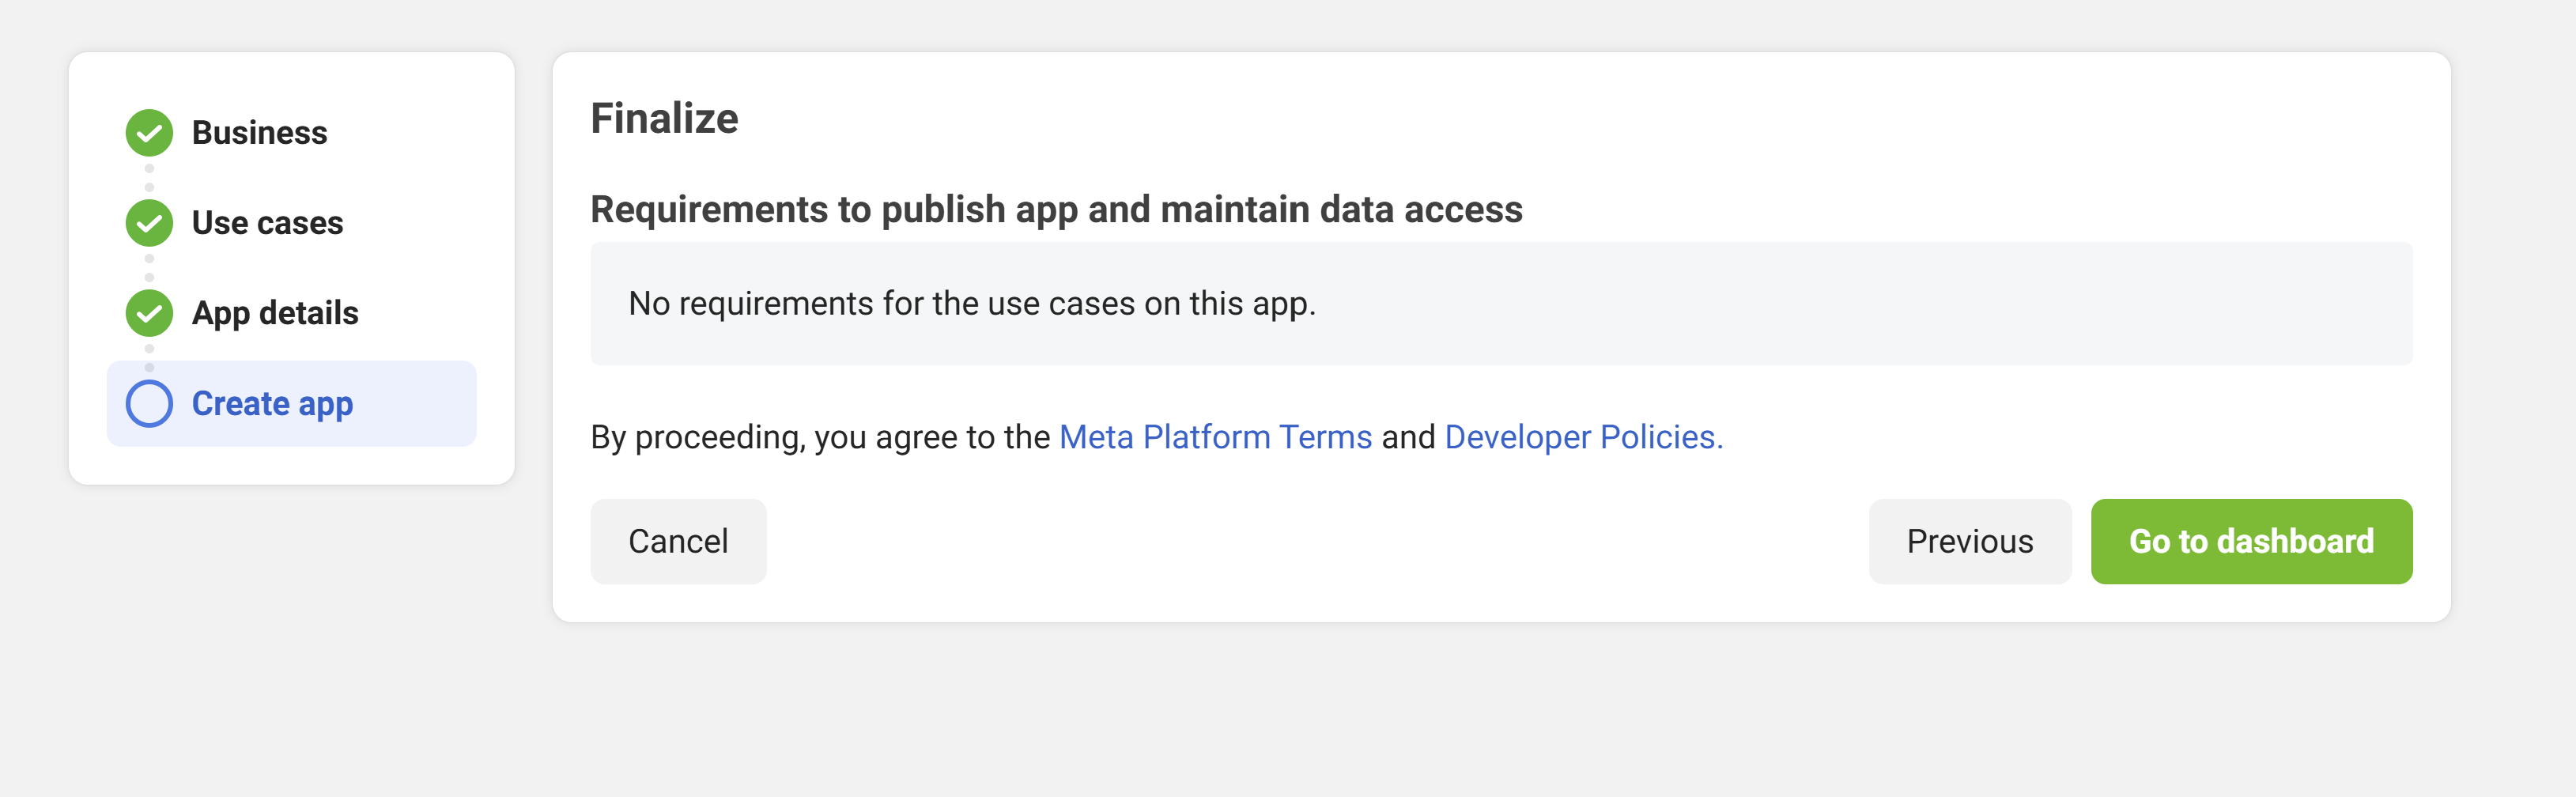
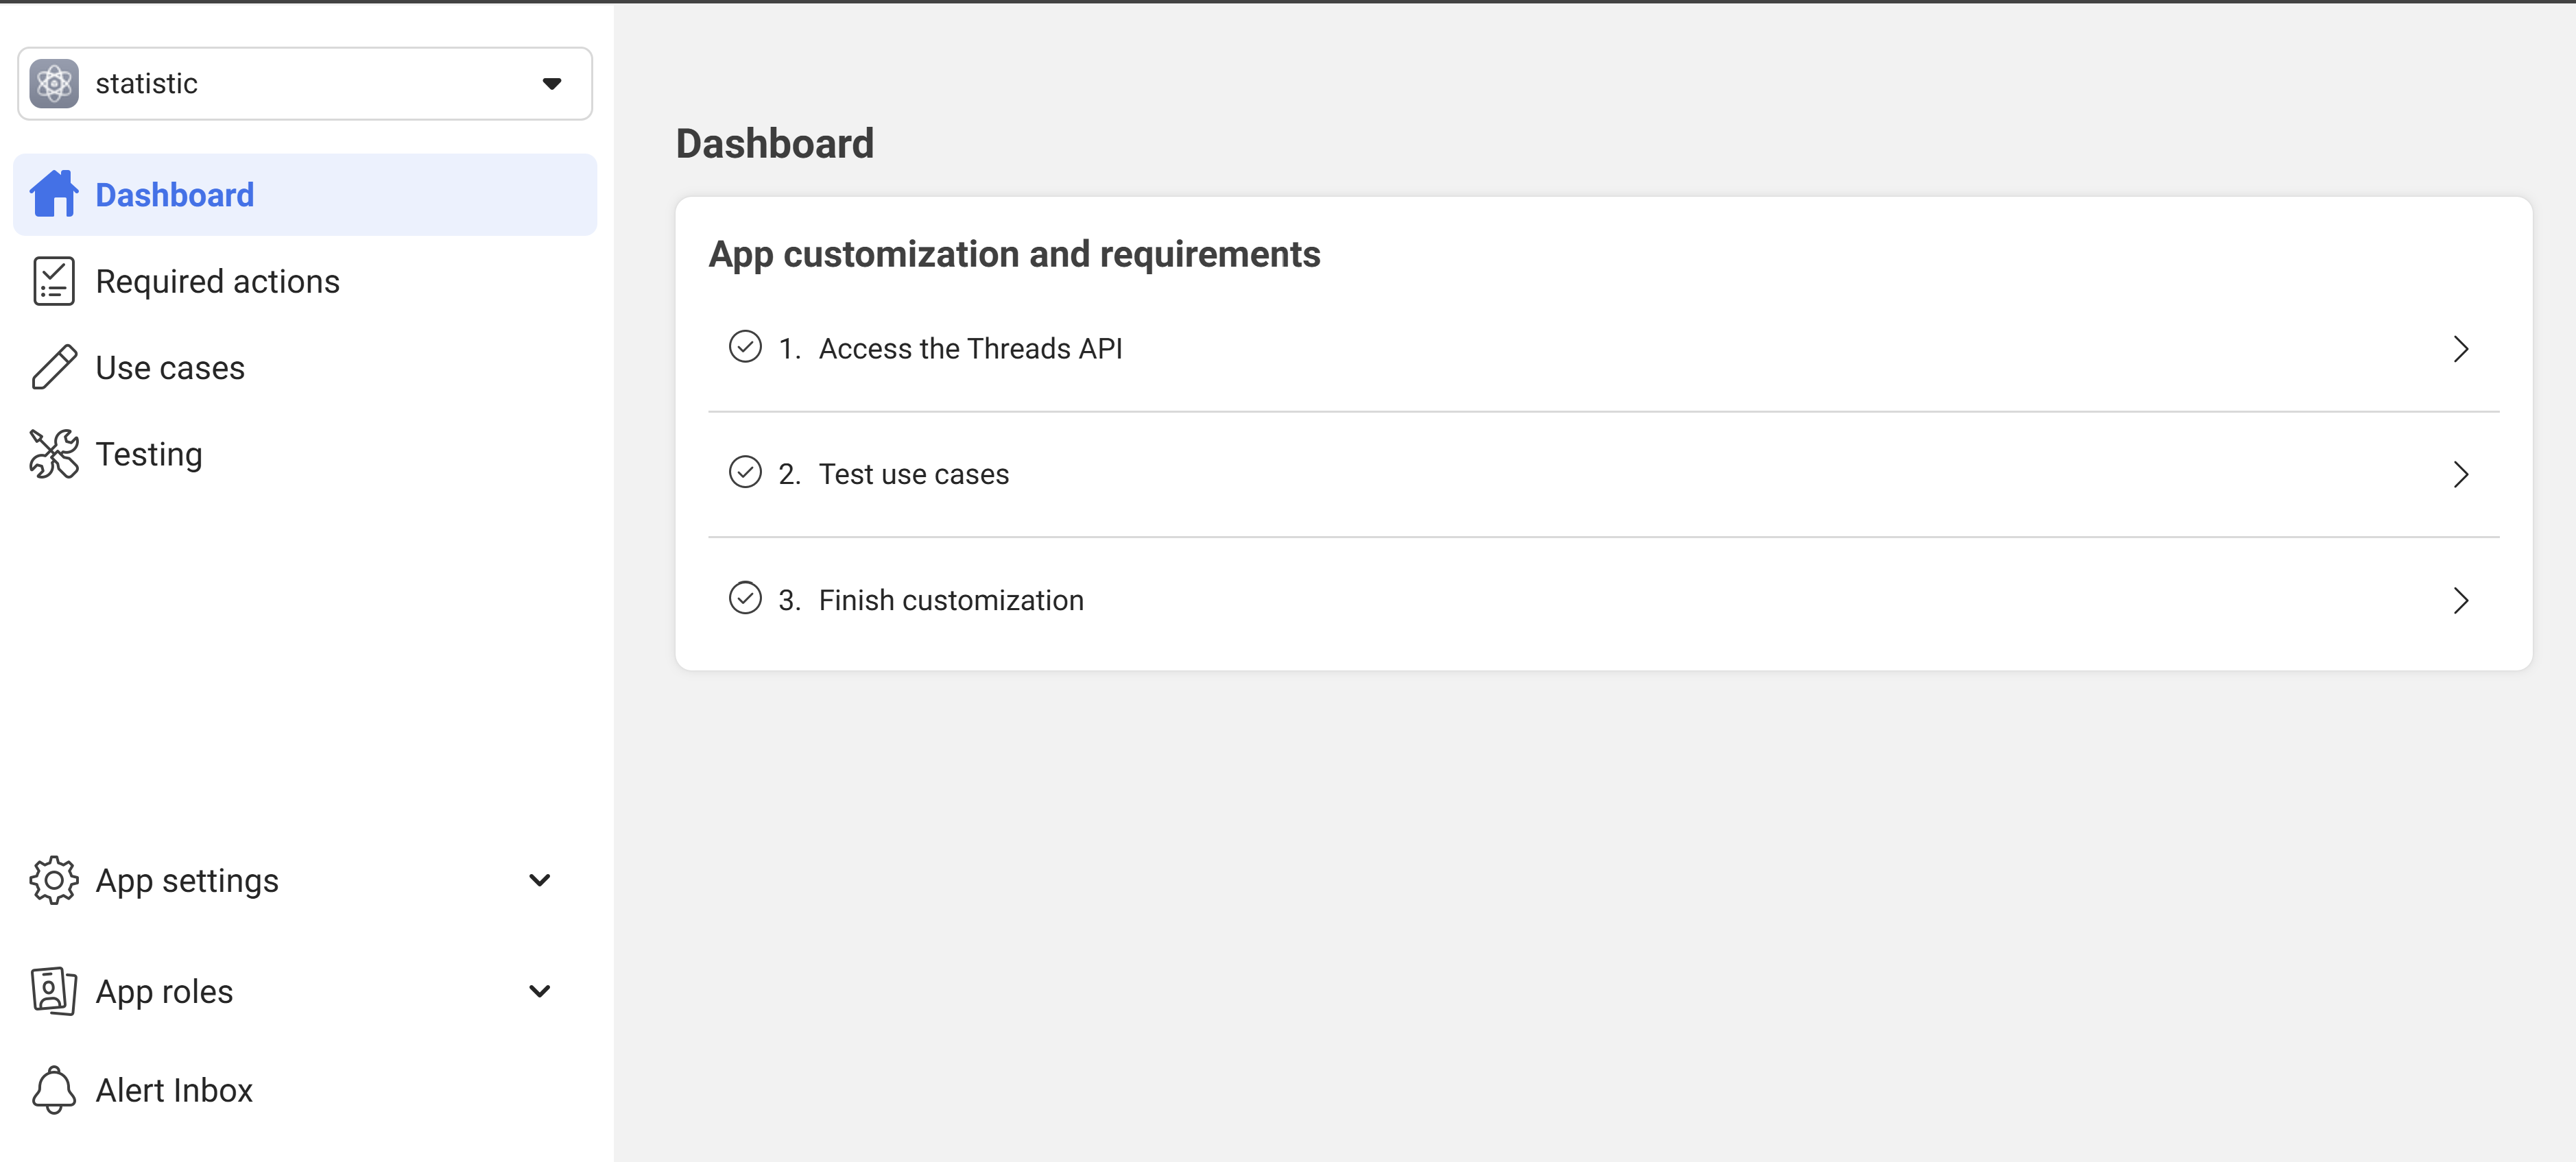
Click “Go to Dashboard”.
In the dashboard settings, continue with more “next-next-next.”
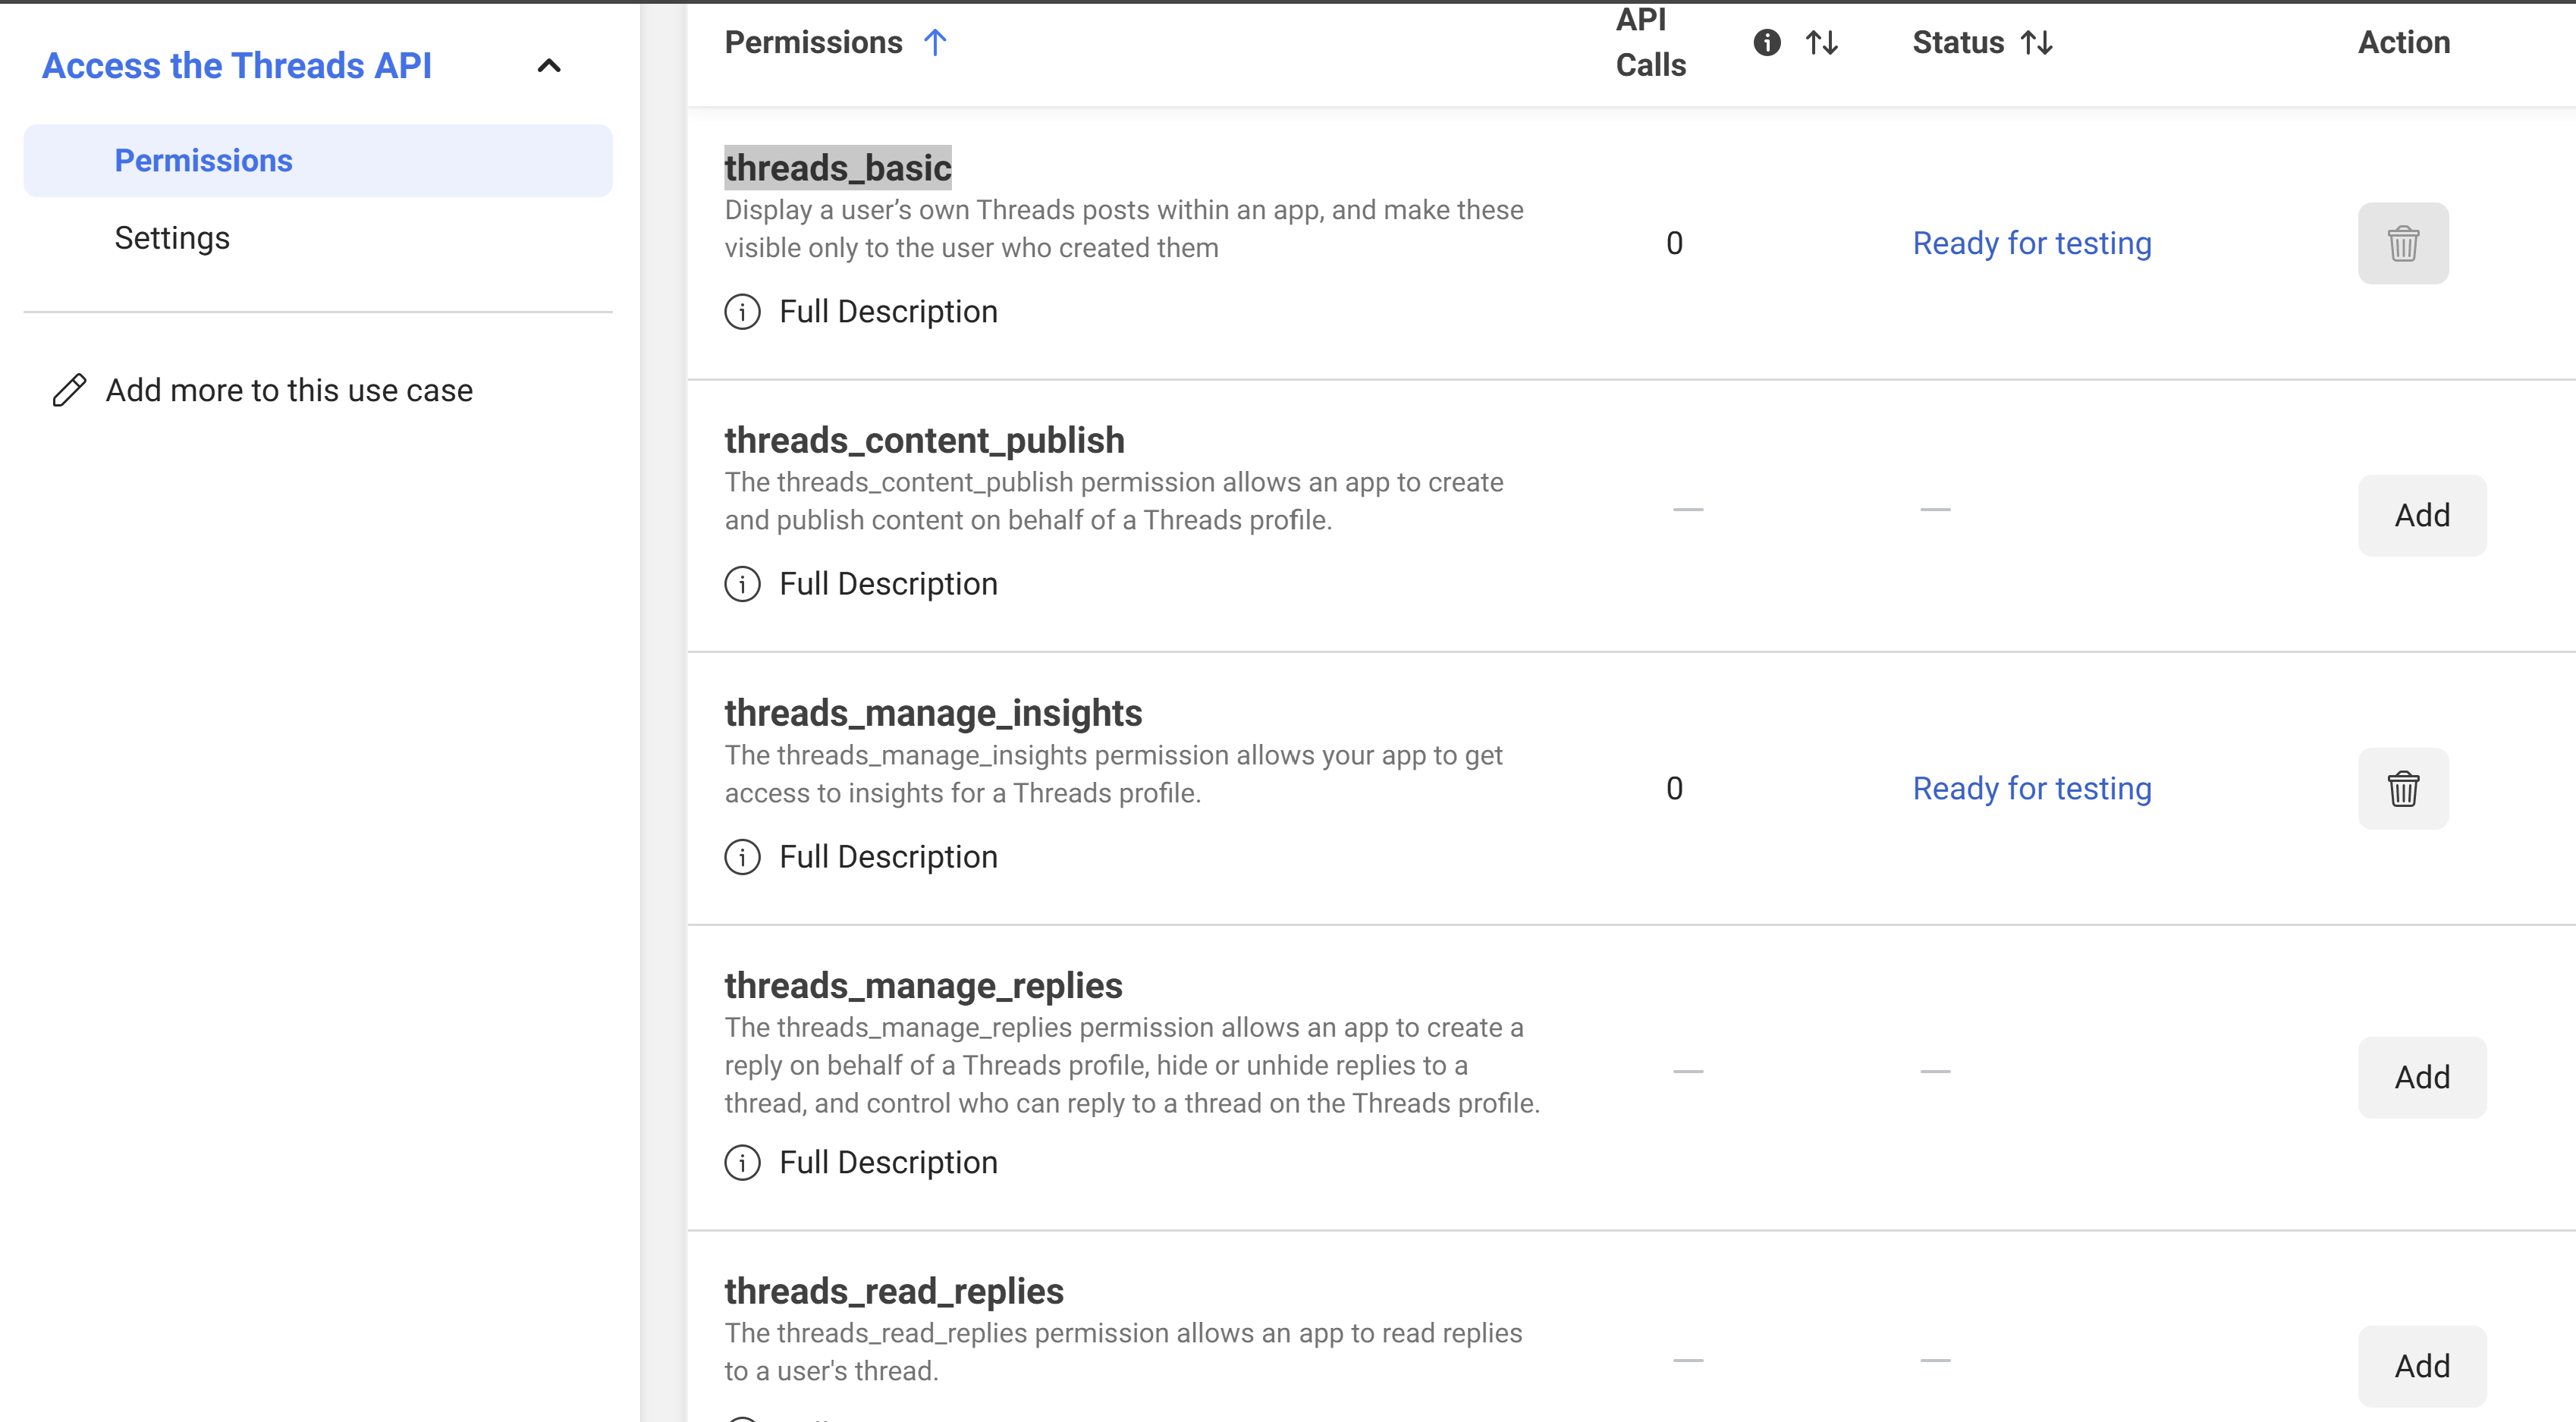
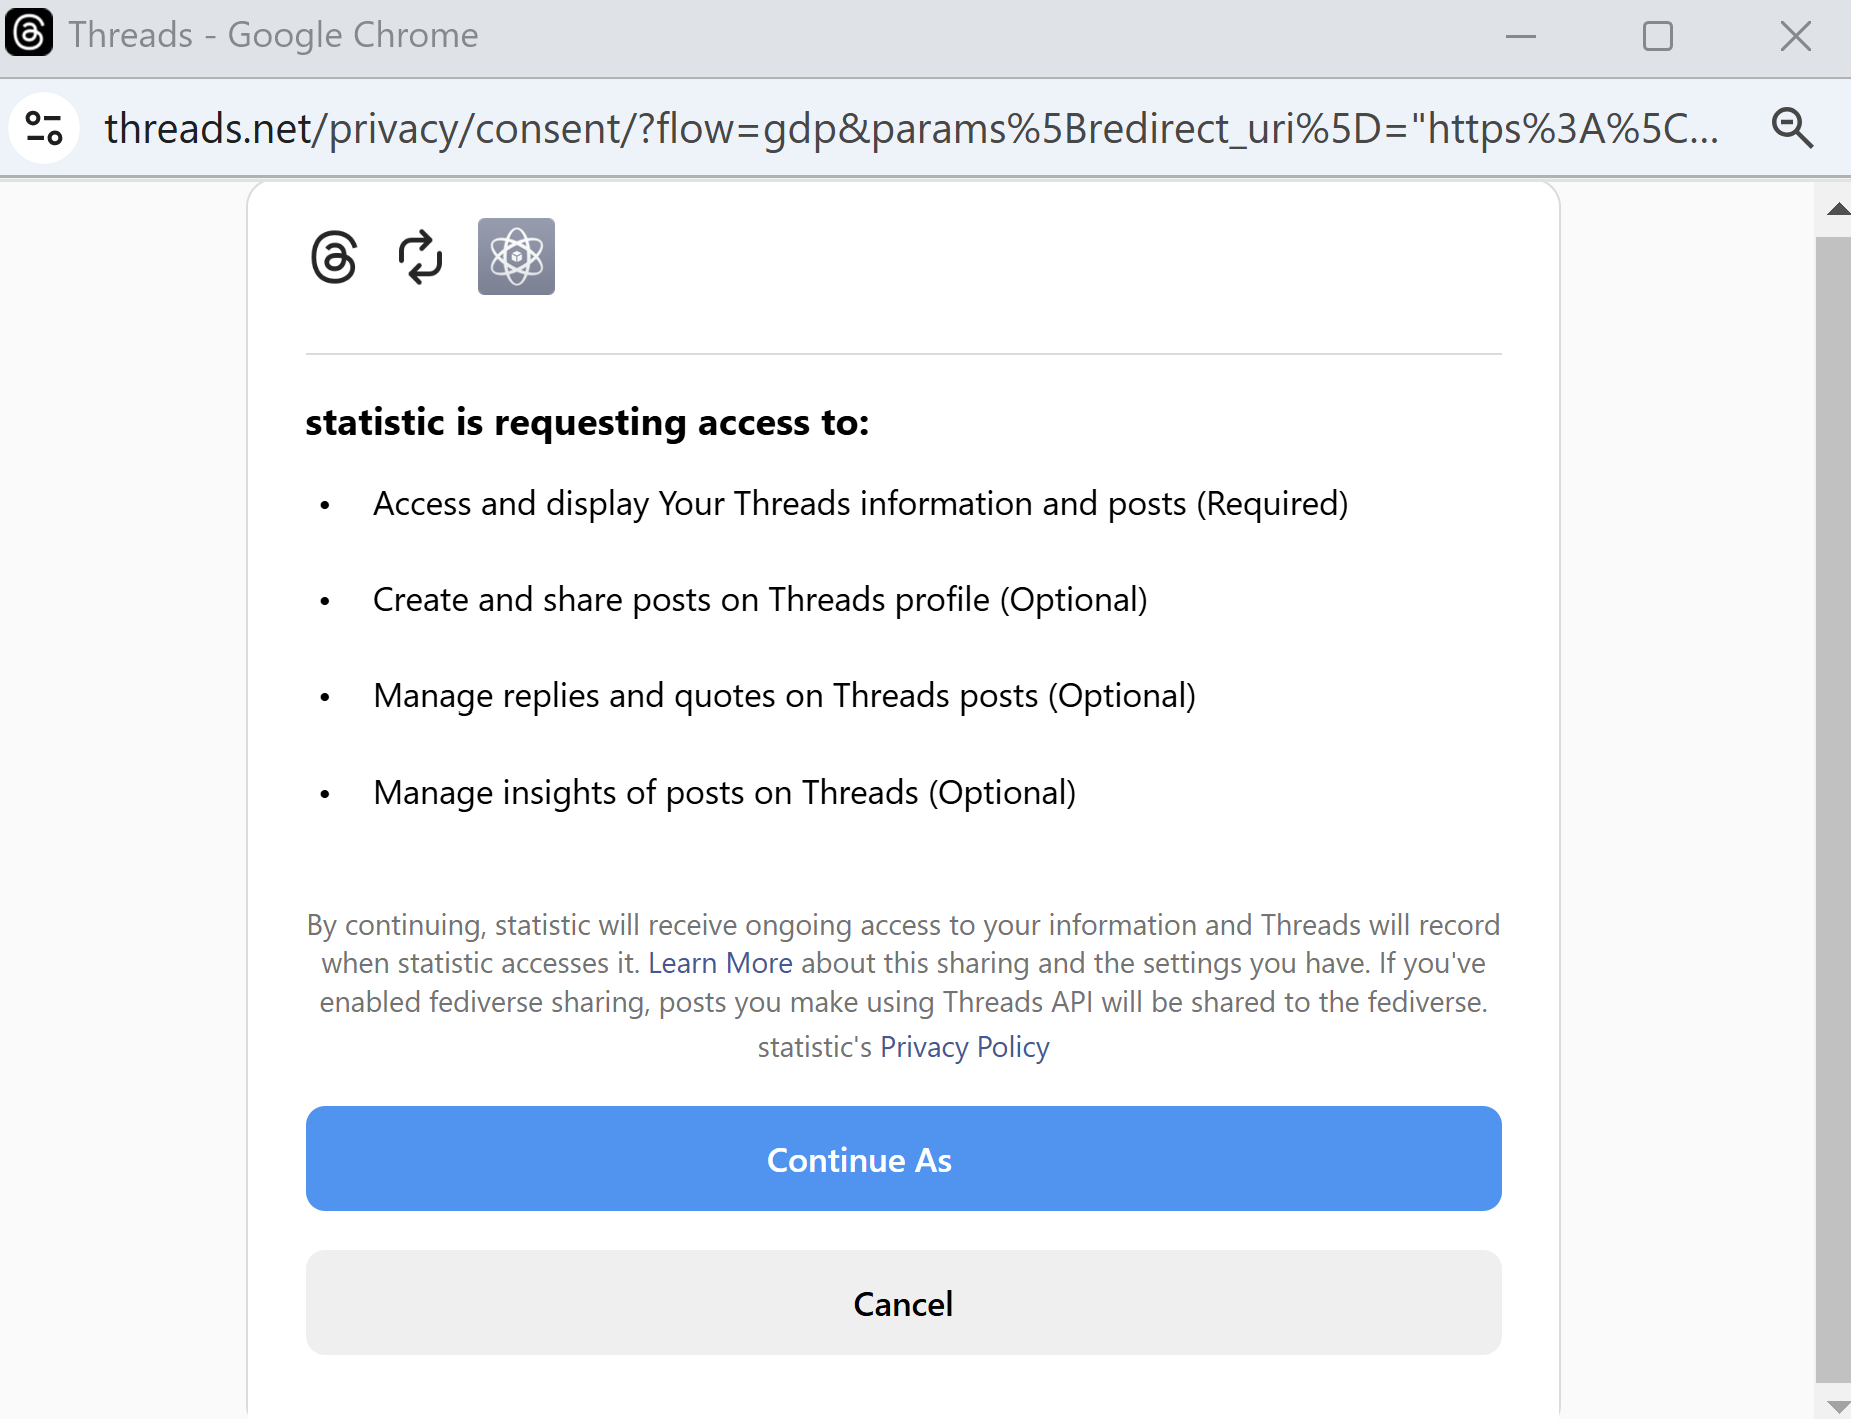
First, go to “Access the Threads API” and select “threads_basic” and “threads_manage_insights”—these are the bare minimum permissions needed for this project. If you want to do more, adjust your permissions accordingly.
Then, click “Test Use Cases” (it should automatically show a green tick).
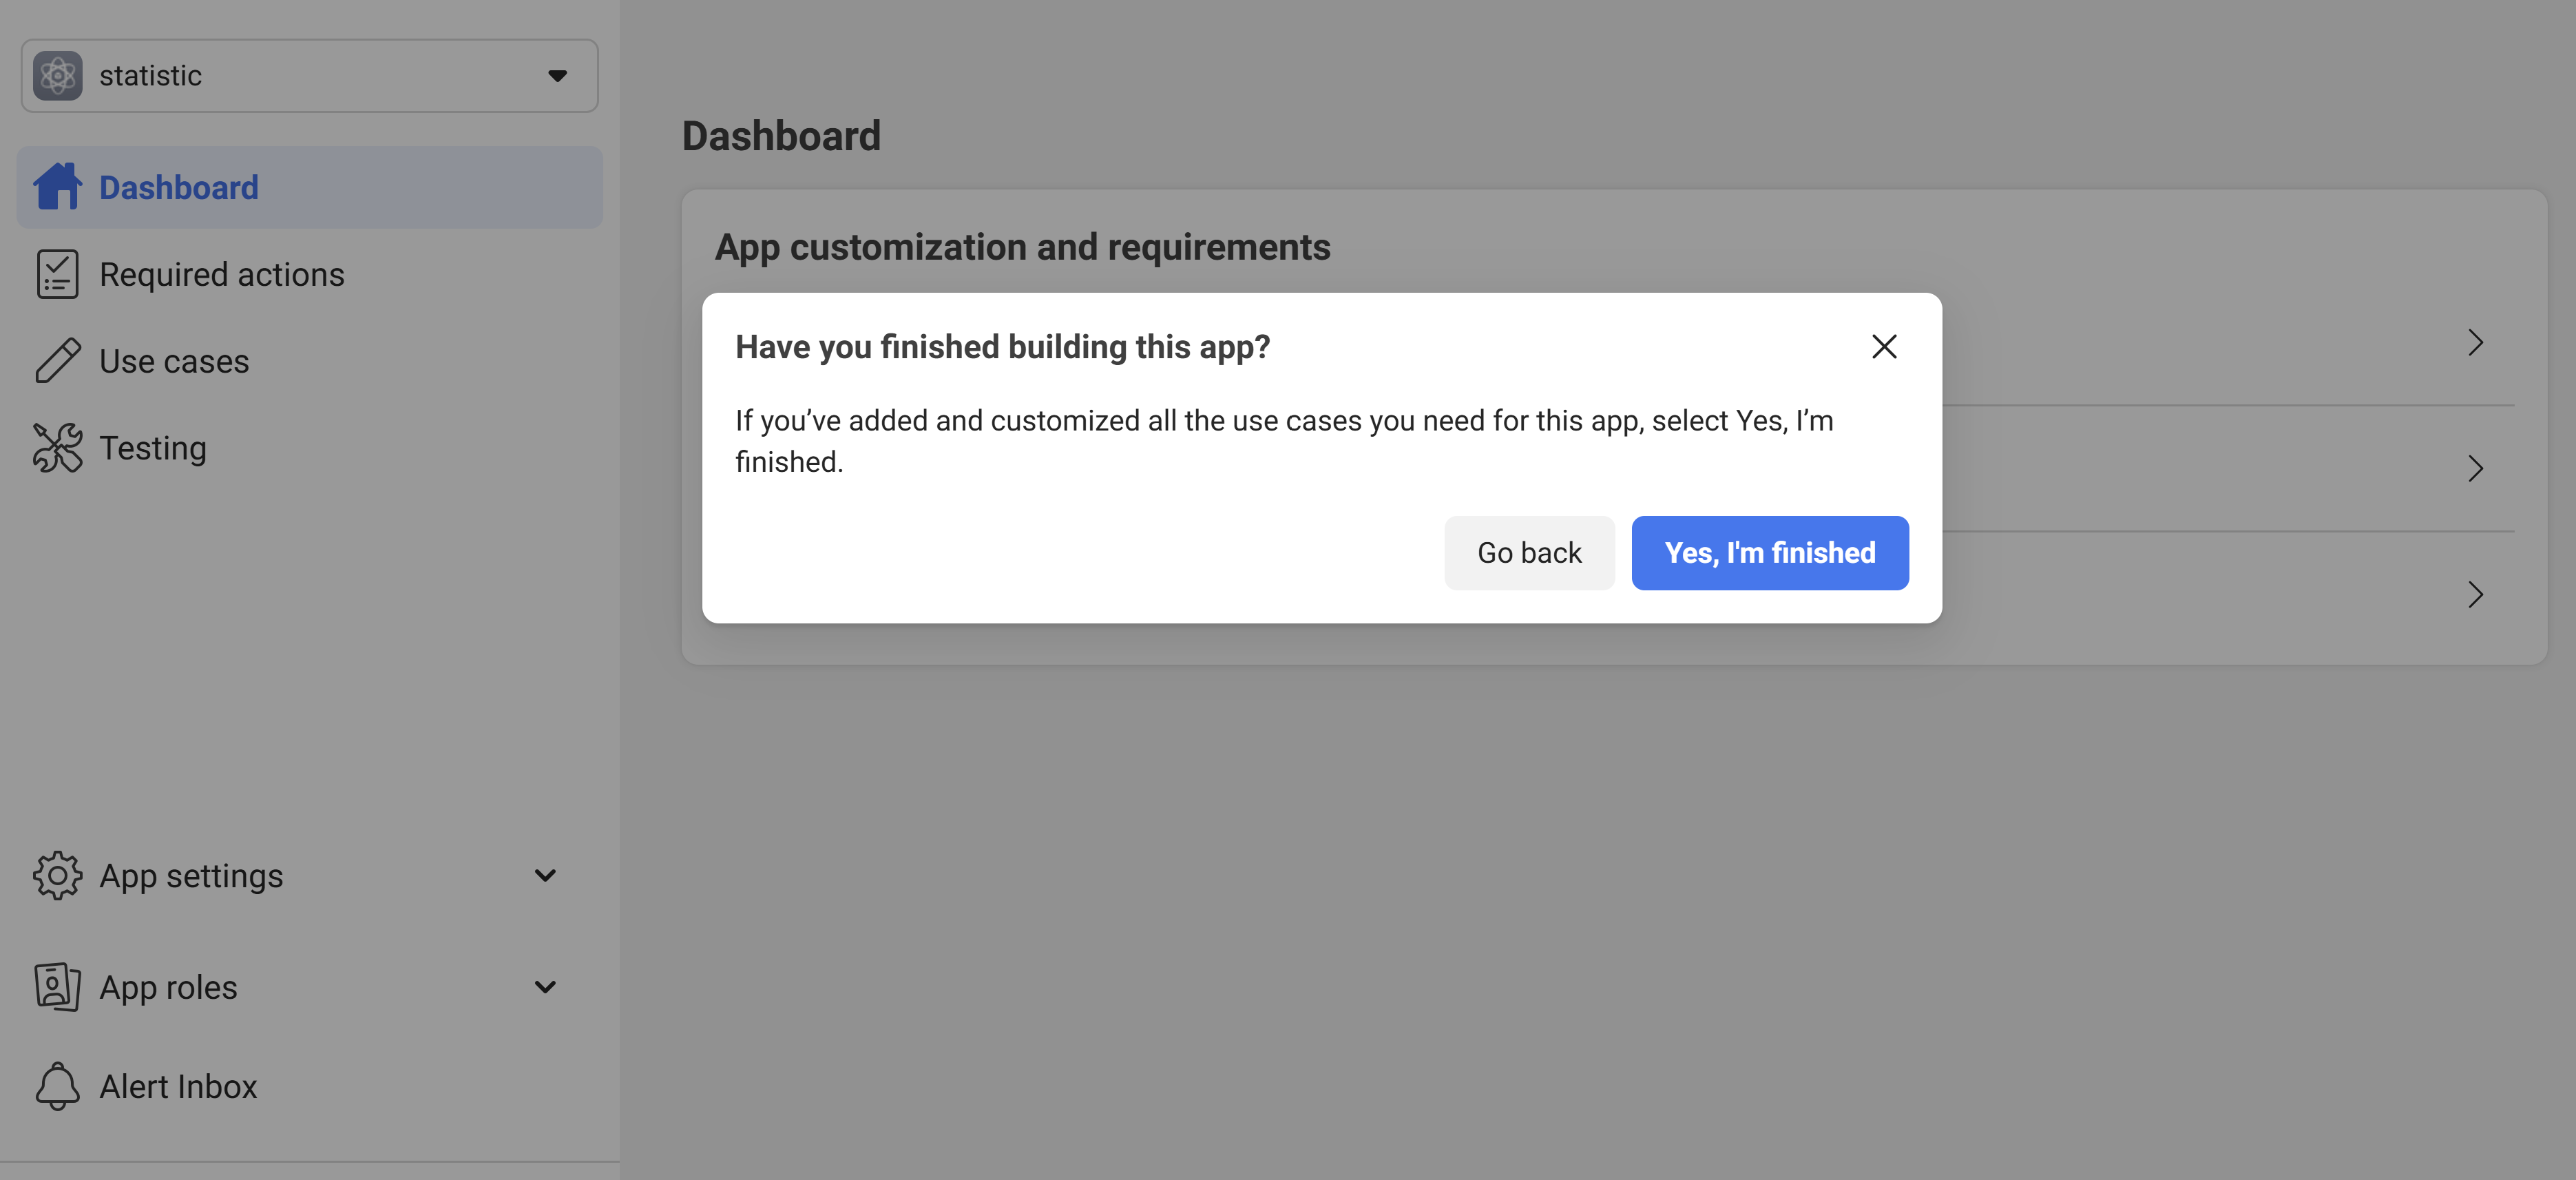
Finally, click “Finish Customization”.
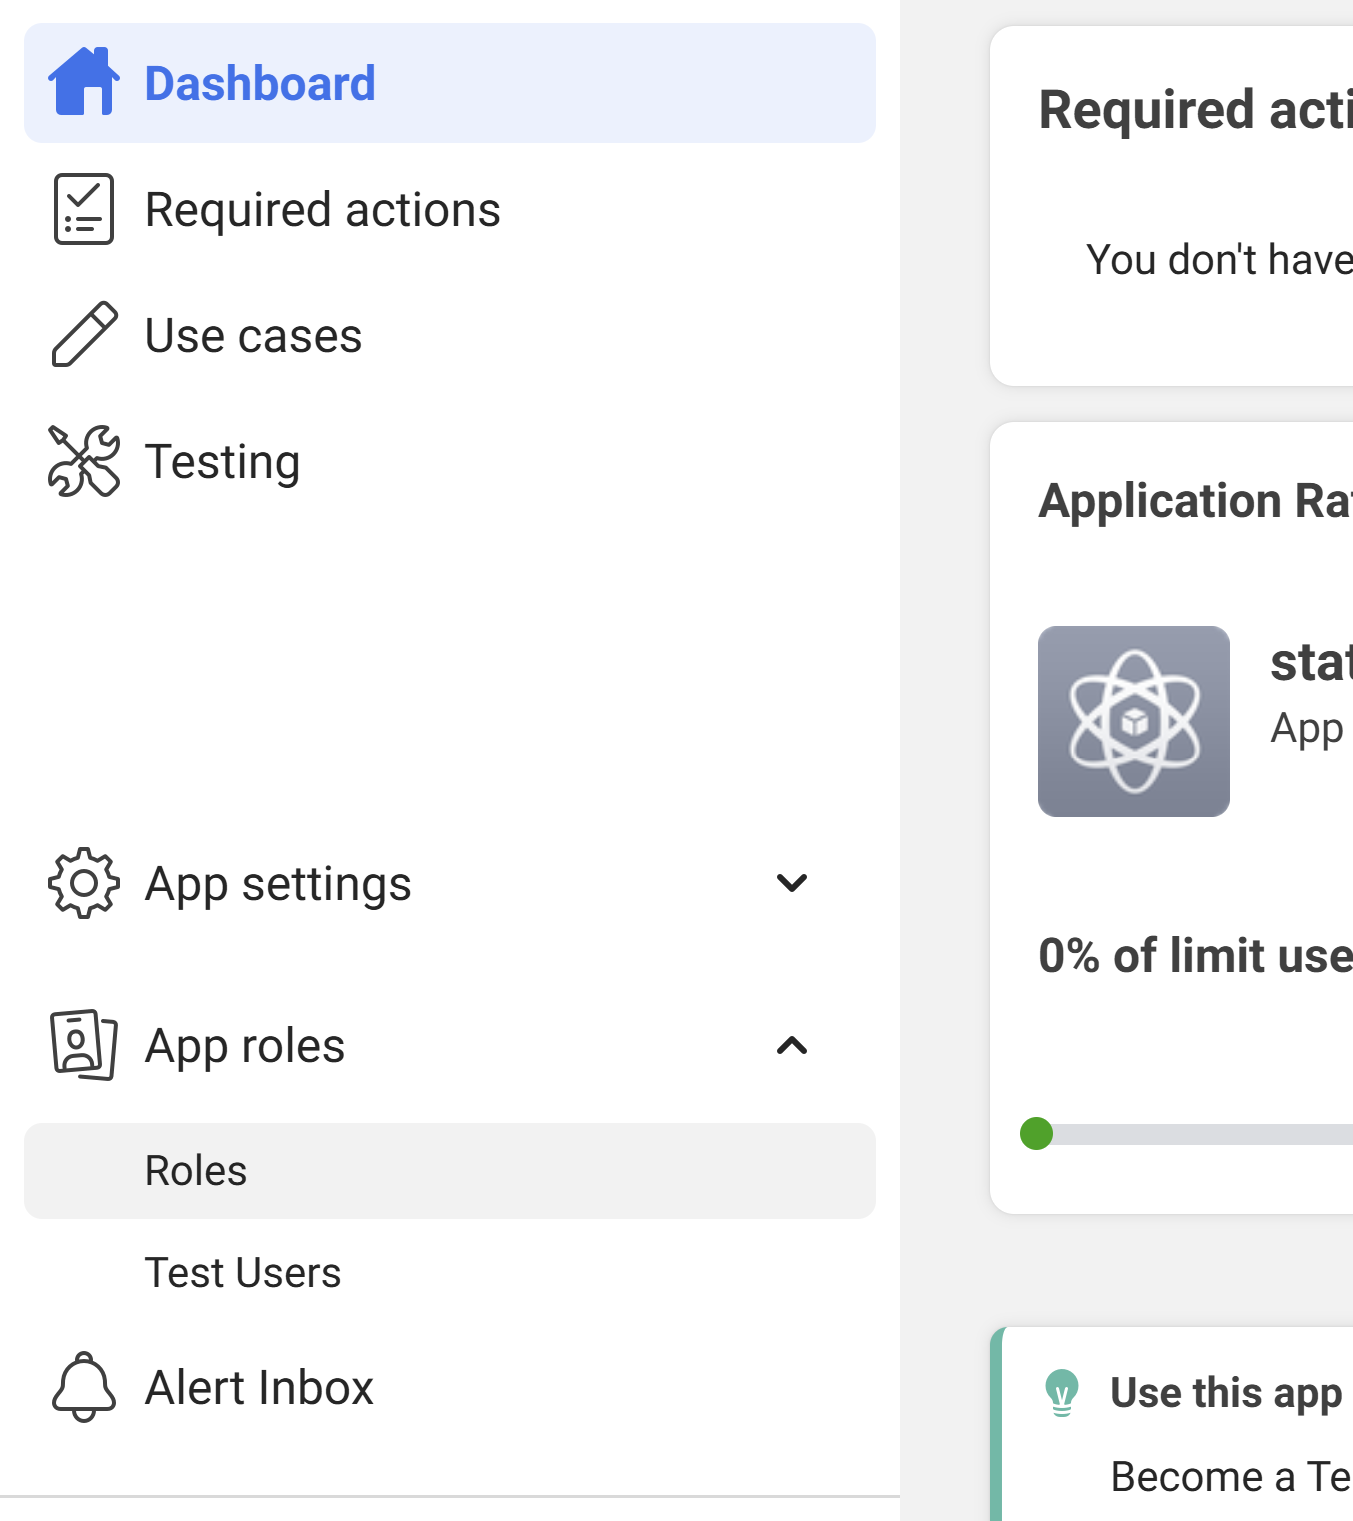
Step 2: Add Roles
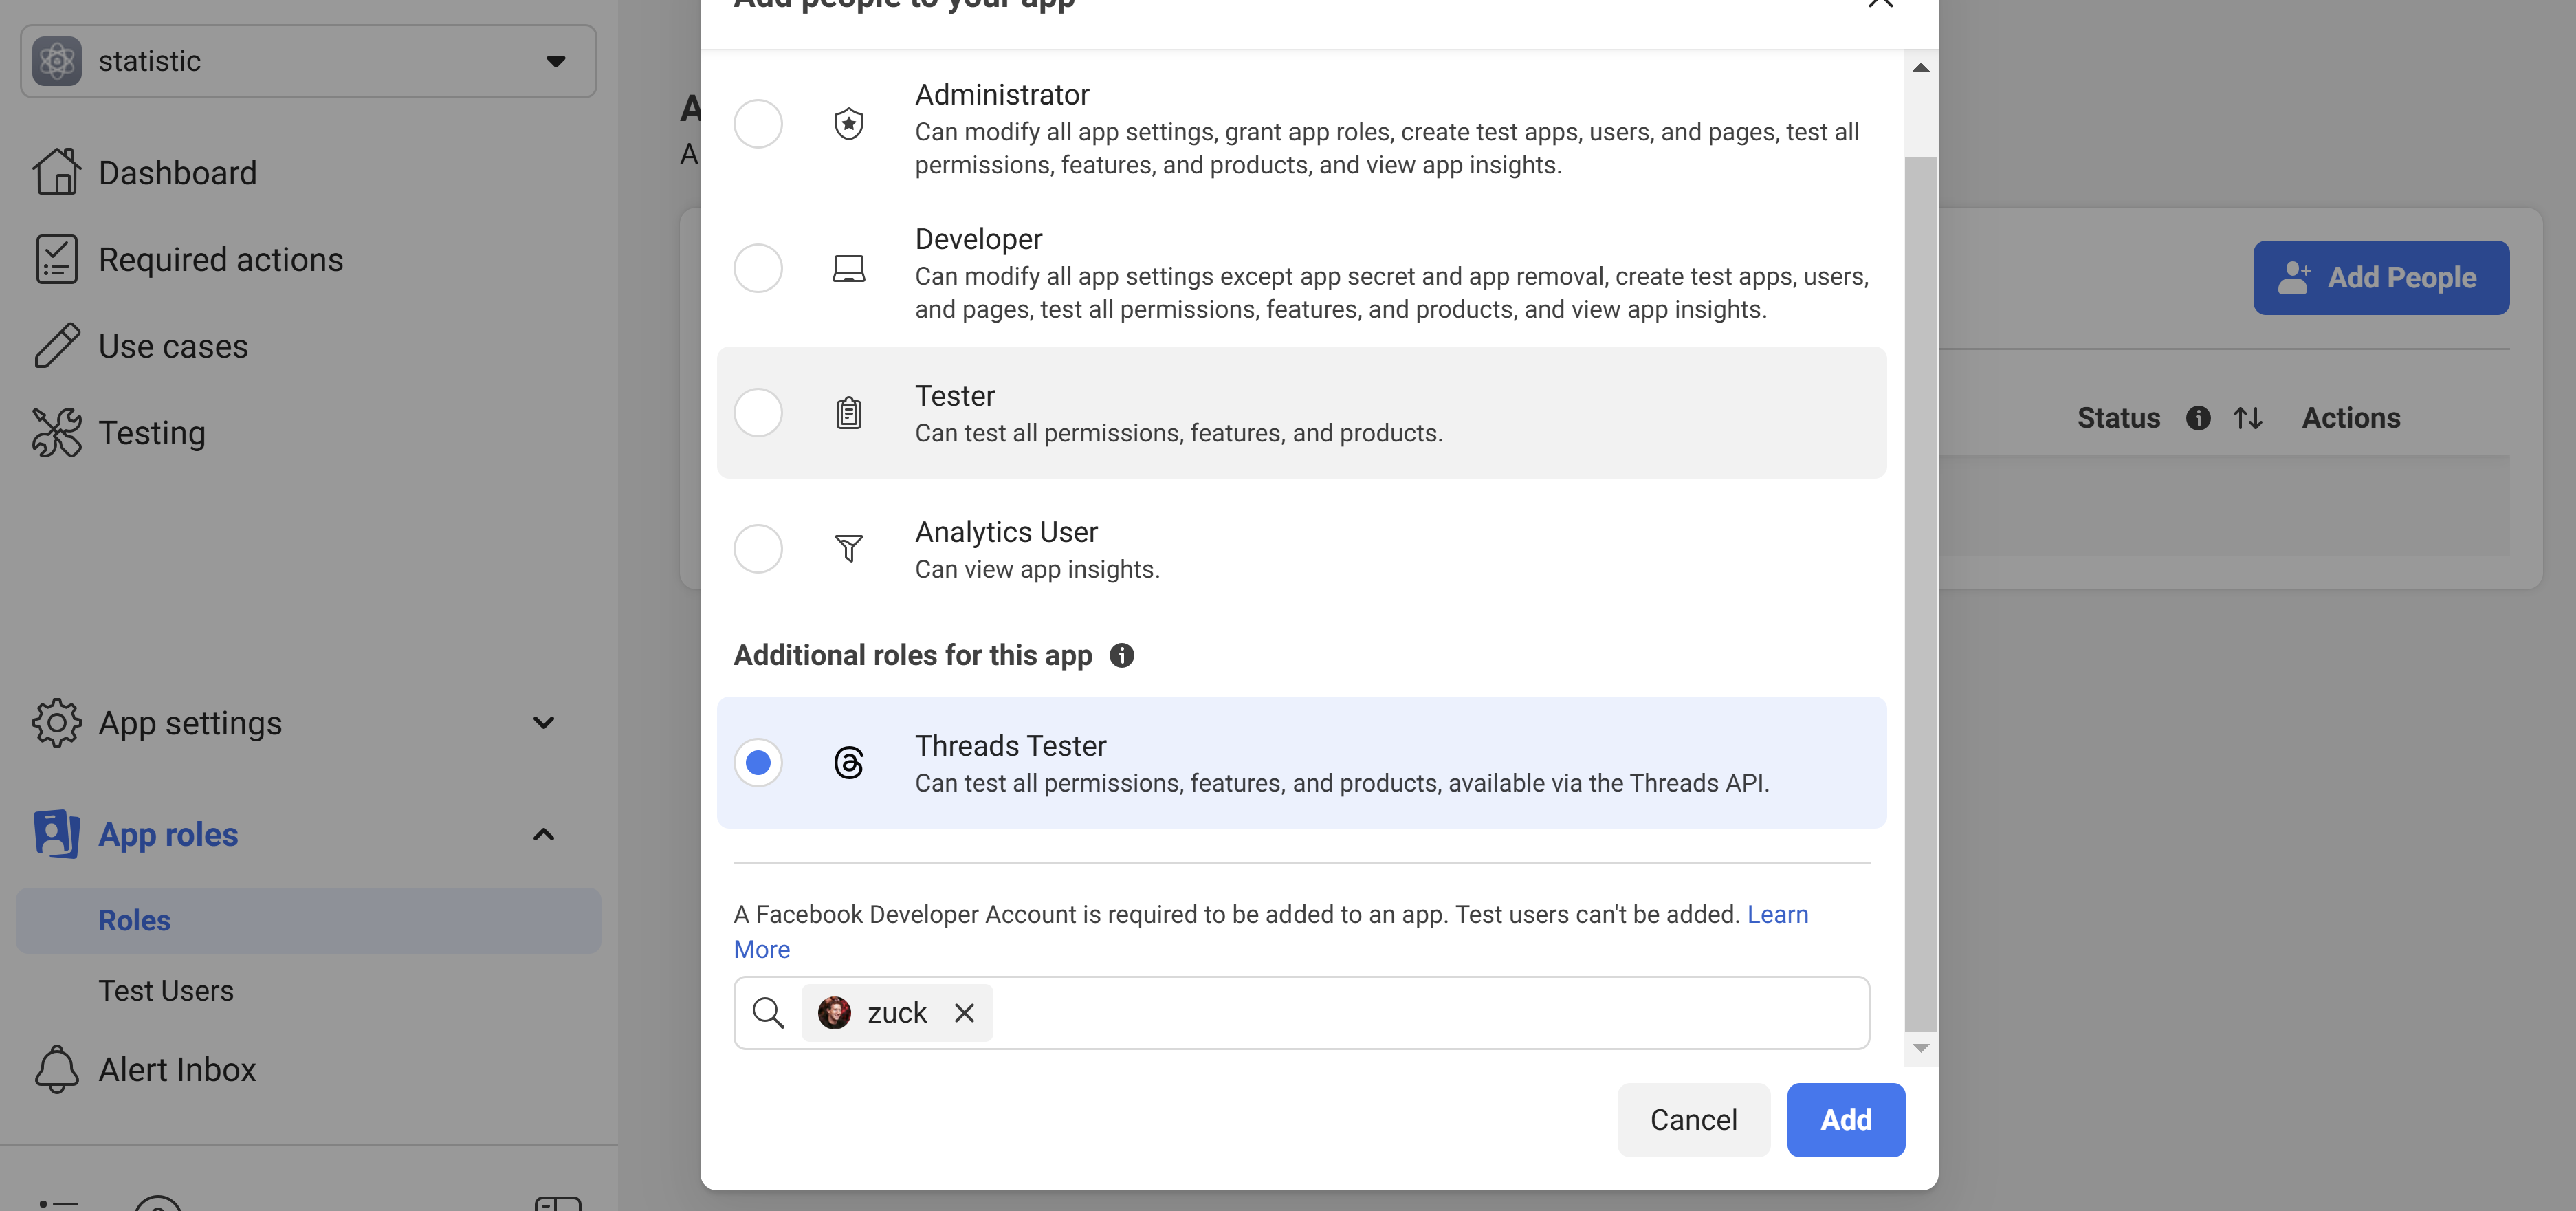
Now, go to “App Roles” and then to “Roles”.
Click “Add People” and select “Threads Tester.” Below that, add your own user, as shown in the screenshot:
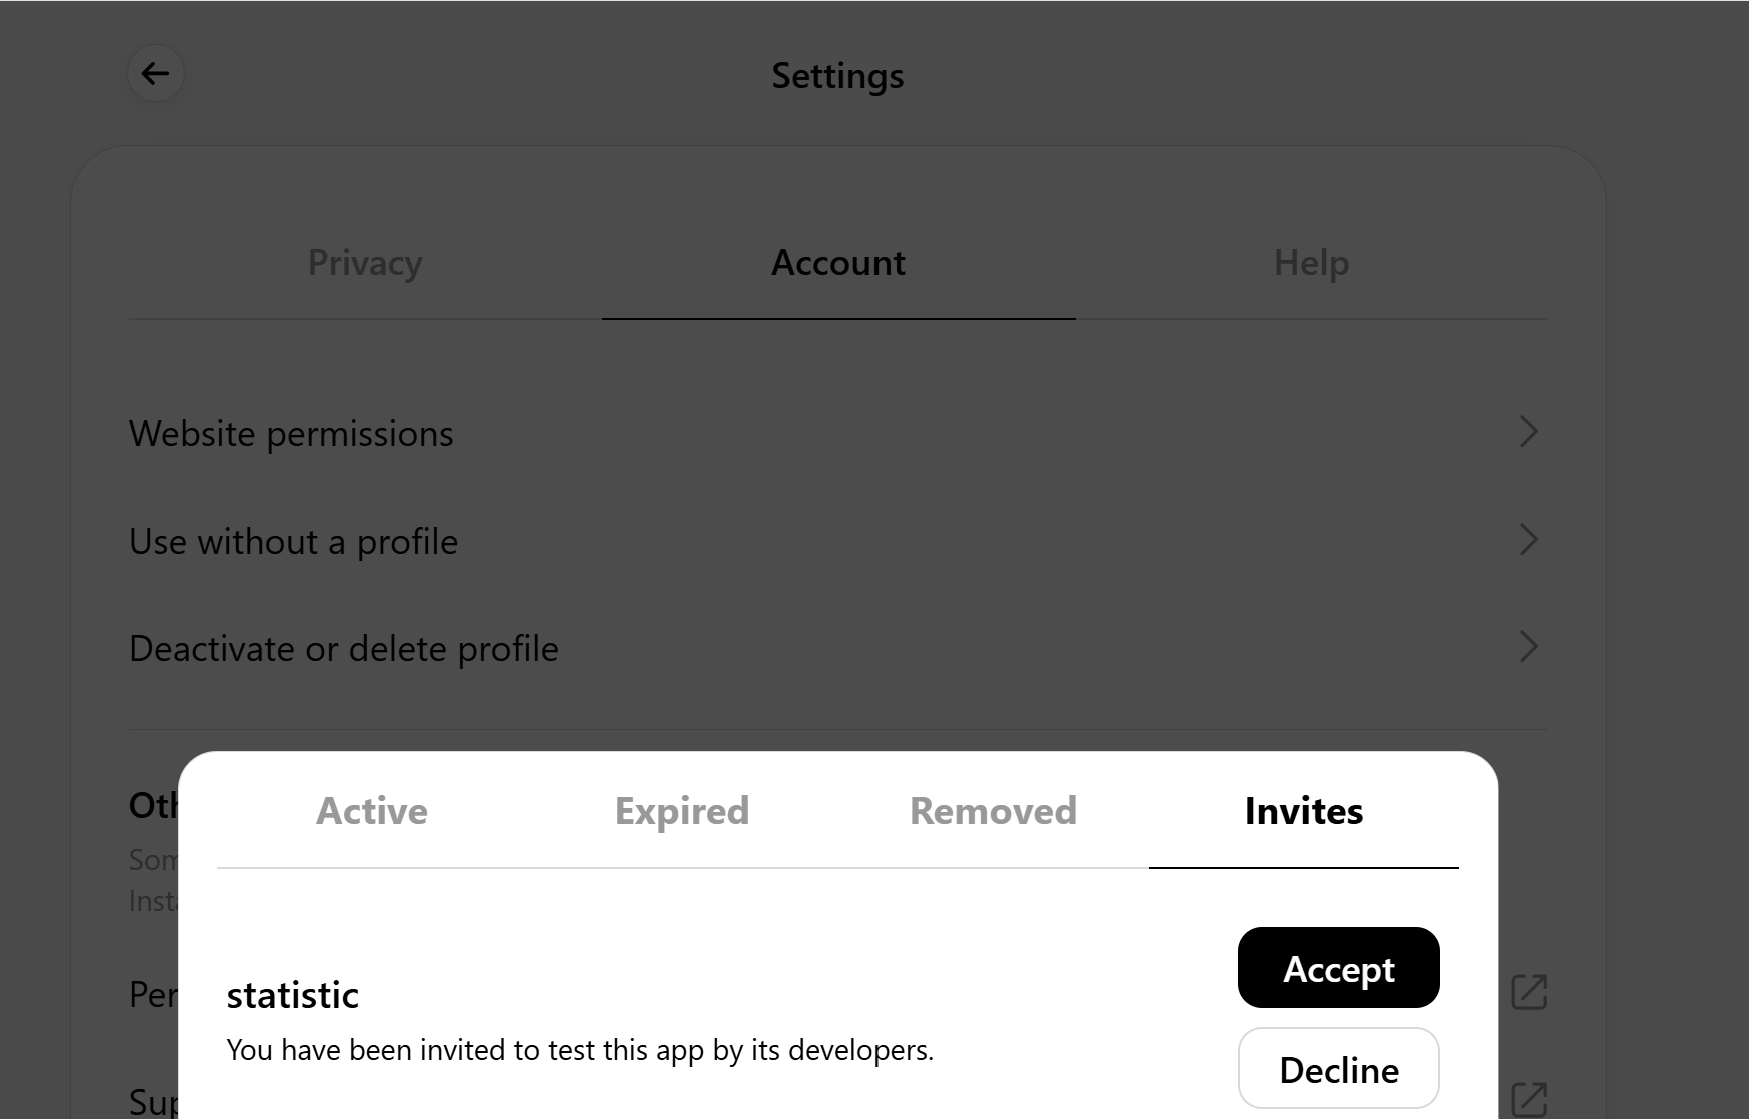
Now, open the Threads app with that user. Go to Settings > Account > Website Permissions > Invites and accept the invite.
If it shows something similar to the screenshot below, then you’re good to go.
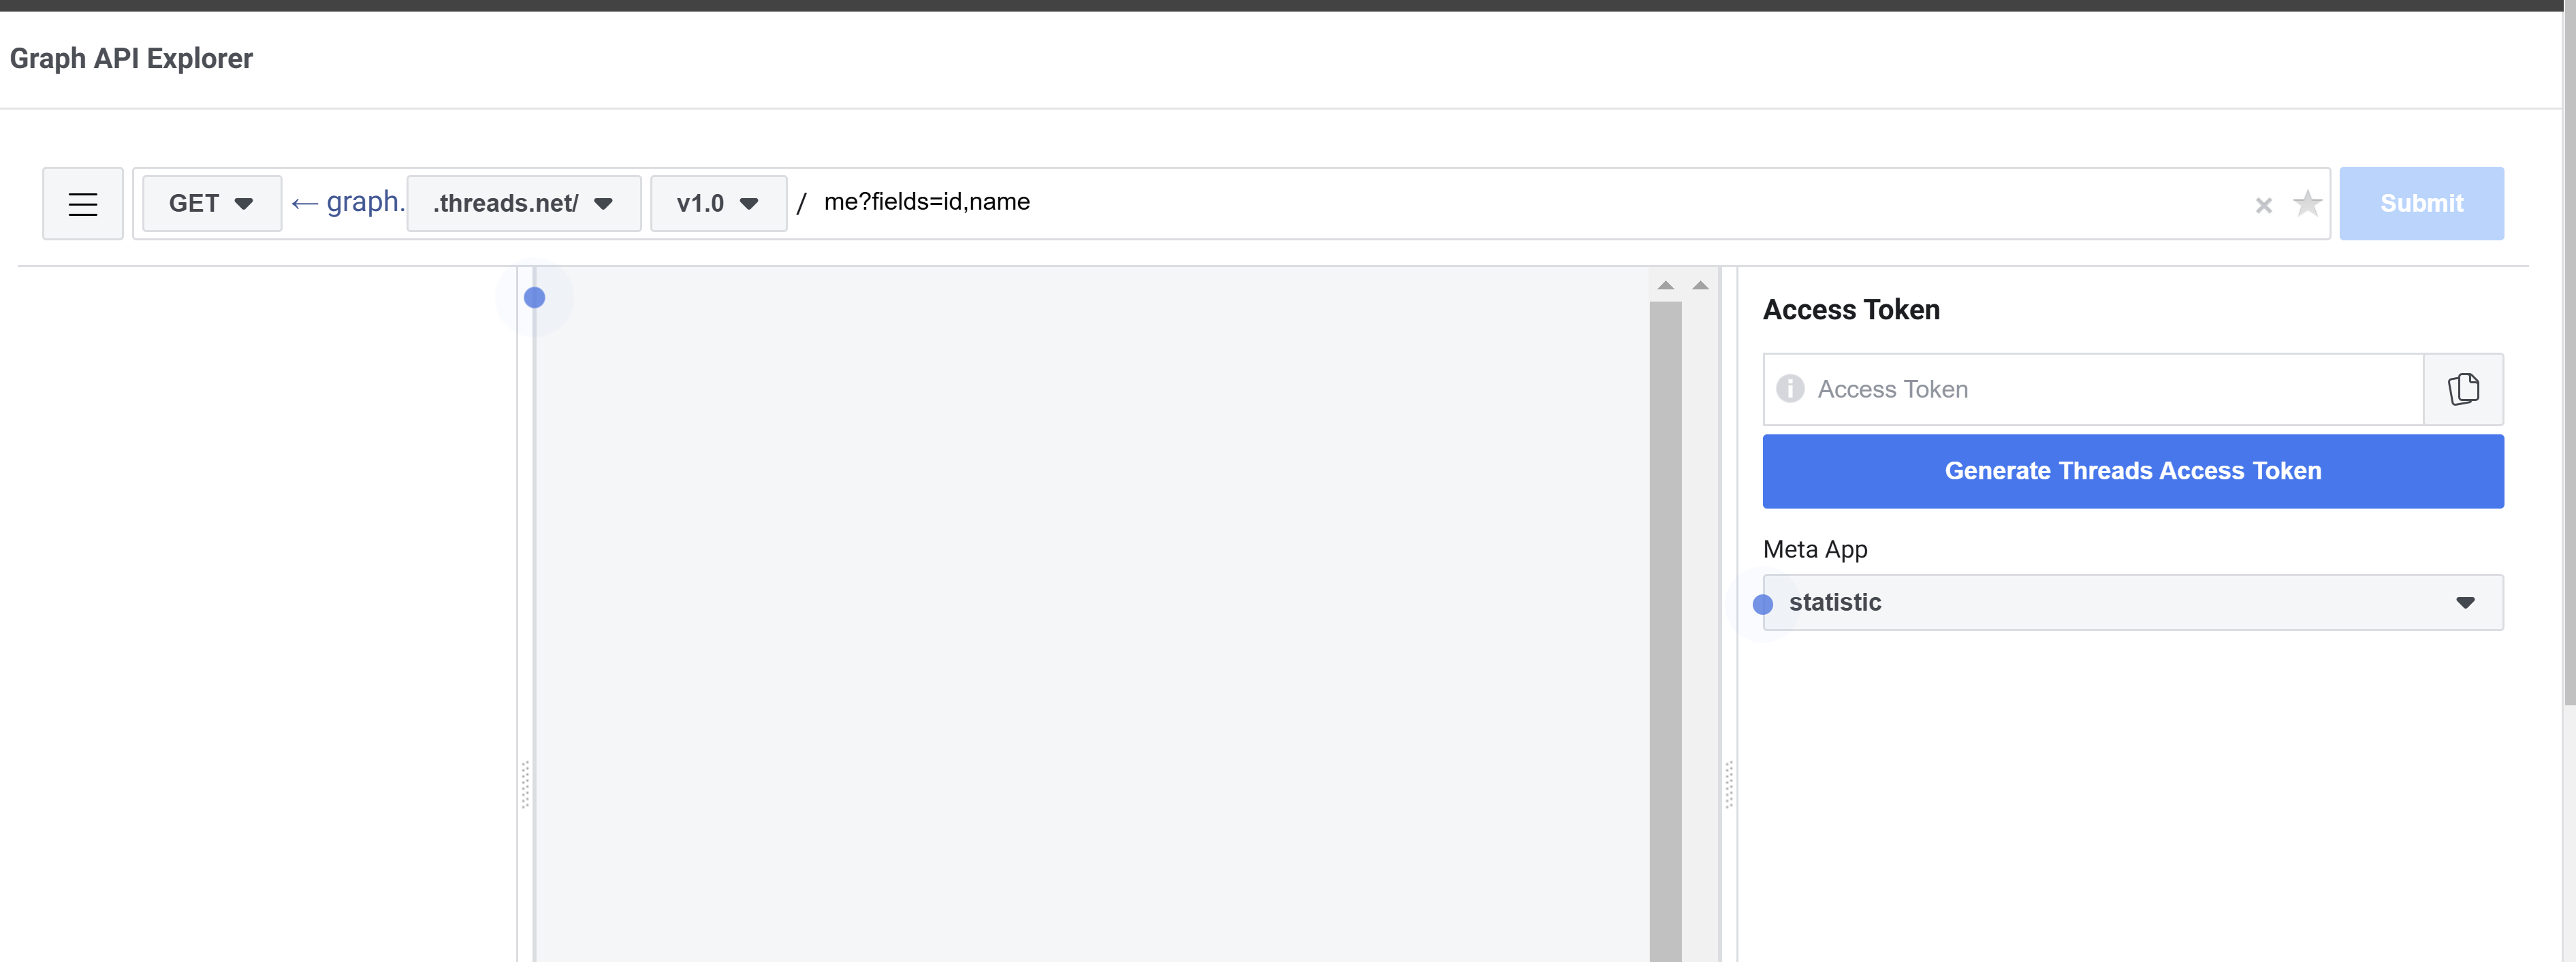
Step 4: Exchange for a Long-Lived Token
Now we need to exchange this short-lived token (which expires in 60 minutes) for a long-lived token that will last two months. Details are here: Long-Lived Tokens.
Run this command:
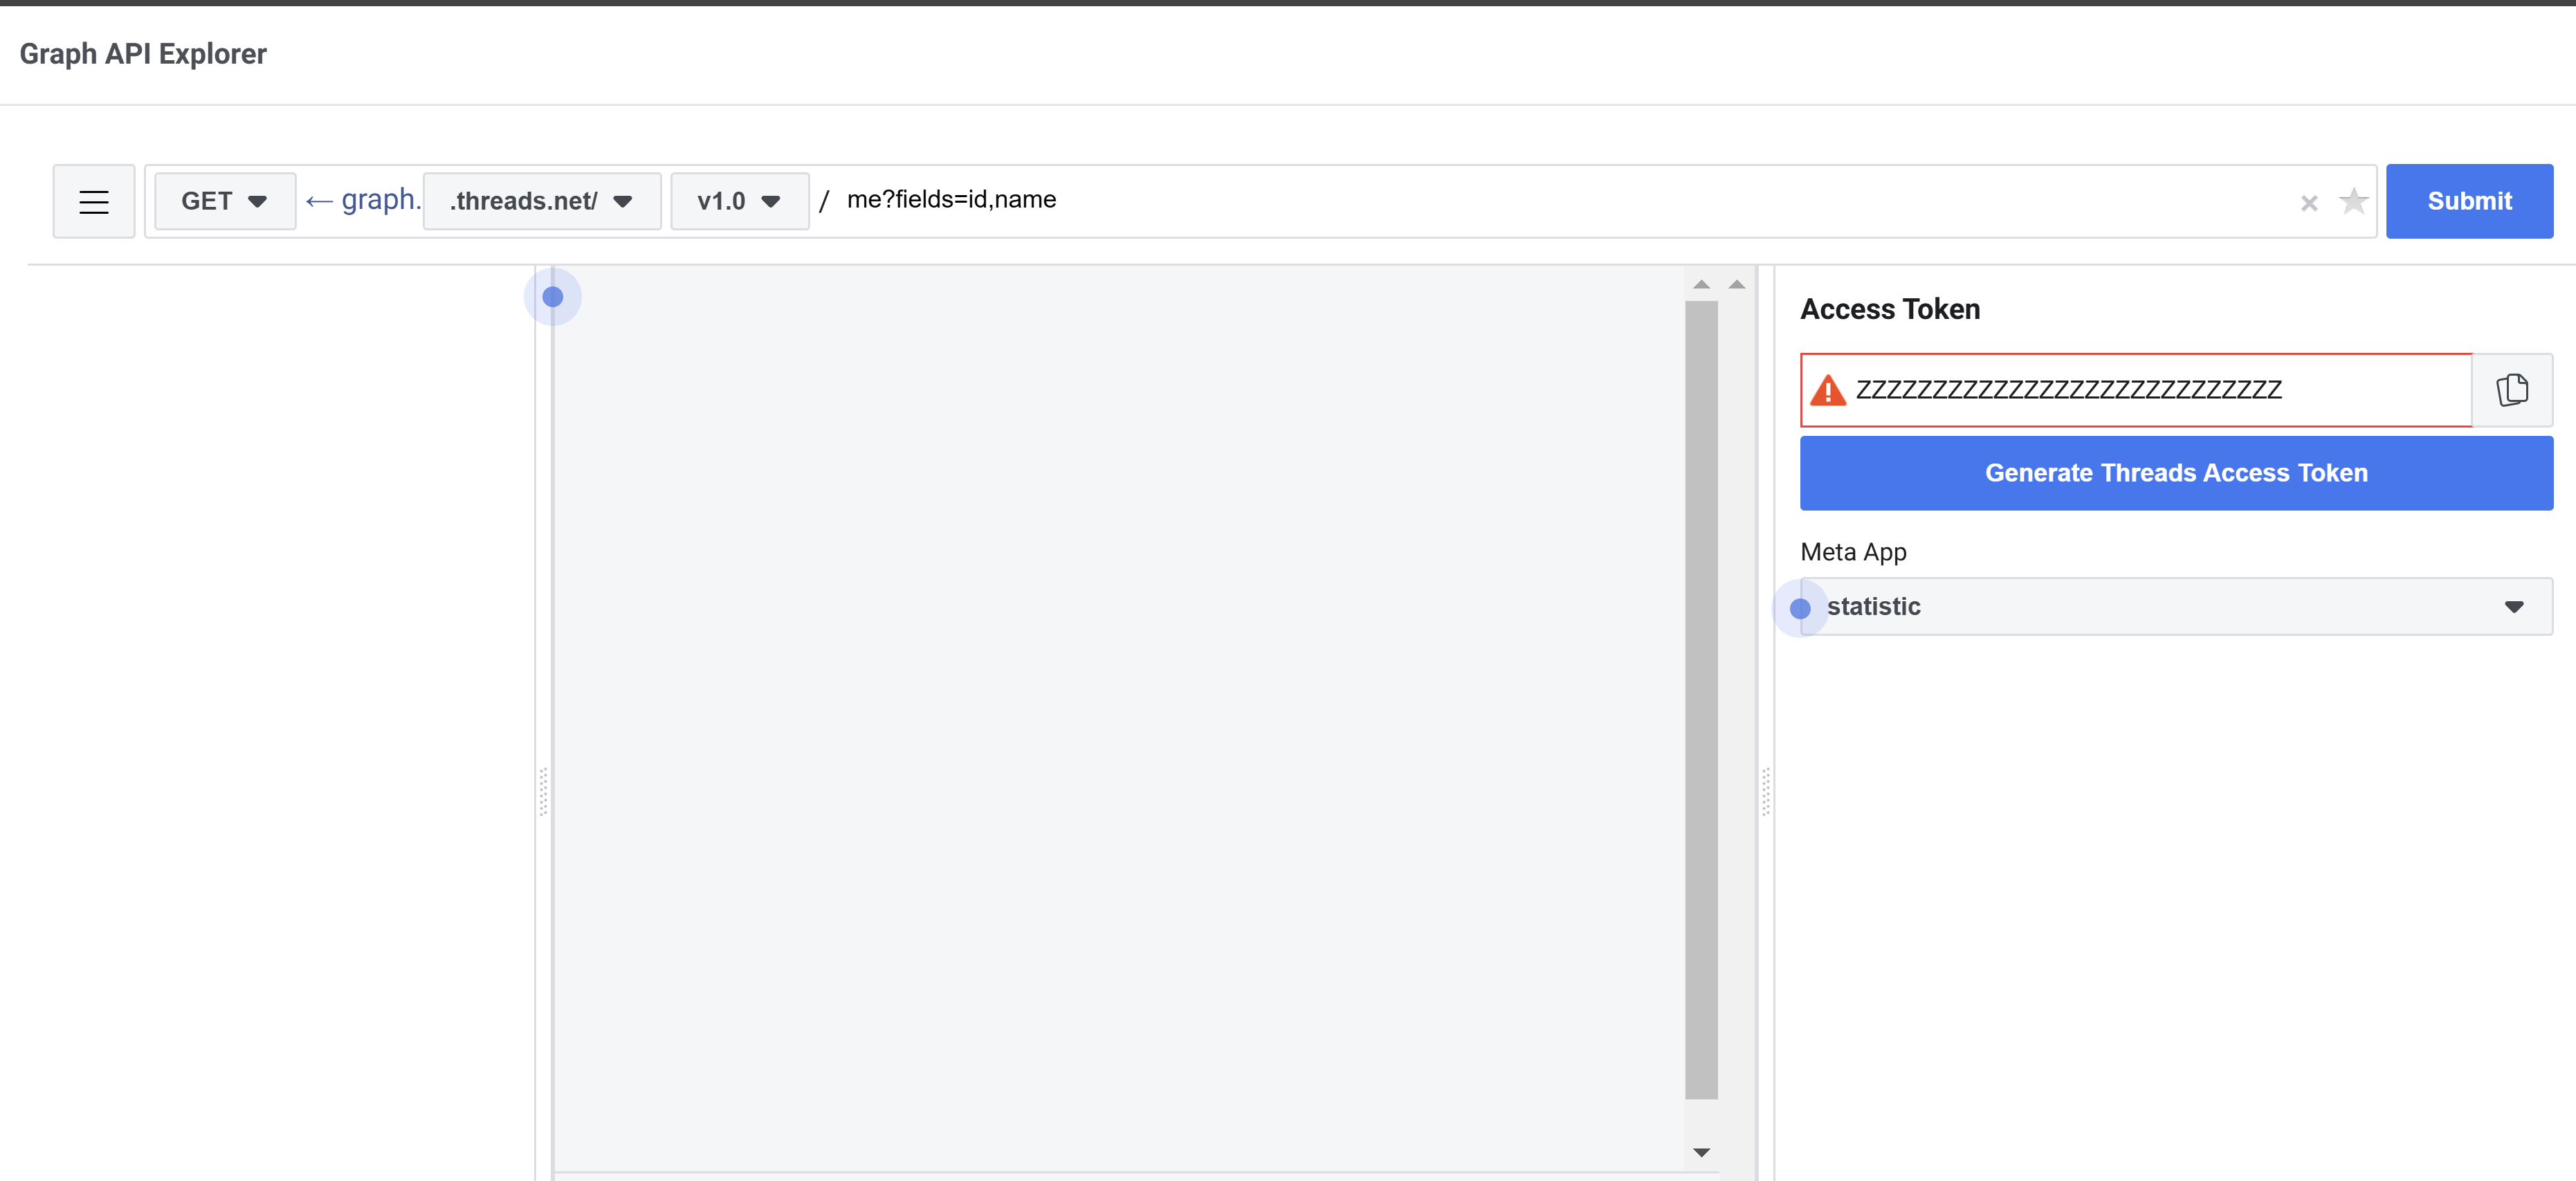
curl -s-X GET "https://graph.threads.net/access_token?grant_type=th_exchange_token&client_secret=<THREADS_APP_SECRET>&access_token=<SHORT_LIVED_ACCESS_TOKEN>"
Since we’re missing THREADS_APP_SECRET, go to Facebook Apps, select your app, and go to “App Settings” > “Basic”. You’ll see a screen like this:
Click “Show” next to “App Secret”.
Now use this in the curl command above to get your long-lived token.
The idea is to have two widgets—a “main” widget for followers + visitors and a “secondary” widget for the last post’s view count.
The main widget will display stats and handle token refresh, saving it in iCloud under the same filename you initially used.
The secondary widget will use the same token from iCloud but won’t handle token refreshes (assuming the token remains valid). This means you can’t use the secondary widget independently without adjusting the code. You can, however, copy the token refresh code from the main widget to the secondary if needed.
Step 6: Save the Long-Lived Token to iCloud
To store the token, use this one-time Scriptable app code during your initial setup. The main widget code will handle future token refreshes and updates:
The secondary widget checks the latest post, and if a post exists with stats (since reposts have no views), it displays the view count and a snippet of the post. For reposts, it’ll just show 0.
And that’s it! After following these steps, you should have a working Threads widget.
]]>Jurijs Ivolgajurijs.ivolga@gmail.comHow to Stop DDoS attacks in VoIP/SIP using Kamailio2021-09-28T16:55:00+00:002021-09-28T16:55:00+00:00https://www.cyberpunk.tools/jekyll/update/2021/09/28/how-to-stop-ddos-using-kamailioKamailio is SIP proxy what can handle 5000+ call setup per seconds and much more. Kamailio is great tool not only as SIP proxy, but in this example I will try to explain how to use it to secure your VoIP network against DDOS attacks.
If you face DDOS attack on your SIP/VoIP infrastructure, then it is good to understand what is a bottleneck. Is it your VoIP application or MySQL DB is overloaded due many requests, or some other 3rd party service is blocking VoIP system(like billing for example)? In some cases it can be network(too much packets arriving on server network card or router or maybe even your internet connection is not enough for all of that load), in this case Kamailio might not help, but there are solutions for that problem too, but probably we can discuss this next time.
In this scenario we will look into a case when there are bottleneck in your VoIP services. In this case we can put Kamailio as Proxy in front of your SIP/VoIP services and it should be easy as it gets, as far as your SIP/VoIP application supports SIP Path Extension. I have sample config for Kamailio as load-balancer using path -
here
Default Kamailio config
file
has everything what we need, you just need to put in config file somewhere after others “defines”(just search for #!define):
#!define WITH_ANTIFLOOD
It is worth to look into what those parts of code actually do.
First part of relevant code:
loadmodule "htable.so"
loadmodule "pike.so"
Here we are loading necessary libraries, pike for actual blocking and htable for hash table support. Kamailio will use hash tables ($sht) for saving IP with flag 1 if it is should be blocked.
# - - - pike params - - -
modparam("pike", "sampling_time_unit", 2)
modparam("pike", "reqs_density_per_unit", 16)
modparam("pike", "remove_latency", 4)# - - - htable params - - -
/* ip ban htable with autoexpire after 5 minutes */
modparam("htable", "htable", "ipban=>size=8;autoexpire=300;")#!endif
In this block first 3 lines tells how big time-period is(2 seconds) and how much requests are allowed during that period - 16. In reality it might be a bit more, but lets stick with this explanation, to make it easier to understand. 4th line is kind of technical settings, it basically tells how long to have IP in memory.
So htable parameters is self explanatory, what means that in 5 minutes block will be removed, so if we have blocked 1 IP then after 5 minutes Kamailio will start to process traffic again from that IP.
Last part of the code:
# flood detection from same IP and traffic ban for a while# be sure you exclude checking trusted peers, such as pstn gateways# - local host excluded (e.g., loop to self)if(src_ip!=myself){if($sht(ipban=>$si)!=$null){# ip is already blocked
xdbg("request from blocked IP - $rm from $fu (IP:$si:$sp)\n");exit;}if(!pike_check_req()){
xlog("L_ALERT","ALERT: pike blocking $rm from $fu (IP:$si:$sp)\n");$sht(ipban=>$si)= 1;exit;}}
In first four lines of this block we make sure to not block our-self, 5–9 lines check if IP is already blocked and if it is, then we just stop processing this SIP request, so attacker will get no response. Last part of code is checking if there are an attack ongoing and if it is, we write to hash table, so next time code will not even reach this part but will exit on first 9 lines of code. After writing to hash table Kamailio stops processing and attacker gets no response.
As you can see this is not something very difficult to implement using Kamailio, so I hope this will be useful.